Sourdough Baking
Pumpkin Sourdough Bread
Pumpkin sourdough bread shaped like a real pumpkin – warmly spiced, subtly sweet and surprisingly easy. With a full baker’s timeline and the thermometer trick that stops it coming out raw in the middle
- Serves 12 slices
- Prep 30 minutes
- Cook 50 minutes
- Total 13 hours
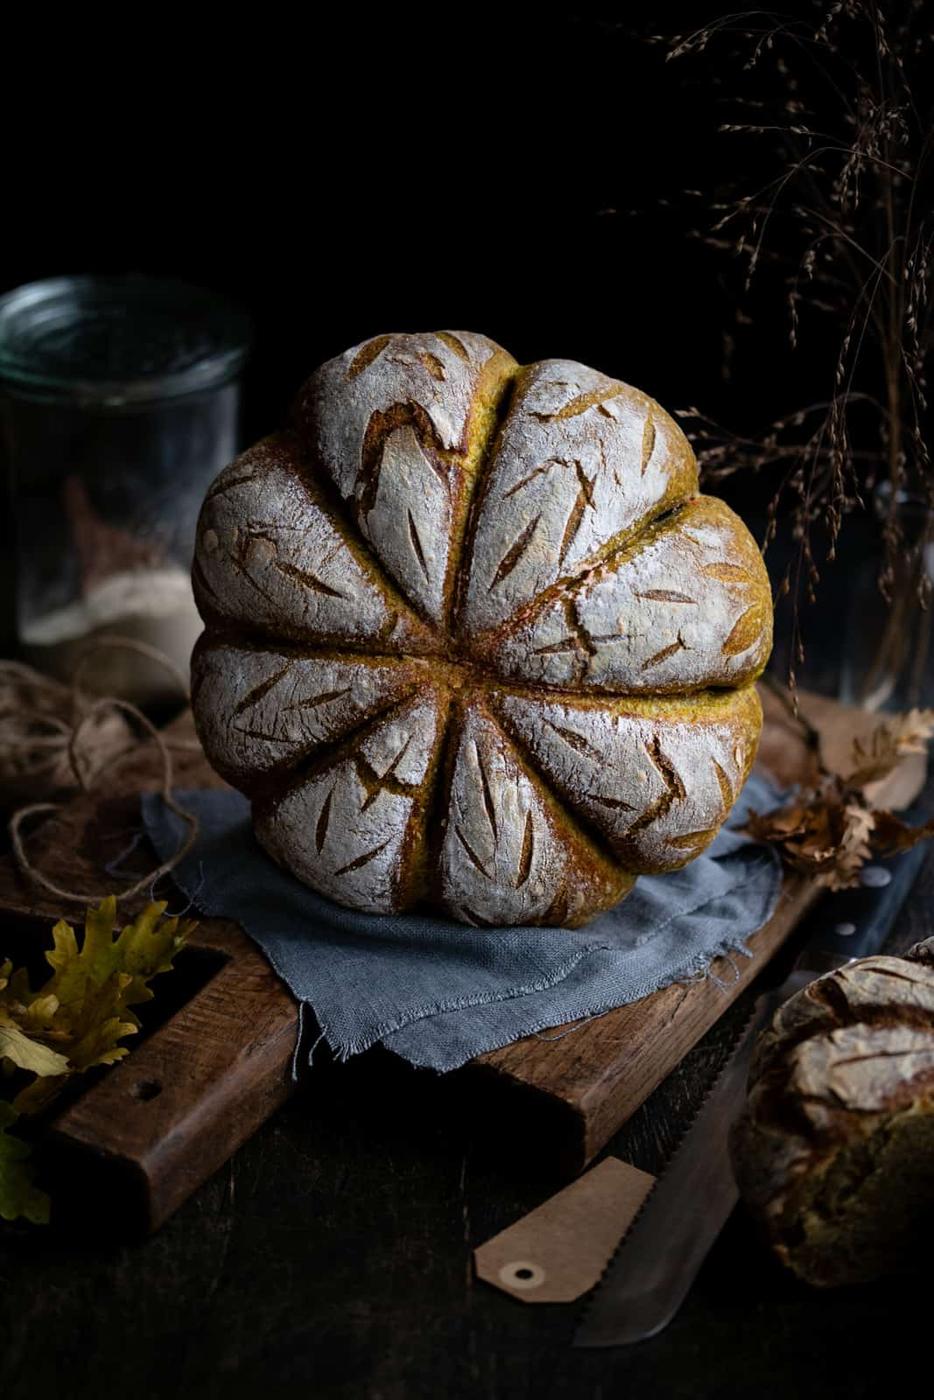
This Pumpkin Sourdough Bread is fragrant with spices, subtly sweet and shaped like a pumpkin! A fun and easy (I promise!) sourdough bread recipe that’s perfect for fall.
One quick thing before you start, because it saves disappointment: this is a proper artisan sourdough loaf – crackly crust, chewy crumb, gently spiced and only faintly sweet. It is not a sweet, cakey pumpkin loaf. If that is what you are after, my Pumpkin Apple Bread is the one you want!
New to Sourdough? Try my Overnight Sourdough recipe.
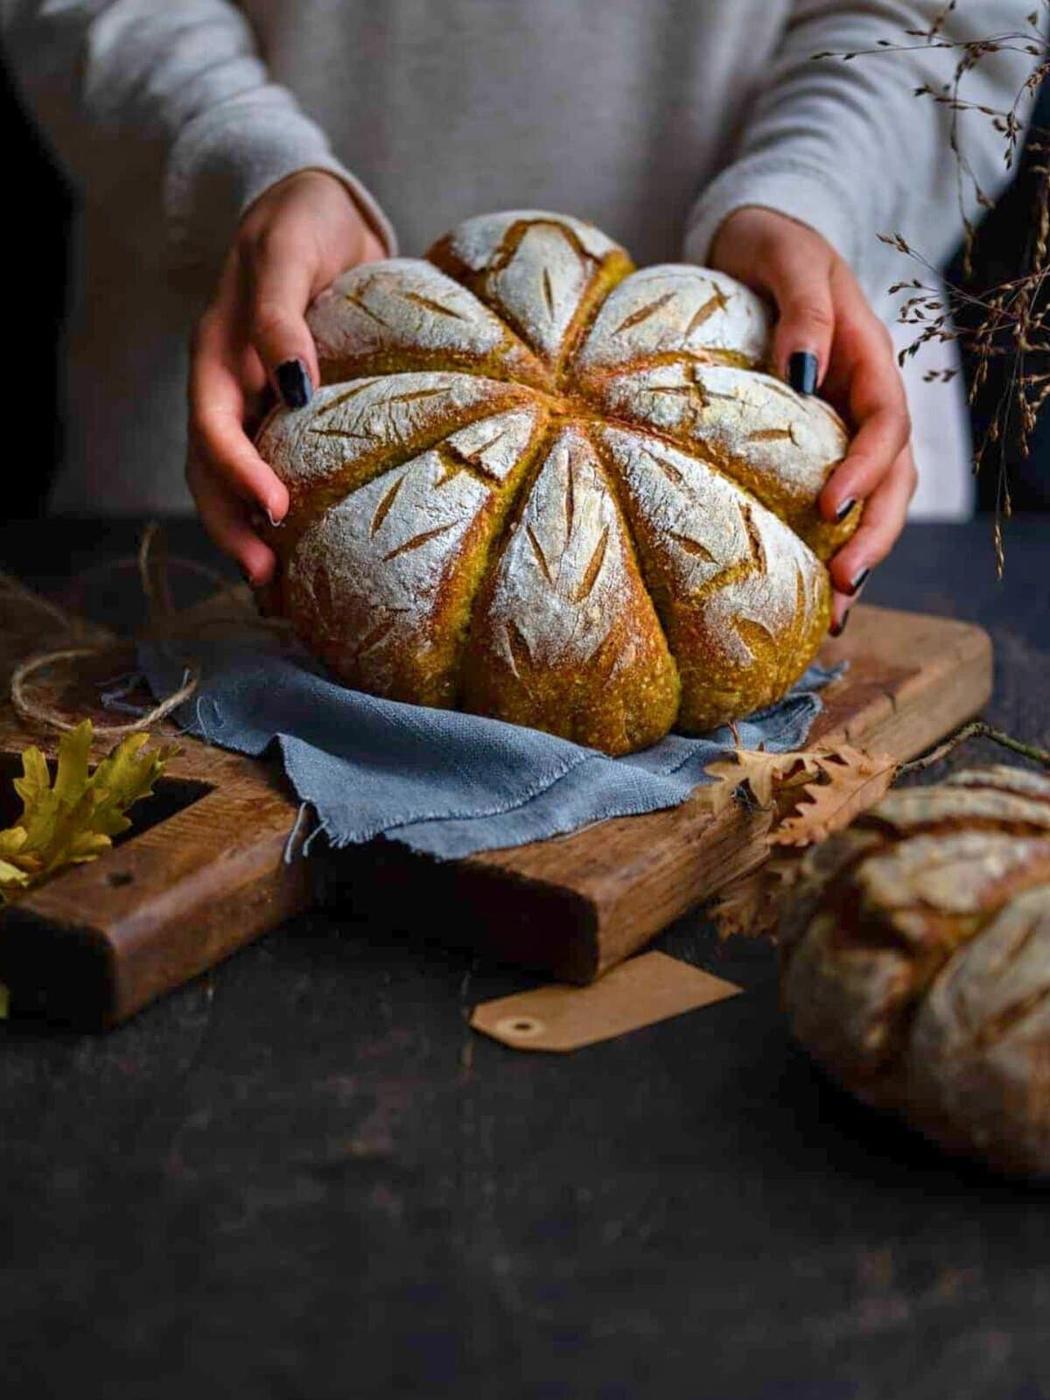
Meet your new fall ritual: Pumpkin Sourdough Bread! Real pumpkin purée gives the dough a gorgeous golden hue and subtle sweetness, while a whisper of warm spice makes the whole kitchen smell like October.
And to go the extra mile, we will be shaping our sourdough like a real pumpkin. It is adorable and perfect for Halloween or Thanksgiving celebrations!
I used a variation of my super-easy Overnight Sourdough recipe. I added canned pumpkin, honey and plenty of warming spices to create a bread that’s slightly sweet, aromatic and perfect for breakfast. The pumpkin flavor is quite subtle, not overpowering.
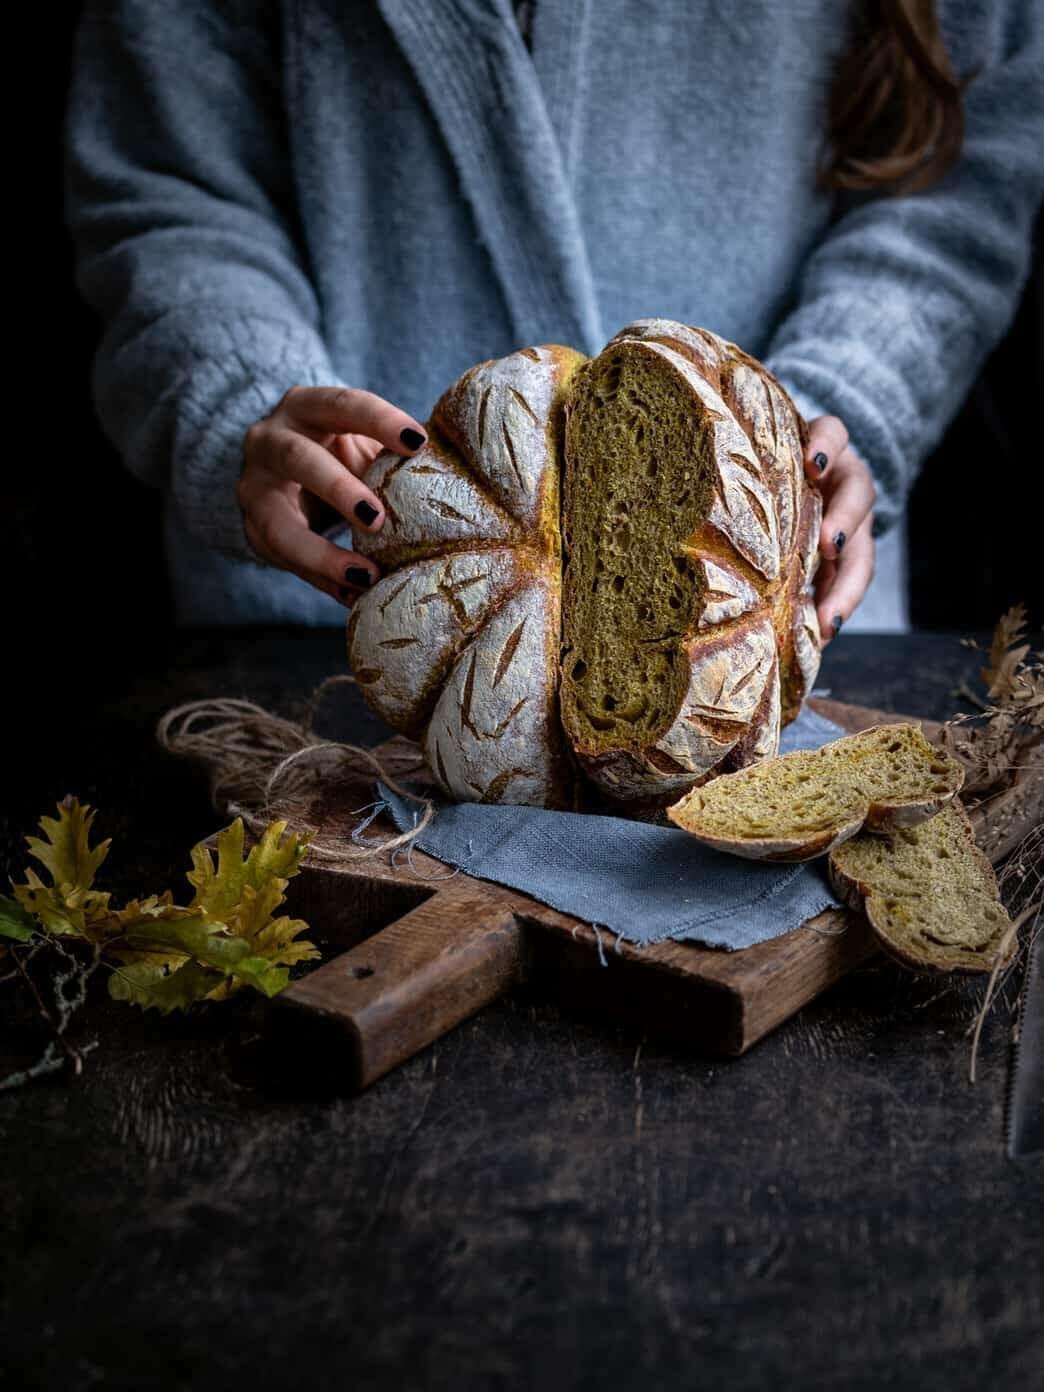
What readers say
“I love this recipe! I’ve made it a few times now… The flavors of this bread are very warm and autumnal, and go perfectly with a bowl of soup!”
★★★★★ Caitlin
What’s Changed in This Recipe
I have been baking this loaf every fall since 2020, and your comments have shaped this update more than anything else. Here is what is different.
The most useful thing I can tell you about this recipe: bake it to temperature, not to the clock. Pumpkin purée and honey are both sugar-rich, so the crust goes deep bronze long before the middle of the loaf is cooked. There is a full section on how to tell your loaf is properly baked further down – please read it before you bake.
- Less turmeric: I have added it purely for color and following your feedback I decided to reduce the amount in the loaf. A small pinch gives you the same golden crumb without the earthy flavor – you can leave it out altogether if you prefer.
- A longer covered bake, and a temperature to aim for. A couple of you told me your loaf was underbaked after the suggested time. To compensate I have adjusted the covered baking time and included the internal temperature to aim for – a far a better indicator.
- Clearer about the oil. The olive oil is for greasing the bowl and the string not part of the dough – use as much as you need and no more.
- Better string guidance, so the twine does not shed fuzz into your crust or bake itself into the loaf.
Pumpkin Sourdough Ingredients
- Mature sourdough starter –if you haven’t got your own you can buy sourdough starter onlineor from a local bakery. If you happen to live close by just knock on my door!
- Canned Pumpkin Purée(100% pumpkin) not “Pumpkin Pie Filling”!
- Honey, maple syrup or sugar to add a hint of sweetness. This is very subtle, it is NOT a sweet bread.
- Pumpkin Spice – or use your own blend of ground cinnamon, ginger, nutmeg and cloves
- Ground turmeric – optional, and there purely to deepen the color. Go easy: a small amount is plenty, and several readers found the original quantity came through as an earthy flavor. Leave it out altogether if you like – the pumpkin brings plenty of color on its own.
- Flour – high protein flour I have used white bread flour
- Salt – ideally fine sea salt
- Water – filtered, bottled, or tap water boiled and cooled to room temperature. Warm water will kill your starter.
Worth knowing before you mix: canned pumpkin purée is roughly 90% water, so this dough runs wetter than a standard sourdough – around 80% hydration once you count the purée and the water in your starter. It is meant to feel sticky. Use wet hands and a bench scraper rather than working in extra flour, which will give you a dense, tight loaf. There is more on this in the Baker’s Notes below the recipe if you want the arithmetic.
Essential Tools
- Digital scales are needed for accurate measuring. I have given measurements in cups as well, but weighing your ingredients will yield better results!
- Bowl or a banneton basket for proving the dough
- A lame, razor or sharp knife for scoring the bread.
- Cast iron pot – I have used my trusty Greenpan Dutch Oven which is lighter and easier to use
- Dough whisk is very useful!
- A digital instant-read thermometer – the single piece of equipment that will improve your bread most. See the section on checking your loaf is baked below.
- String (food safe cotton string) to create the pumpkin shape
Baker’s tip
Weigh your flour
Sourdough is the one bake where digital scales really are worth it. A cup of flour can vary by 20% or more depending on how you scoop it, and in a dough this wet that is the difference between a loaf you can shape and one you cannot. I have given cups throughout, but weigh if you possibly can.
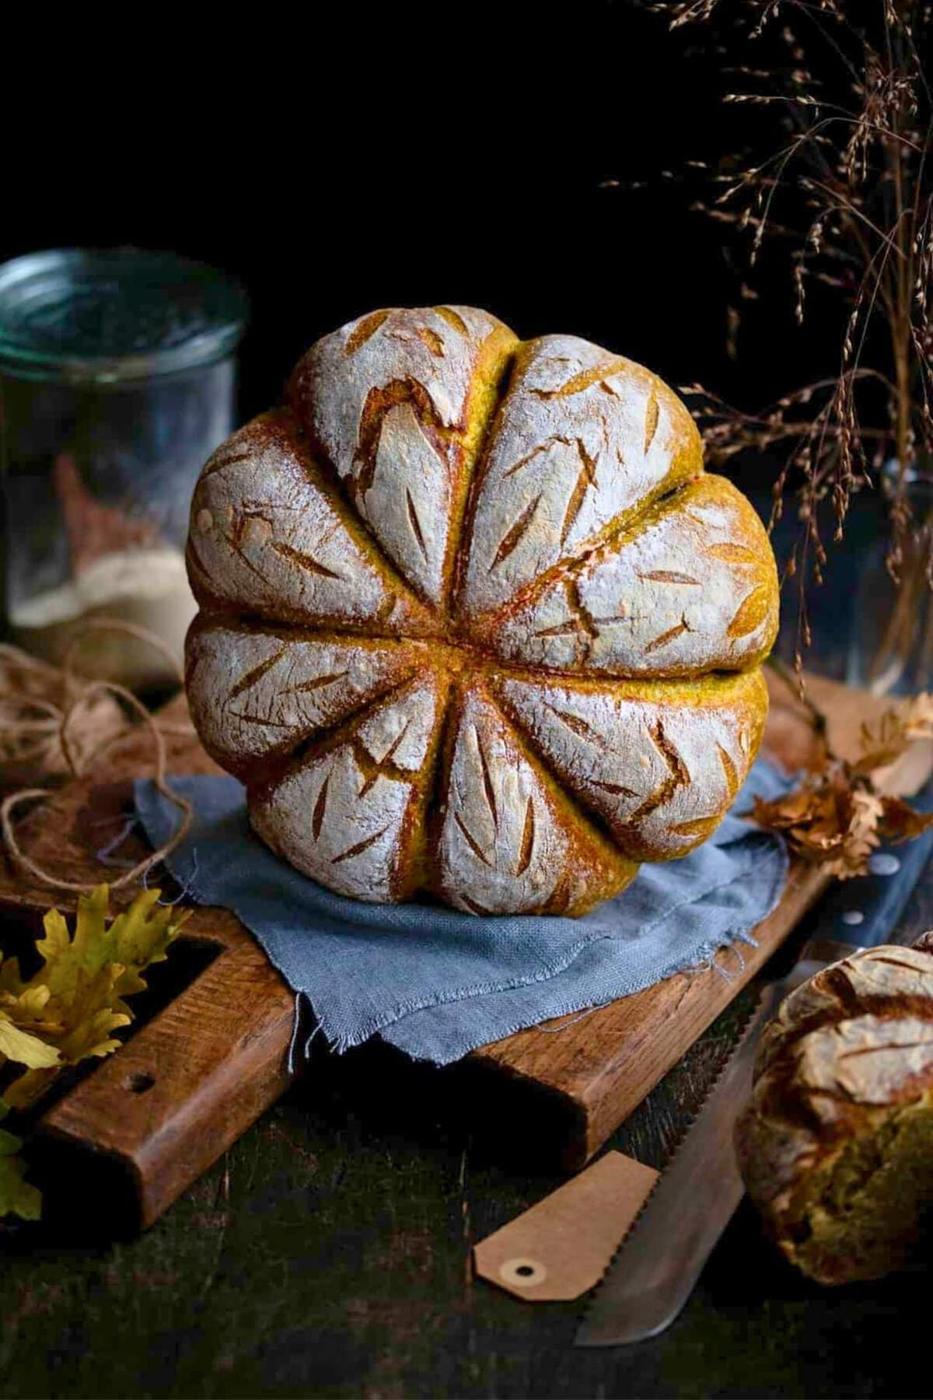
How to Make Sourdough Pumpkin Bread
Prepare the Dough
- Mix the sourdough starter and water together in a large mixing bowl – I use my dough whisk for this. Add the honey or maple syrup, pumpkin purée, pumpkin spice and salt. Mix well.
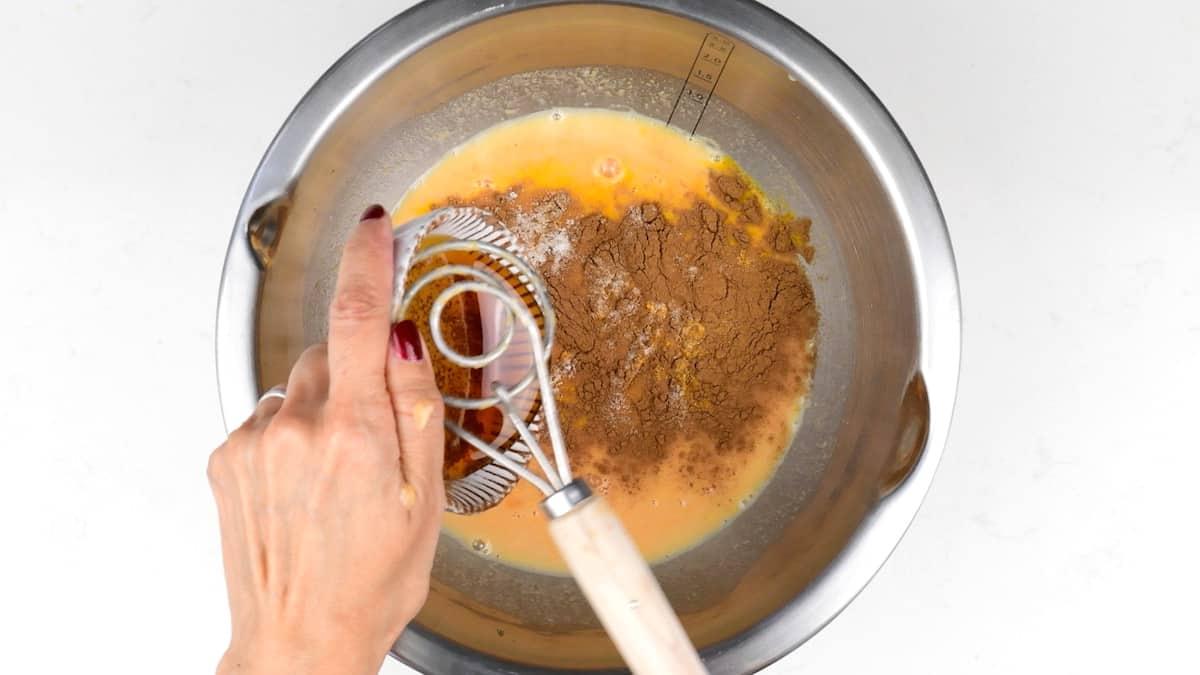
- Add the flour and mix well with the dough whisk or your hands until you have a shaggy, slightly sticky dough. If the dough is really sticky add a little flour, a tablespoon at a time and work it into the dough. Cover the bowl and leave for 30 minutes.
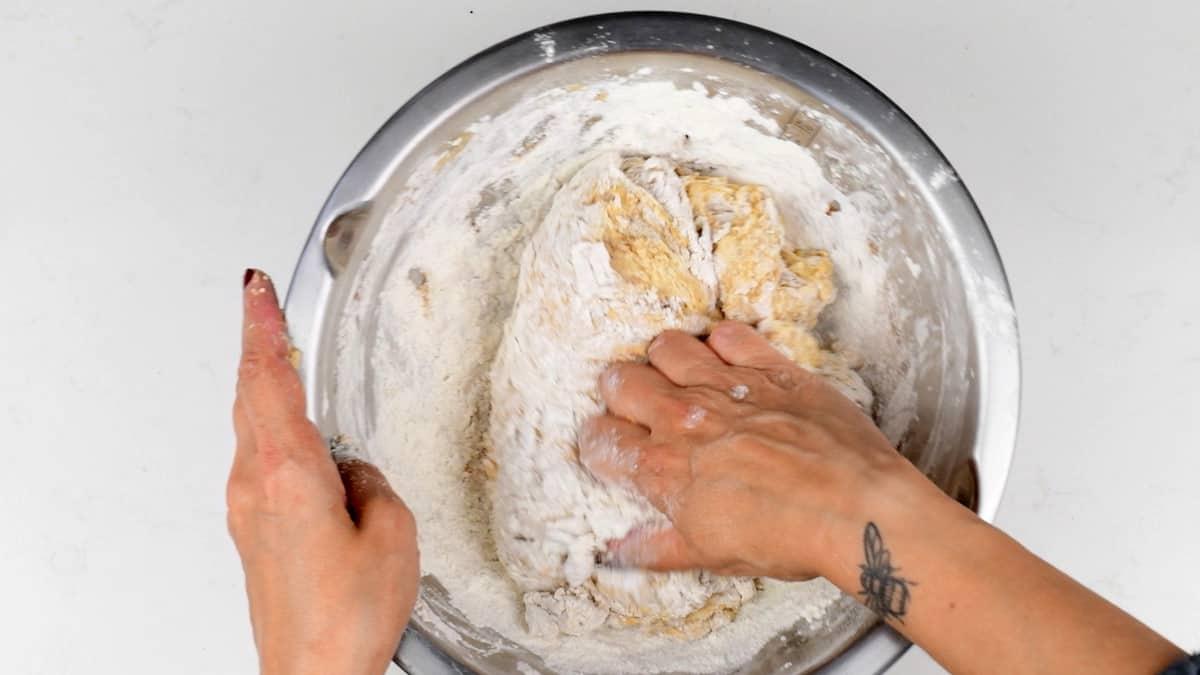
- STRETCH AND FOLD Pull a section of the dough from the underside and stretch it upwards. Fold this over the rest of the dough. Rotate the bowl as you do this so that you stretch the entire dough. Repeat every 30 minutes for two hours or just the once. I am quite lazy when it comes to sourdough baking (eek!).
Bulk Fermentation (First Rise)
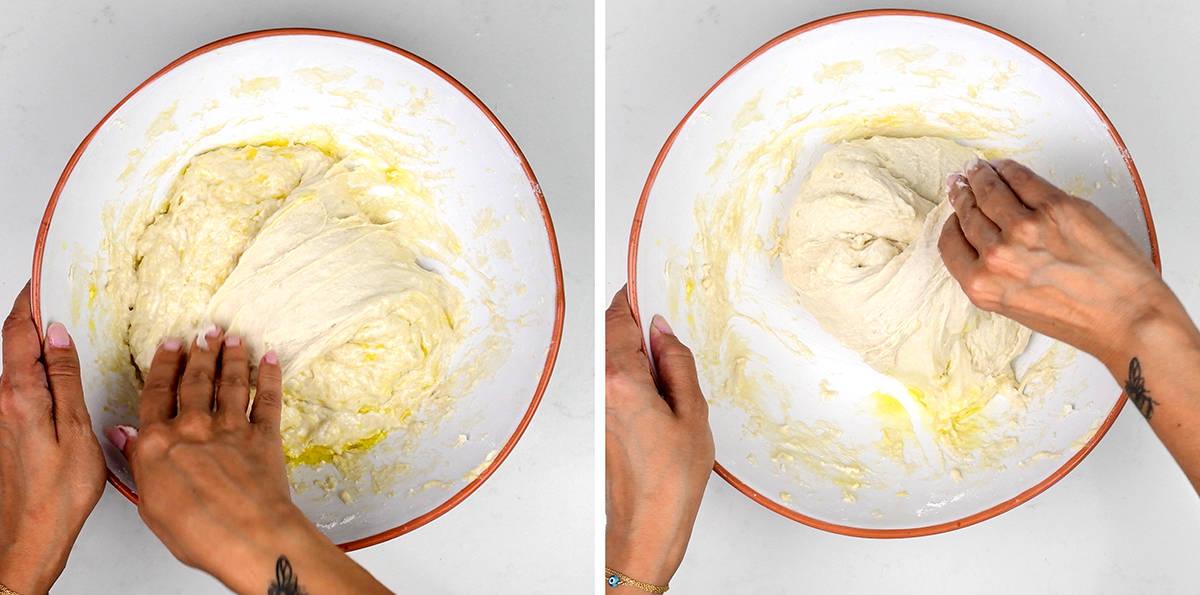
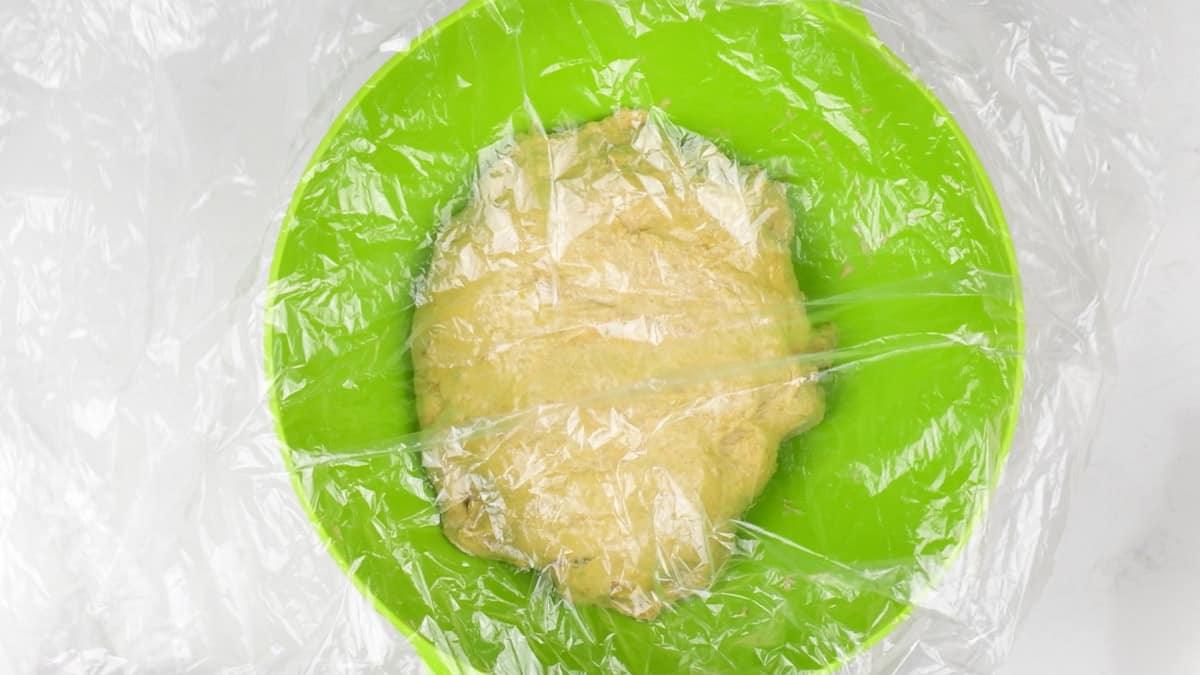
- Cover the bowl and leave the dough to rise either at room temperature for 8–10 hours, or in the fridge for 10–14 hours. The fridge version ferments more slowly and is usually said to build better flavor – and the dough comes out firmer, which makes shaping and tying a good deal easier.
- Watch the dough, not the clock. Kitchen temperature makes an enormous difference – a warm kitchen can be finished in 6 hours while a cold one may need 12, and this dough ferments faster than a plain sourdough because the honey and pumpkin give the starter more to work with. You are looking for the dough to have risen by about half to double, to look domed and jiggly, and to show bubbles at the edges. If it has spread out and gone soupy it has gone too far – bake it anyway, it will still taste good, and start checking earlier next time.
Second Rise
- Take a look at your dough – it should have risen in the bowl to almost doubled. Mist your worktop with water and scrape the dough onto it – do not punch the dough down.
- Gently stretch the dough to form a rectangle then fold it into thirds (letter fold).
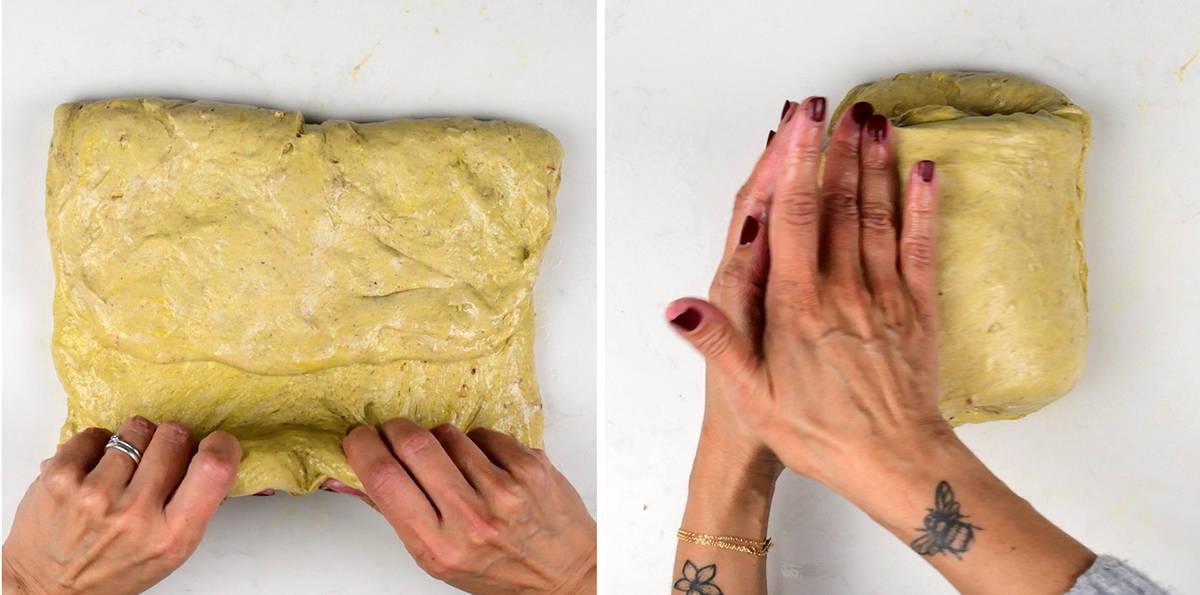
- Roll the dough into a tight ball and shape into a round loaf using your hands and a bench scraper to aid you. Dust with gluten-free flour and smooth it over the loaf.
- Transfer into a banneton basket or a round bowl and let rise for 30-120 minutes. Check your loaf is ready to bake by gently prodding with a finger. If the indent springs back slowly leaving a small dent then you are ready to bake. If it springs back really quickly you need to allow it to rise for a little longer.
Baker’s tip
Season a new banneton first
A new banneton must be seasoned before you use it, or your first loaf will stick fast. There is a step-by-step guide below the recipe.
How to Make a Pumpkin-Shaped Sourdough Loaf
You can use any type of sourdough loaf and shape it in this way – it works beautifully on my Easy Sourdough Bread, and it is the same trick as my Pumpkin Dinner Rolls. You will need food safe cotton string, parchment paper and a cast iron pot (Dutch Oven) to bake the bread in. Use 100% cotton butcher’s twine – this matters more than it sounds, because craft string and some kitchen strings shed fibers that bake into the crust and are impossible to pick out afterwards.
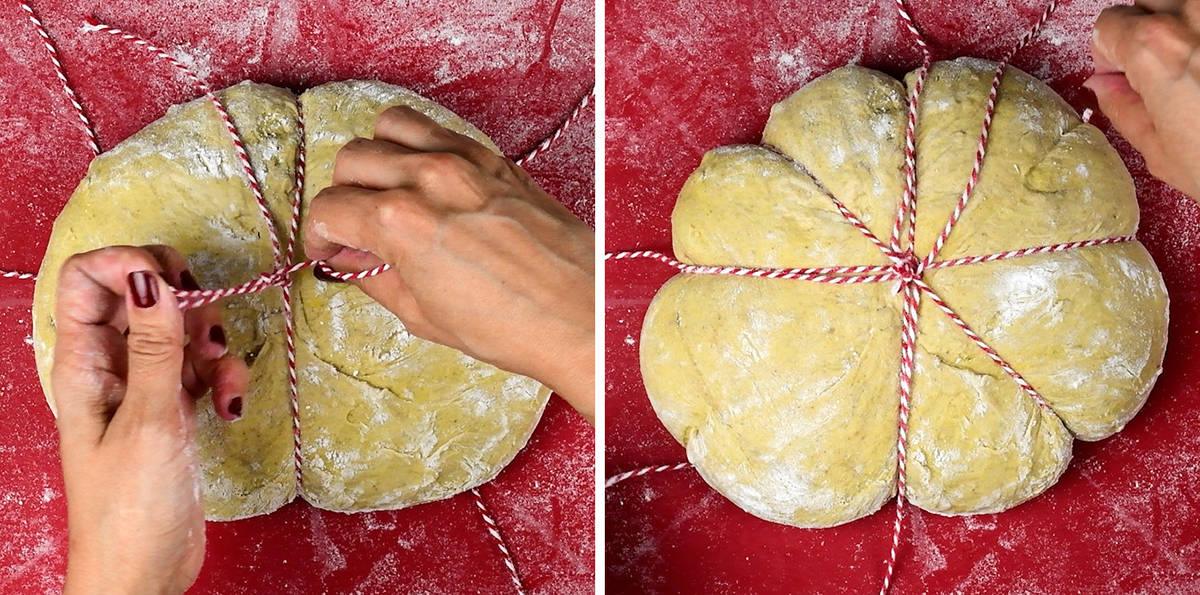
- Cut four pieces of string, about 24 inches (60cm) long. Soak them in vegetable oil for a full 10 minutes rather than just dipping them – properly saturated string releases cleanly from the crust. Leave about 2 inches (5cm) at each loose end out of the oil so you have clean ends to grip, then run them between your fingers to strip off the excess.

- Position the strings on top of a round piece of parchment paper or a silicone bread sling, crossing them at the center so that you have eight spokes.
- Turn the loaf out onto the strings rather than lifting it. This dough is too soft to pick up in your hands. Hold the parchment over the mouth of the banneton, then flip the whole thing over in one confident movement so the loaf drops into the middle of the crossed strings. Nudge it into the center if it lands off-target.
- Bring the strings up over the loaf and tie them loosely – leave about ¾ inch (2cm) of slack so the bread can expand as it bakes. Too tight and the loaf strangles itself instead of rising.
- Cut any excess string, then score the loaf. Score within the lobes, not across the strings – a cut that crosses a string will tear as the bread expands. One shallow cut running down the middle of each section helps it swell evenly and look properly pumpkin-like. Keep the cuts shallow; deep scoring fights the string.
Bake the Bread
- Preheat the oven to 450°F (230°C) with the Dutch oven inside, for a full 45–60 minutes. Cast iron takes longer than you think to heat right through, and a pot that is hot on the surface but cool in the middle is one of the main reasons a loaf underbakes. Start the preheat well before the end of the second rise.
- Lower the loaf into the hot pot by the parchment paper. Cover and bake for 30 minutes.
- Reduce the oven to 425°F (220°C), take the lid off, and bake for a further 15–20 minutes – until the crust is deep golden and the internal temperature in the center of the loaf reaches 205–210°F (96–99°C). Start checking the temperature at 15 minutes. If the crust is darkening before the temperature is there, tent it loosely with foil and keep going.
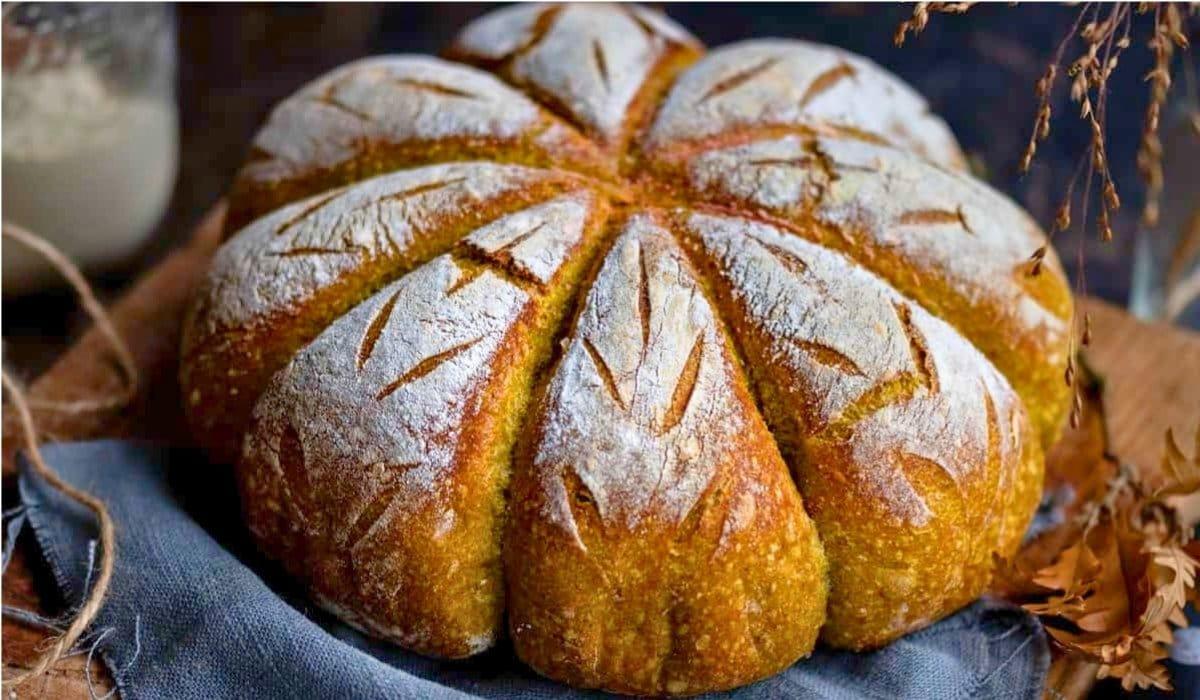
- Lift the loaf out and let it cool, uncovered, for at least 2 hours before you cut it. Snip the strings and gently remove them once it is cool enough to handle – cut them into sections rather than pulling them through whole.
How to Tell Your Loaf Is Properly Baked
Crust color lies in this recipe. Pumpkin purée and honey are both sugar-rich, and sugar browns long before the middle of a loaf is cooked – so a deep bronze crust at 40 minutes can still be hiding a damp, gummy crumb. This is the single most common thing that goes wrong with this bake, and a thermometer solves it completely.
- Under 200°F (93°C) is not done. The inside of a loaf can never climb past 212°F (100°C), because that is the temperature water boils at – so those last few degrees are the loaf driving moisture out of the crumb, and they are exactly the degrees a wet, purée-rich dough needs.
- If the crust is dark but the temperature is low, tent the loaf loosely with foil, drop the oven to 400°F (200°C) and keep going, checking every 5 minutes. This is completely normal with a sweetened dough and it does not mean you have ruined anything.
- No thermometer? Tip the loaf out and knock the base with a knuckle – it should sound hollow and drum-like rather than dull and solid. It is a reasonable backup, but it is genuinely hard to read on a tied pumpkin loaf, which is why I now bake this one with a probe.
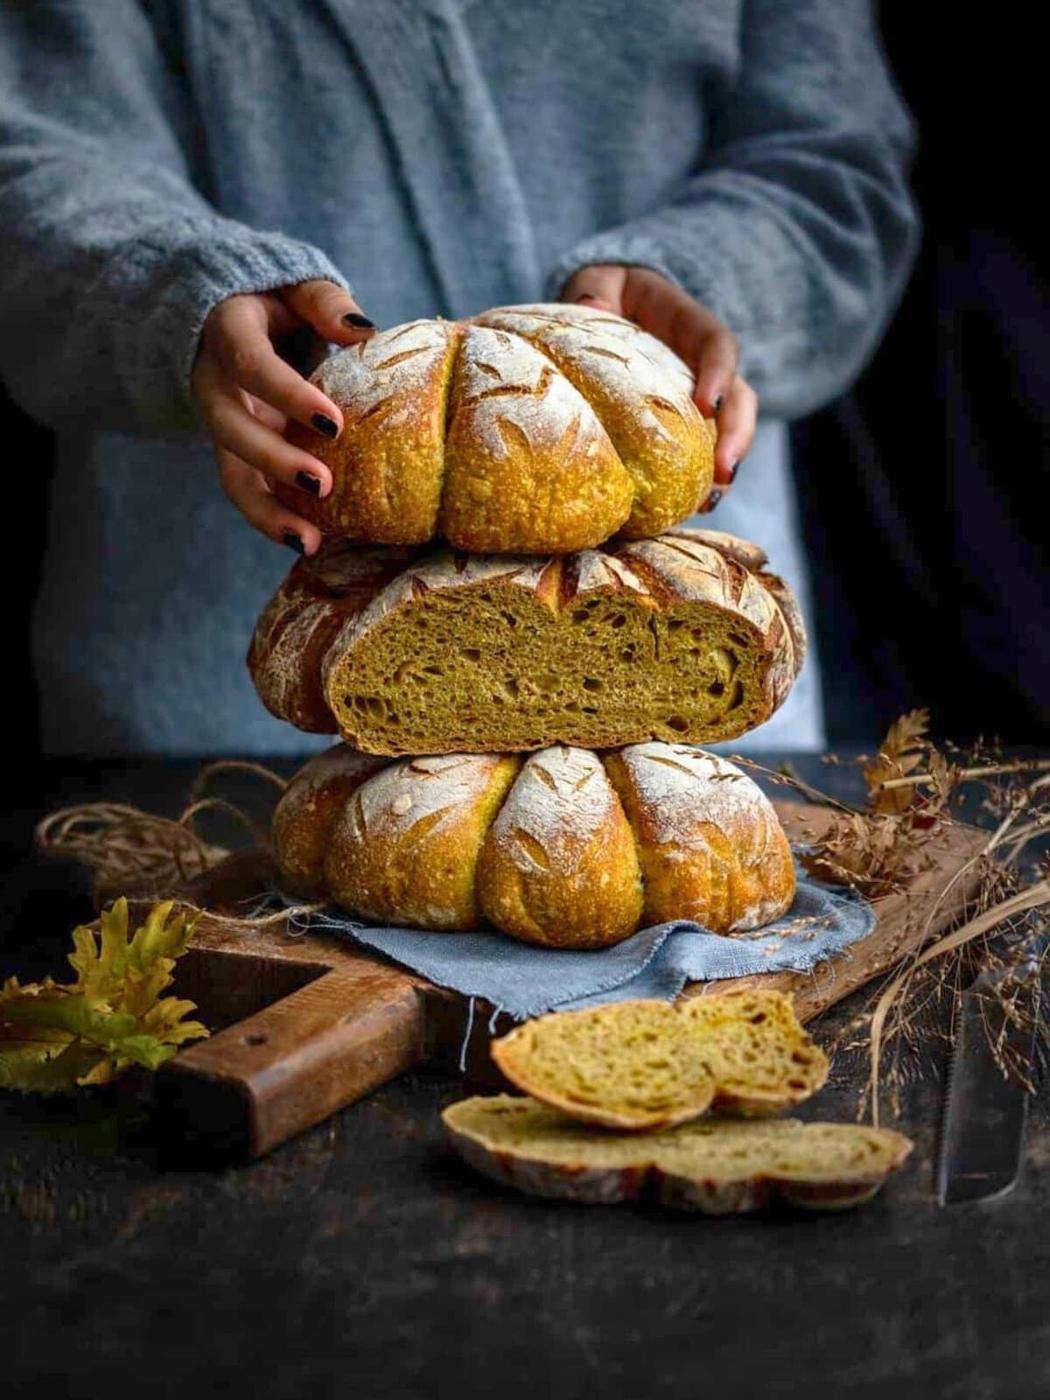
- Then cool it completely – at least 2 hours. The crumb carries on setting as the loaf cools, and cutting into a warm sourdough will make even a perfectly baked loaf feel gummy. This is the most common reason a good loaf gets blamed for being underbaked.
Baker’s tip
Bake to temperature, not time
Aim for 205–210°F (96–99°C) in the center of the loaf. Slide an instant-read probe in through the base of the loaf, or through one of the scored cracks, angling it toward the middle. Avoid the very bottom crust, which sits against the hot pot and reads high.
Variations and Add-Ins
Fold any of these in during the last stretch and fold, so they distribute without tearing the gluten you have built.
- Chocolate chips – a scant ⅔ cup (100g). Ridiculous with pumpkin, and the version children ask for.
- Toasted pecans or walnuts – ¾–1 cup (80–100g), roughly chopped.
- Dried cranberries – about ½ cup (60g), for a Thanksgiving loaf.
- Cinnamon chips, or a cinnamon-sugar swirl laminated in at shaping.
- Pumpkin seeds pressed onto the crust before baking.
For a savory version, leave out the honey and the turmeric, halve the pumpkin spice, and add 1 cup (100g) of grated sharp cheddar or crumbled feta plus a tablespoon of chopped sage or rosemary. Excellent with soup, and it toasts beautifully. If savory sourdough is your thing, my Sourdough Olive Bread and Everything Sourdough are worth a look.
Serving Suggestions
- This pumpkin sourdough has a lovely crisp crust and is best toasted and eateb with salted butter and maybe some apple butter which is exactly the right kind of sweet against the spice.
- Peanut butter and honey, which a reader suggested and which is now a regular in this house.
- Alongside a bowl of soup. It holds up to anything brothy and improves it.
- As the bread on a Thanksgiving table, whole, and untied in front of everyone at the last moment.
Storing Sourdough Bread
Cover the cooled loaf in a clean tea towel and store at room temperature – the bread will keep for 2-3 days but it is much better eaten fresh.
Don’t refrigerate it; bread stales faster in the fridge. I prefer to slice the entire loaf and then freeze it – that way you can toast slices directly from frozen whenever the fancy takes you.
Frequently Asked Questions
An active sourdough starter should double in size and be bubbly within a few hours of being fed. To check whether it is ready, add a spoonful of active starter to a glass of tepid water – if it floats you are good to go! If it sinks it’s not quite there yet – this is called the float test.
Make sure to use 100% pumpkin purée and not pumpkin pie filling – the cans look quite similar so it’s an easy mistake to make!
Yes, but it needs to be thick – thick enough to sit on a spoon rather than pour off it. Homemade purée is usually much wetter than canned, and that extra water goes straight into an already wet dough. The easiest fix is to line a sieve with a double layer of cheesecloth, tip the purée in and leave it over a bowl for 20–30 minutes; a surprising amount of water drains out. Cooking it down in a pan works too. Either way, hold back 2–3½ tablespoons (30–50g) of the water from the recipe until you see how the dough handles.
A preheated Dutch oven creates the high-heat trapped steam baking environment of a commercial oven. The steam keeps the crust soft during the first 20 minutes of baking so your sourdough can rise tall. If you don’t have a Dutch oven, you can bake your sourdough on a preheated pizza stone covered with an inverted oven-safe pan for the first 20 minutes.
Take its temperature. The center of the loaf should read <strong>205–210°F (96–99°C)</strong> on an instant-read thermometer. Crust color is not a reliable guide in this recipe, because the pumpkin and honey make it brown early – a dark crust at 40 minutes can still be hiding a raw middle. If the crust is dark and the temperature is low, tent loosely with foil and keep baking.
There are four usual culprits and they are easy to tell apart. If you hit 205°F (96°C) and it is still gummy, you almost certainly cut it too soon – give it a full 2 hours to cool. If it never reached temperature, it is underbaked. If it is dense and tight rather than gummy, the bulk ferment was too short or you added extra flour to fight the stickiness. And if you used homemade purée that was on the loose side, the dough was simply too wet – hold back some water next time.
This dough sits at about 80% hydration, so it’s stickier than a standard sourdough. Wet your hands and use a bench scraper instead of adding flour, and give it another round or two of stretch and folds to build strength. There is a difference between sticky and overproofed: sticky dough still springs back when you prod it, while overproofed dough spreads out and stays flat. If it is the second, bake it now rather than waiting.
Yes. It is there purely for color and contributes nothing you want in the flavor. A small pinch gives you a golden crumb; leave it out entirely and the loaf will just be a shade paler.
You can, but bread flour is much better here because it absorbs more liquid and this is a wet dough. If you do use all-purpose flour, reduce the water by about 1½ tablespoons (25g).
Not for this loaf – it needs an active, peaking starter to rise. If you have discard to use up, my <a href=”https://www.Nusde.com/sourdough-discard-banana-bread/”>Sourdough Discard Banana Bread</a> and <a href=”https://www.Nusde.com/sourdough-discard-focaccia/”>Sourdough Discard Focaccia</a> are both good homes for it. And if what you actually want is a sweet, cakey pumpkin loaf, go to my <a href=”https://www.Nusde.com/no-knead-pumpkin-bread/”>No Knead Pumpkin Bread</a>.
Yes – fold them in during the final stretch and fold. See the variations section above for quantities. Chocolate chips, toasted pecans or walnuts, dried cranberries and cinnamon chips all work well.
Yes, and it makes excellent breakfast toast. Shape it as a batard, drop it into a greased 9x5in (23x13cm) loaf pan for the second rise, and bake at 425°F (220°C) for 40–45 minutes – still to 205–210°F (96–99°C) in the center. You lose the pumpkin shape but gain neat slices.
It isn’t 100% cotton, or it wasn’t oiled enough. Use butcher’s twine and soak the pieces for a full 10 minutes rather than dipping them.
Let the loaf cool completely, then snip the strings into short sections with scissors and lift each piece out. Pulling a whole string through a warm loaf is how they tear or stay stuck.
Yes – that is the slower, more flavorful option, and this recipe is written for either. Room temperature takes 8–10 hours, the fridge 10–14. Cold dough is also considerably easier to shape, tie and score, so if the pumpkin shape is the part that worries you, use the fridge. Just allow the longer end of the second rise afterwards, because the dough starts cold.
More Sourdough Recipes
Bread, Muffins, Donuts and Pastries
Everything Sourdough (Sourdough with Everything Bagel Seasoning)
Bread, Muffins, Donuts and Pastries
Easy Sourdough Discard Focaccia With Yeast
Sourdough Baking
Sourdough Sandwich Bread (Easy & Beginner Friendly!)
Air Fryer
Air Fryer Sourdough Bread
👉 If you bake my Pumpkin Sourdough Bread recipe, please leave a rating and comment – it helps more people find the recipe. Don’t forget to also tag me on @Instagram or TikTok so I can see (and share!) your amazing bakes.
Baker’s Notes
If you want to go a bit deeper – planning the timings, fixing a bake that went wrong, or understanding why this dough behaves the way it does – here it is. None of it is needed to make the loaf.
A Flexible Baker’s Timeline
Both of these work – pick whichever fits your week.
Overnight on the counter (bake in the morning)
Overnight in the fridge (a slower, more flavorful rise)
A cold first rise also makes the loaf noticeably easier to shape, tie and score, because the dough is firmer coming out of the fridge. If the pumpkin shape is the part that worries you, this is the version to use.
Troubleshooting
Why This Dough Is Wetter Than It Looks
Canned pumpkin purée is roughly 90% water. So the purée in this recipe is doing the work of about 6 tablespoons (90g) of water on top of the water you are pouring in. Add the water in your starter and you land at an effective hydration of around 80% – a genuinely wet dough, and a large part of why this loaf tastes as good as it does.
- The dough will feel stickier than a plain sourdough. That is correct and it is not a mistake. Resist the urge to work in extra flour – wet your hands and use a bench scraper instead. A cup of extra flour will give you a dense, tight loaf.
- If you use homemade purée, hold back 2–3½ tablespoons (30–50g) of the water until you see how the dough handles. Homemade purée is usually looser than canned. The test is simple: your purée should be thick enough to sit on a spoon rather than pour off it. If it pours, strain it or cook it down first.
How to drain a loose purée: line a sieve with a double layer of cheesecloth, tip the purée in, and leave it over a bowl for 20–30 minutes. You will be surprised how much water comes out. Worth doing with homemade purée as a matter of course – canned purée is thick enough that it does not need it.
The same logic applies to any purée or vegetable you add to a dough – roasted squash, sweet potato, beetroot. Weigh it, assume most of it is water, and take that much water out.
How to Prep a Banneton
A new banneton is bare, thirsty cane, and dough will stick to it fiercely. Season it properly, and every loaf after that turns out cleanly.
- Mist the inside lightly with water. Damp, not wet – you are only giving the flour something to cling to.
- Work in rice flour. Tip in a generous handful and push it into the coils with your fingers or a dry pastry brush, pressing it into every groove and right up the sides. Rice flour rather than wheat flour, because it does not absorb moisture and turn to paste.
- Tap out the excess and let it dry completely somewhere warm – overnight is ideal. Using it while it is still damp will glue your first loaf straight in.
Baker’s tip
Never wash a banneton
After each bake, tap the loose flour out, let it air dry completely and put it away. The flour worked into the coils is exactly what stops the next loaf sticking, and the basket seasons over time like a cast iron pan. If it ever smells musty or shows a bloom of mildew, that is a drying problem – give it an hour in a low oven at around 200°F (95°C) and let it cool before using it again.
Recipe
Pumpkin Sourdough Bread
This Pumpkin Sourdough Bread is fragrant with spices, subtly sweet and shaped like a pumpkin! A fun and easy (I promise!) sourdough bread recipe that’s perfect for Fall.
- Serves 12 slices
- Prep 30 minutes
- Cook 50 minutes
- Total 13 hours
Ingredients
For your starter
- scant ¼ cup (50g) mature starter (room temperature)
- ⅓ cup + 1 tbsp (50g) flour
- 3 ½ tbsp (50g) tepid water ((filtered, bottled, or boiled and cooled to room temperature))
For the sourdough loaf
- 3 ½ oz (100g) active starter ((most of the starter you prepared earlier))
- 1 ¼ cups (300g) water ((filtered, bottled, or boiled and cooled to room temperature))
- 3 ½ oz (100g) canned pumpkin purée
- 3 tbsp honey or maple syrup
- 1 tbsp pumpkin spice
- ½ tsp ground turmeric (optional – for color only, see notes)
- scant 2 tsp sea salt
- 4 cups (500g) white bread flour (, more as needed)
- olive oil (for greasing the bowl, as needed)
- olive or vegetable oil (for the string, as needed)
- rice flour or gluten free flour (for the bowl or banneton, as needed)
Method
Feed Your Sourdough Starter
- 1
Feed your mature starter. Leave for 4-6 hours, or until doubled in size, bubbly and floating in water (float test).
Prepare The Dough
- 2
Mix the starter and water together in a large bowl. Add the pumpkin purée, spices, salt and honey and mix well.
- 3
Add the bread flour and mix well with the dough whisk or your hands. It’s easier to have a feel for the dough if you use your hands. You will have a shaggy, slightly sticky dough. Cover the bowl and leave to rest for half an hour.
Stretch and Fold
- 4
Pull a section of the dough from the underside and stretch it upwards. Fold this over the rest of the dough. Rotate the bowl as you do this so you stretch the entire dough. You can do this a few times – every 30 minutes for two hours or just the once.
- 5
Transfer the dough into an oiled bowl, cover and leave to rise either at room temperature for 8-10 hours, or in the fridge for 10-14 hours. Watch the dough rather than the clock: it should rise by about half to double, look domed and jiggly, and show bubbles at the edges. A warm kitchen will get there considerably faster.
Shape The Sourdough
- 6
The following day take a look at your dough – it should have almost doubled. Mist your worktop with water and scrape the dough onto it – do not punch the dough down. Gently stretch the dough to form a rectangle.
- 7
Fold into three sections, like a letter. Roll the dough into a tight ball.
- 8
Flip over, seam side down, and shape into a round loaf (known as a “boule”). Use your hands and a bench scraper to roll the loaf in your hands, slightly tucking the edges under as you go (please check the video for a demo).
Second Rise
- 9
Line a bowl or basket with baking paper and lightly dust the paper and your loaf with gluten free flour or rice flour to prevent the bread from sticking to the paper. Cup the loaf in your hands and place into the prepared bowl seam side down.
- 10
Leave the dough to rise again for 30-120 minutes – dough that has come from the fridge is cold and will need the longer end. Check your dough is ready to bake by gently prodding with a finger. If the indent springs back slowly leaving a small dent then you are ready to bake. If it springs back really quickly you need to allow it to rise for a little longer.
Shape your loaf
- 11
Cut four pieces of 100% cotton butcher’s twine, about 24 inches (60cm) long. Soak them in vegetable oil for a full 10 minutes rather than just dipping them, leaving about 2 inches (5cm) at each loose end out of the oil, then run them between your fingers to strip off the excess. Position the strings on top of a round piece of parchment paper (cut so that it fits your Dutch Oven), crossing them at the center.
- 12
Turn the loaf out onto the strings rather than lifting it – hold the parchment over the mouth of the banneton and flip the whole thing over in one movement so the loaf lands in the middle of the strings. Bring the strings up over the loaf and tie them loosely, leaving about ¾ inch (2cm) of slack so the bread can expand as it bakes, so that it is divided into eight equal sections.
- 13
Cut any excess string, then score the loaf. Score within the lobes rather than across the strings – a cut that crosses a string will tear as the bread expands. One shallow cut down the middle of each section works well. Keep the cuts shallow; deep scoring fights the string.
Bake your Sourdough
- 14
Preheat your oven to 450°F (230°C) with the Dutch oven inside, for a full 45-60 minutes. Cast iron takes longer than you think to heat right through, so start the preheat well before the end of the second rise.
- 15
Remove the pot from the oven using pot holders (please be very careful). Place the loaf into the pot, lifting it by the baking paper.
- 16
Cover and bake for 30 minutes. Reduce the temperature to 425°F (220°C), take the lid off and bake for a further 15-20 minutes – until the crust is deep golden and the internal temperature in the center of the loaf reaches 205-210°F (96-99°C). Start checking the temperature at 15 minutes. If the crust darkens before the temperature is there, tent it loosely with foil and keep baking.
- 17
Leave the bread to cool, uncovered, for at least 2 hours before you cut it – the crumb carries on setting as it cools, and slicing a warm sourdough will make even a perfectly baked loaf feel gummy. Remove the strings and boast about your pumpkin shaped sourdough!
Notes
Bake to temperature, not to time. Pumpkin purée and honey are both sugar-rich, so the crust browns well before the crumb is set. The center of the loaf should read 205-210°F (96-99°C). Under 200°F (93°C) is not done. Cool it completely. The crumb carries on setting as the loaf cools, so give it a minimum of two hours before slicing. Turmeric is optional and is there for color only – a small amount is plenty, and you can leave it out altogether. Using a Banneton Basket If you are using a banneton basket (you need to prep this first before first use) dust the basket with rice or gluten free flour, shaking out some of the excess. Carefully transfer your loaf seam side up in this case. Cover with a bag and leave to rise. When the dough is ready to bake, after the second rise, carefully invert onto baking paper then proceed to bake in a Dutch Oven. Homemade pumpkin purée needs to be thick enough to sit on a spoon rather than pour off it. Line a sieve with a double layer of cheesecloth and let it drain for 20-30 minutes, and hold back 2-3½ tablespoons (30-50g) of the water until you see how the dough handles. Storing Sourdough Bread Cover the cooled loaf in a clean tea towel and store at room temperature – the bread will keep for 2-3 days. I prefer to slice the entire loaf and then freeze it – that way you can toast slices directly from frozen whenever the fancy takes you.
Equipment
- Dough Whisk
- Digital scales
- Pumpkin Purée
- Banneton Proofing Basket
- Silicone Bread Sling
- Dutch Oven
Nutrition
- Calories173 kcal
- Carbohydrates35 g
- Protein6 g
- Fat1 g
- Saturated Fat1 g
- Sodium390 mg
- Potassium47 mg
- Fiber1 g
- Sugar1 g
- Calcium6 mg
- Iron1 mg
Questions
How do I know my starter is ready to bake with?
An active sourdough starter should double in size and be bubbly within a few hours of being fed. To check whether it is ready, add a spoonful of active starter to a glass of tepid water – if it floats you are good to go! If it sinks it’s not quite there yet – this is called the float test.
What kind of pumpkin should I use?
Make sure to use 100% pumpkin purée and not pumpkin pie filling – the cans look quite similar so it’s an easy mistake to make!
Can I use homemade pumpkin purée?
Yes, but it needs to be thick – thick enough to sit on a spoon rather than pour off it. Homemade purée is usually much wetter than canned, and that extra water goes straight into an already wet dough. The easiest fix is to line a sieve with a double layer of cheesecloth, tip the purée in and leave it over a bowl for 20–30 minutes; a surprising amount of water drains out. Cooking it down in a pan works too. Either way, hold back 2–3½ tablespoons (30–50g) of the water from the recipe until you see how the dough handles.
Do I need a Dutch oven?
A preheated Dutch oven creates the high-heat trapped steam baking environment of a commercial oven. The steam keeps the crust soft during the first 20 minutes of baking so your sourdough can rise tall. If you don’t have a Dutch oven, you can bake your sourdough on a preheated pizza stone covered with an inverted oven-safe pan for the first 20 minutes.
How do I know when my pumpkin sourdough is baked?
Take its temperature. The center of the loaf should read 205–210°F (96–99°C) on an instant-read thermometer. Crust color is not a reliable guide in this recipe, because the pumpkin and honey make it brown early – a dark crust at 40 minutes can still be hiding a raw middle. If the crust is dark and the temperature is low, tent loosely with foil and keep baking.
Why is my loaf gummy or dense inside?
There are four usual culprits and they are easy to tell apart. If you hit 205°F (96°C) and it is still gummy, you almost certainly cut it too soon – give it a full 2 hours to cool. If it never reached temperature, it is underbaked. If it is dense and tight rather than gummy, the bulk ferment was too short or you added extra flour to fight the stickiness. And if you used homemade purée that was on the loose side, the dough was simply too wet – hold back some water next time.
Dough sticky and won’t hold its shape. What do I do?
This dough sits at about 80% hydration, so it’s stickier than a standard sourdough. Wet your hands and use a bench scraper instead of adding flour, and give it another round or two of stretch and folds to build strength. There is a difference between sticky and overproofed: sticky dough still springs back when you prod it, while overproofed dough spreads out and stays flat. If it is the second, bake it now rather than waiting.
Can I leave the turmeric out?
Yes. It is there purely for color and contributes nothing you want in the flavor. A small pinch gives you a golden crumb; leave it out entirely and the loaf will just be a shade paler.
Can I use all-purpose flour instead of bread flour?
You can, but bread flour is much better here because it absorbs more liquid and this is a wet dough. If you do use all-purpose flour, reduce the water by about 1½ tablespoons (25g).
Can I make this with sourdough discard?
Not for this loaf – it needs an active, peaking starter to rise. If you have discard to use up, my Sourdough Discard Banana Bread and Sourdough Discard Focaccia are both good homes for it. And if what you actually want is a sweet, cakey pumpkin loaf, go to my No Knead Pumpkin Bread.
Can I add chocolate chips, nuts or dried cranberries?
Yes – fold them in during the final stretch and fold. See the variations section above for quantities. Chocolate chips, toasted pecans or walnuts, dried cranberries and cinnamon chips all work well.
Can I bake this in a loaf pan instead?
Yes, and it makes excellent breakfast toast. Shape it as a batard, drop it into a greased 9x5in (23x13cm) loaf pan for the second rise, and bake at 425°F (220°C) for 40–45 minutes – still to 205–210°F (96–99°C) in the center. You lose the pumpkin shape but gain neat slices.
Why is the string shedding fuzz into my crust?
It isn’t 100% cotton, or it wasn’t oiled enough. Use butcher’s twine and soak the pieces for a full 10 minutes rather than dipping them.
My strings are stuck in the loaf – how do I get them out?
Let the loaf cool completely, then snip the strings into short sections with scissors and lift each piece out. Pulling a whole string through a warm loaf is how they tear or stay stuck.
Can I do the first rise in the fridge?
Yes – that is the slower, more flavorful option, and this recipe is written for either. Room temperature takes 8–10 hours, the fridge 10–14. Cold dough is also considerably easier to shape, tie and score, so if the pumpkin shape is the part that worries you, use the fridge. Just allow the longer end of the second rise afterwards, because the dough starts cold.