Bread, Muffins, Donuts and Pastries
Easy Sourdough Bread (Perfect for Beginners!)
This easy Sourdough Bread recipe requires no kneading or folding. The perfect sourdough recipe for beginners. Check out my step
- Serves 12 slices
- Prep 10 minutes
- Cook 45 minutes
- Total 12 hours
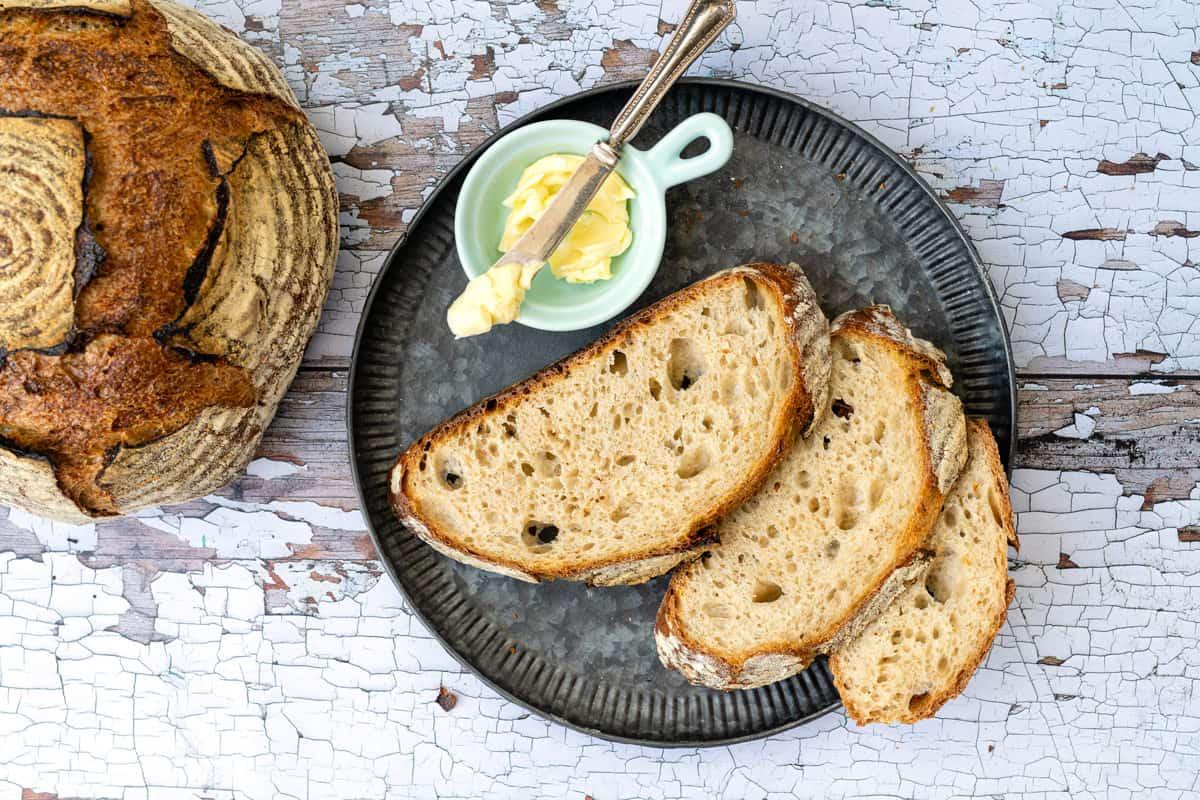
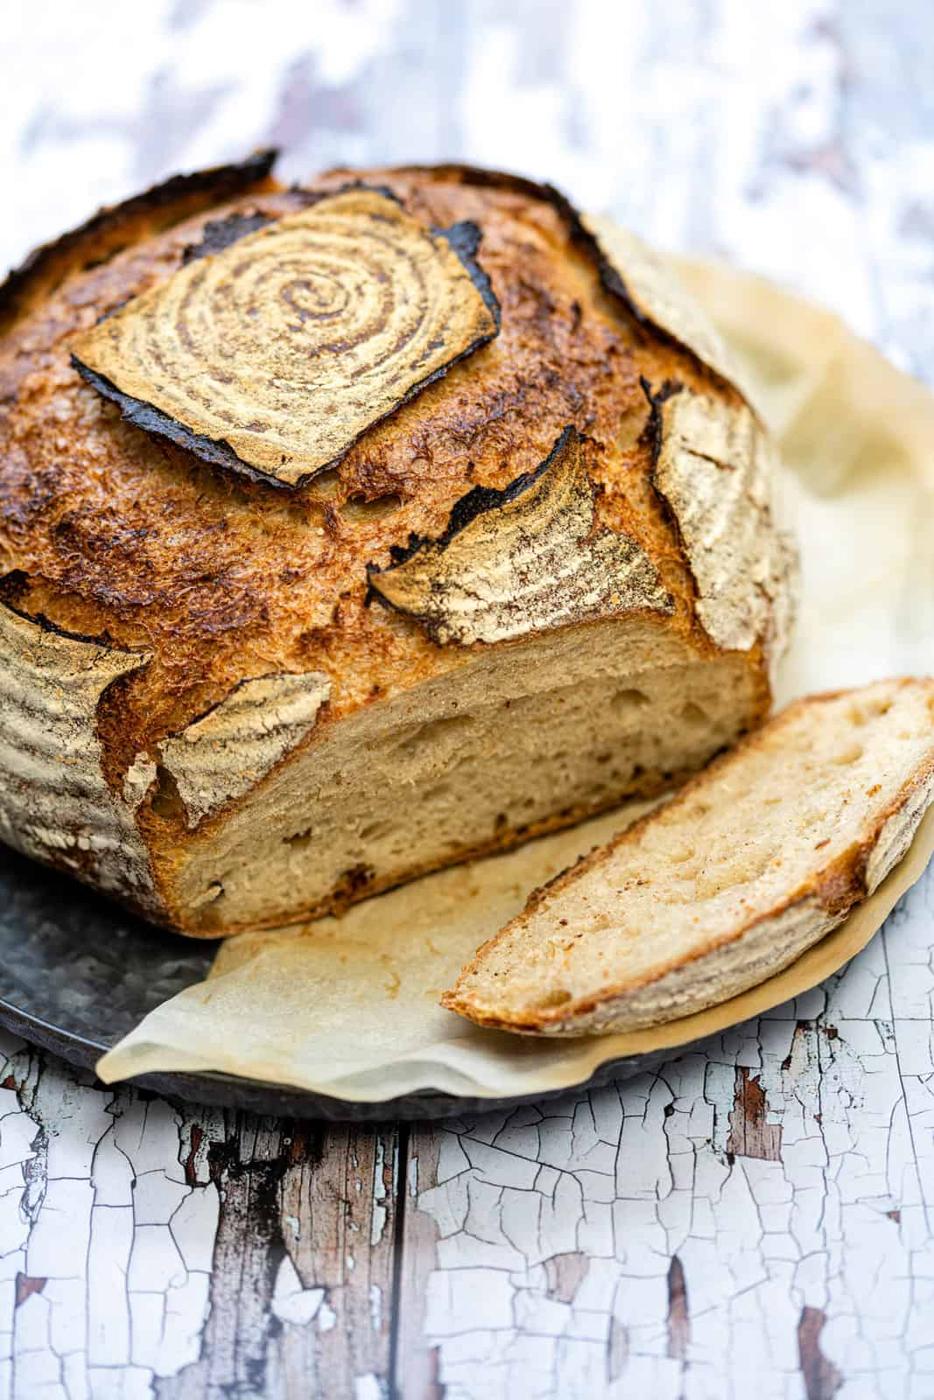
Beginner’s Sourdough Bread
Want to bake your first sourdough bread but feel intimidated and overwhelmed? My simplified method will take you from starter to sourdough bread with about 10 minutes hand on effort.
No kneading, no stretching and folding… this really is the easiest overnight sourdough ever! Make sure to check out the video to see the recipe in action, especially the shaping of the loaf.
Fancy baking a sourdough focaccia? This is another super easy recipe that’s perfect for newbies!
The Sourdough Trend
Like so many others during the bizarre spring of 2020, I decided to nurture a sourdough starter. This was merely an experiment to keep my mind focused and the kids engaged, my hopes weren’t high.
We fed our starter, christened Haku after Spirited Away, dutifully every day for a week. There was some bubbling, but it didn’t really look very active. Then on day 9, when I had just about given up, the starter literally doubled before our astonished eyes. Time to get baking!
And here is where my mind literally went into screensaver mode. There was so much information about baking sourdough bread, so many new terms to wrap my head around, so much work.
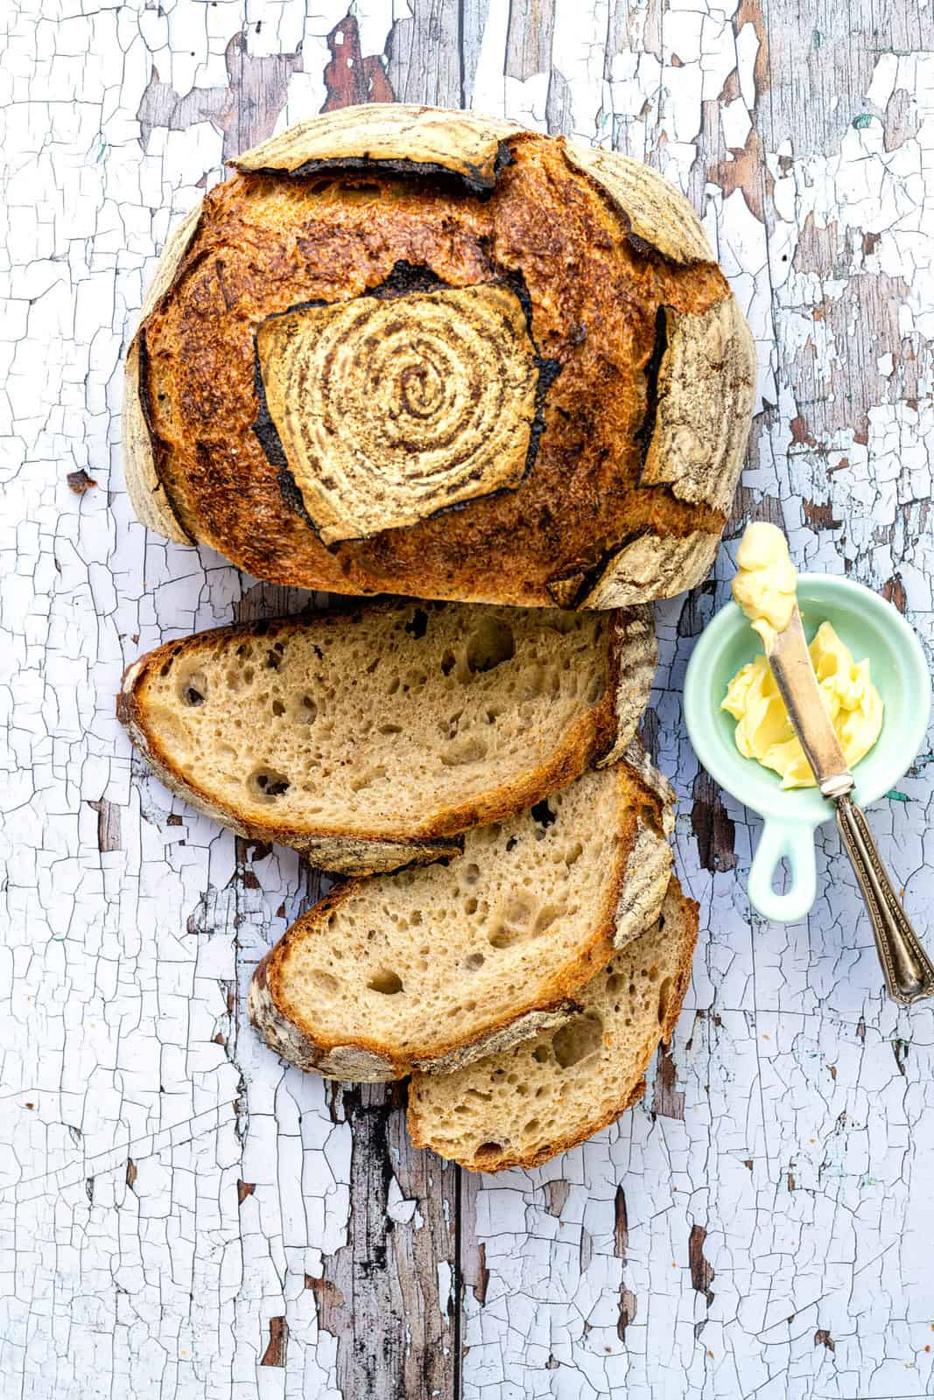
So I decided to tackle my first sourdough bread the same lazy way I bake my no knead bread: mix the ingredients, leave them to do their thing, shape, rise and bake. To my amazement this no knead sourdough worked a treat.
And the wonder and pride you will feel when you cradle your first sourdough loaf is really such a high, you will soon want to bake bread again and again.
Health Benefits of Sourdough
Sourdough bread tastes infinitely more delicious than insipid commercial bread loaves, but is it good for you?
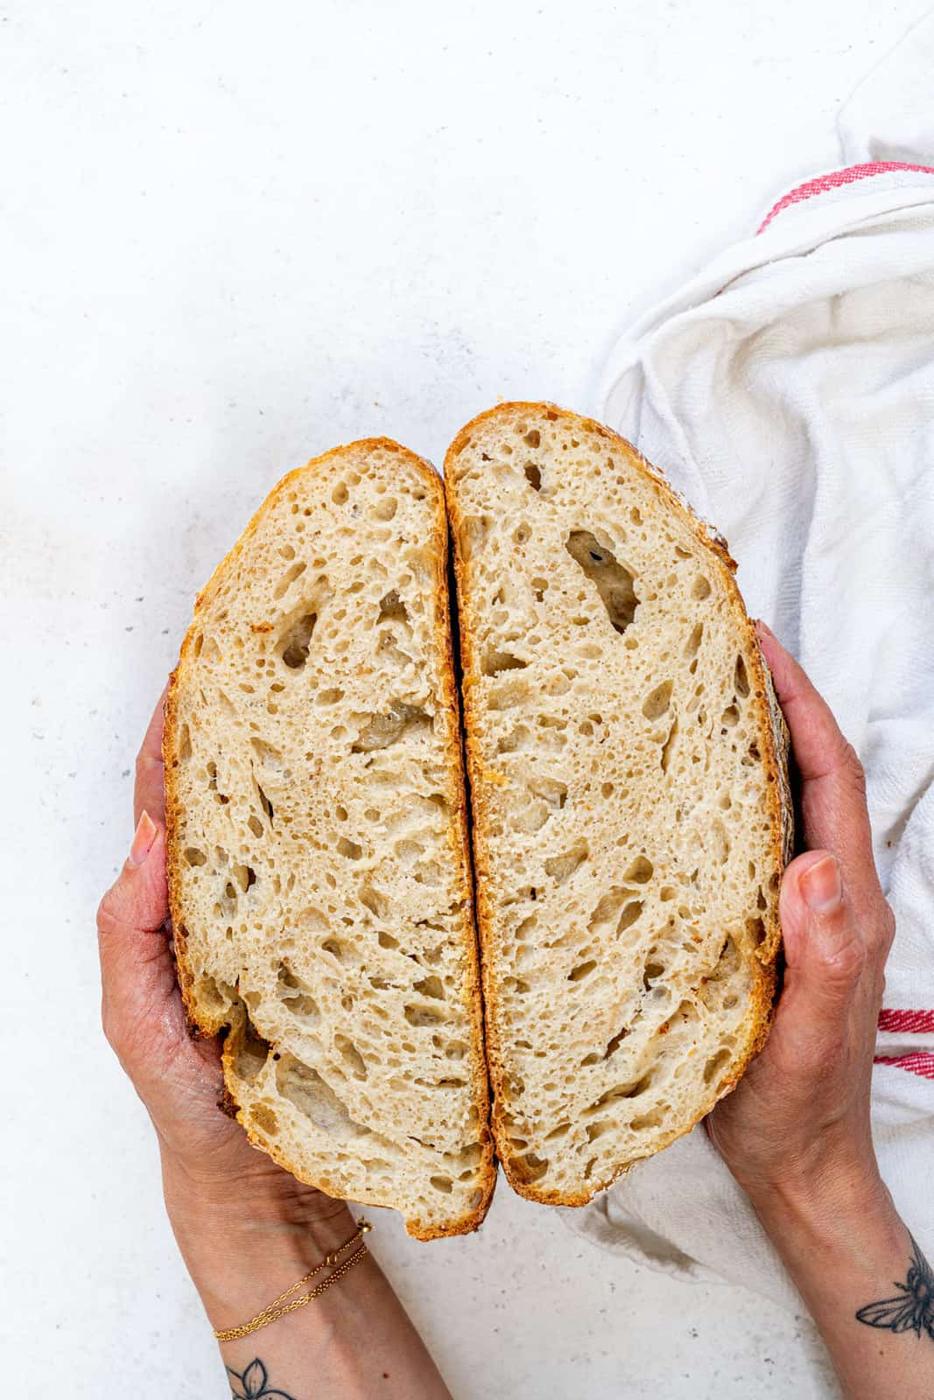
Sourdough bread is easier to digest, more nutritious and better tolerated than regular bread. This basic sourdough bread recipe is also naturally vegan / vegetarian.
Sourdough bread is NOT, however, gluten-free unless it has been prepared using a gluten free sourdough starter and flour. Take a look at this recipe for Gluten Free Sourdough.
Sourdough Bread Ingredients
- Active sourdough starter – you can get your starter from a friend, or buy sourdough starter online or from a local bakery. You can also make your own (recipe to follow soon)
- Bread flour – this is higher in protein and will give your loaf a better structure. You can use all purpose (plain) flour but your loaf may not rise as well. For this simple sourdough recipe I have used white bread flour.
- Salt – ideally fine sea salt
- Water – filtered, bottled or tap water*.
*Chlorinated water is thought to inhibit the growth of sourdough starter – I usually boil tap water and leave it to cool before using. - Rice flour or gluten free flour for the bowl
Useful equipment & Tools
- Digital scales are needed for accurate measuring
- Bowl or a banneton basket for proving the dough
- Lame, razor or sharp knife for scoring
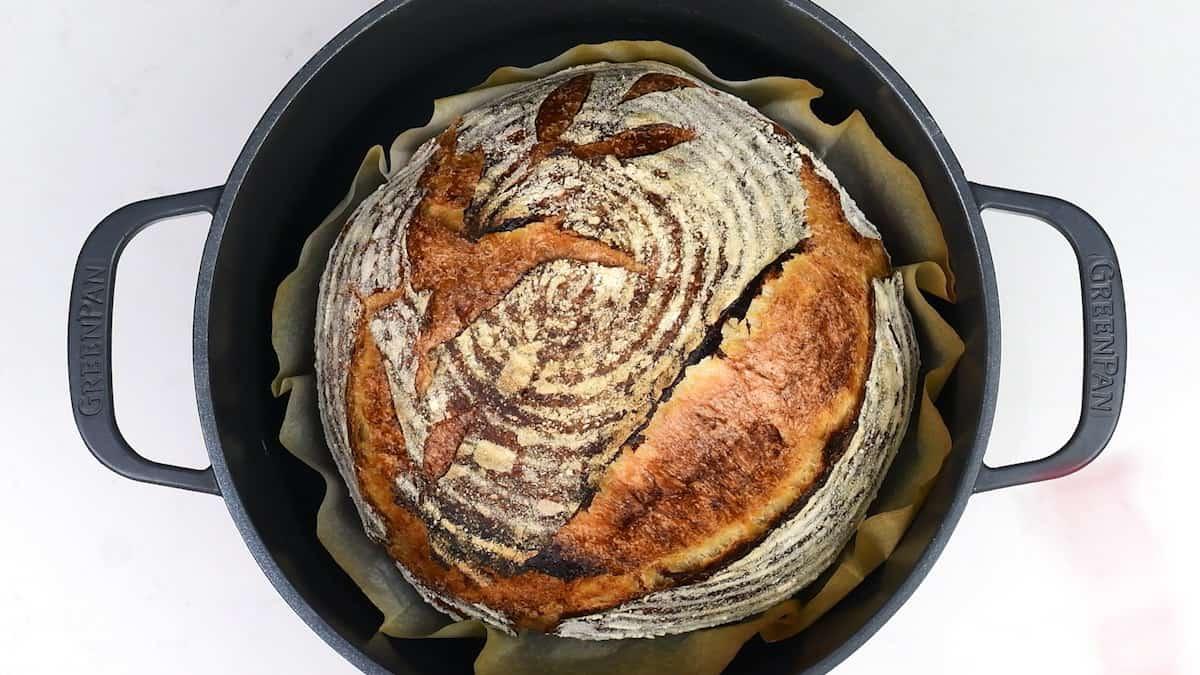
- A cast iron pot – I have used my trusty Greenpan Dutch Oven
- Large jar if you are making your own starter (I love these Weck Jars)
- Spatula for mixing your starter
- Dough whisk for mixing bread dough (optional but useful!)
- Bench scraper and small spray bottle
How Do I Know If My Starter Is Ready?
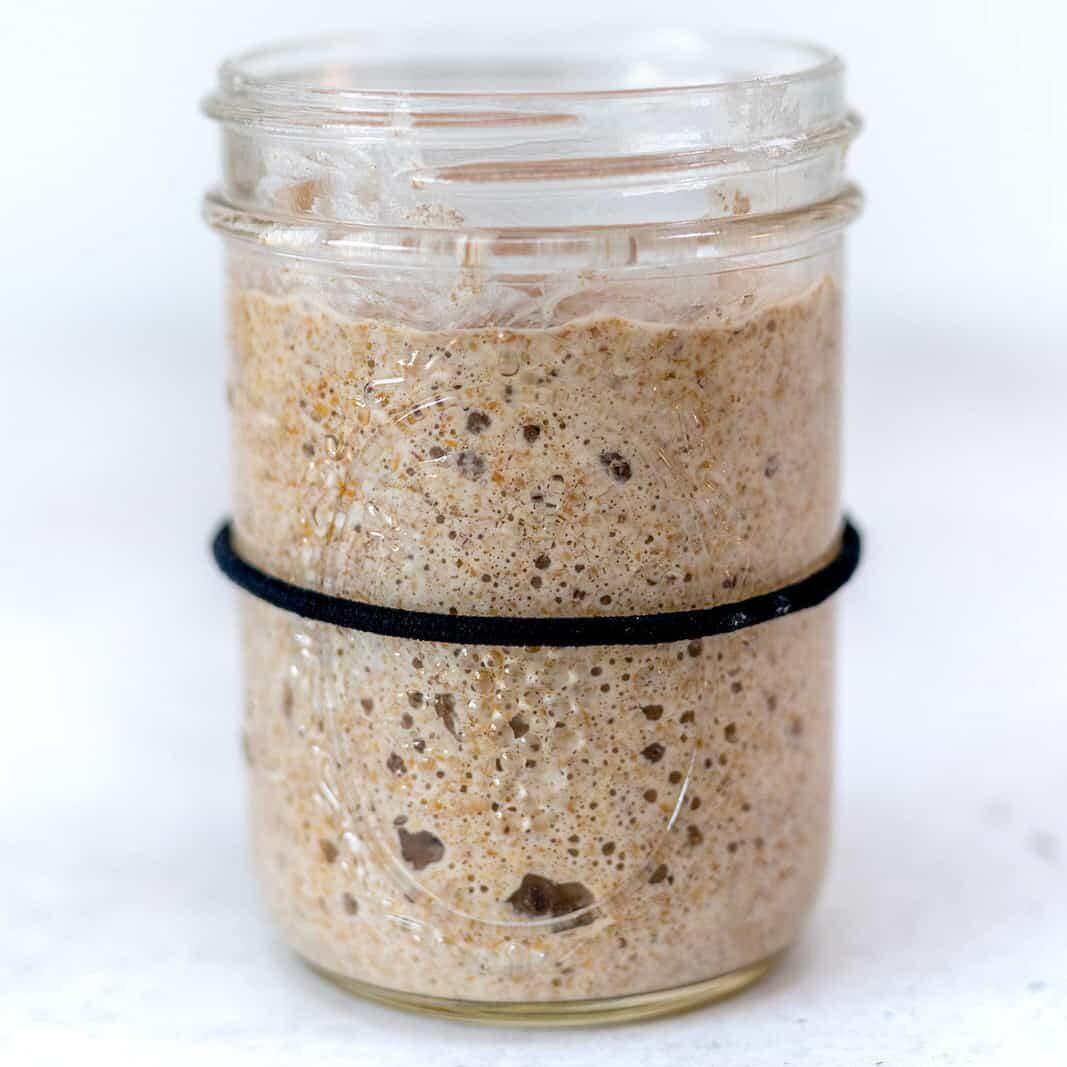
An active starter should double in size and be bubbly within a few hours of being fed. To check whether it is ready, add a spoonful of active starter to a glass of water. If it floats you are good to go. If it sinks it’s not quite there yet – this is called the float test.
How to Make Sourdough Bread
↓ For the full ingredients and detailed method, jump to the recipe card.
This is my timetable for making overnight sourdough. You can follow your own schedule just keep and eye on the timing. If the weather is particularly warm the bread will prove quite quickly and is in danger of over fermenting – I usually prefer to prove the dough in the fridge overnight for 12 hours or longer.
- 6pm Feed Your Starter Feed a mature starter then leave for 4 hours, or until doubled in size, bubbly and floating in water (float test). Try to use your starter at its peak, before it starts to sink again (you will see a trail on the sides of the jar when it starts to deflate). Don’t forget – always keep some of your active starter in the fridge for further baking!
- 10pm Mix The Dough Add the bubbly starter in a large mixing bowl. Pour in the water and mix well – I use my dough whisk for this.
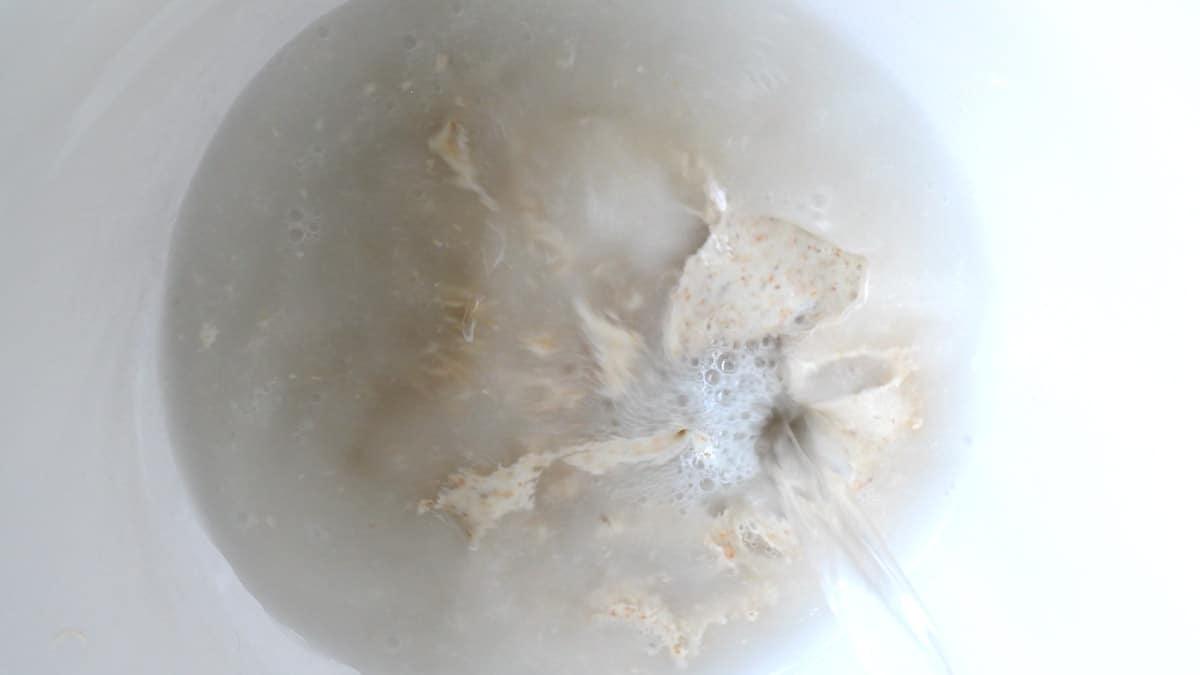
- Add the bread flour, salt and mix well with the dough whisk or your hands. It’s easier to have a feel for the dough if you use your hands. You will have a shaggy, slightly sticky dough.
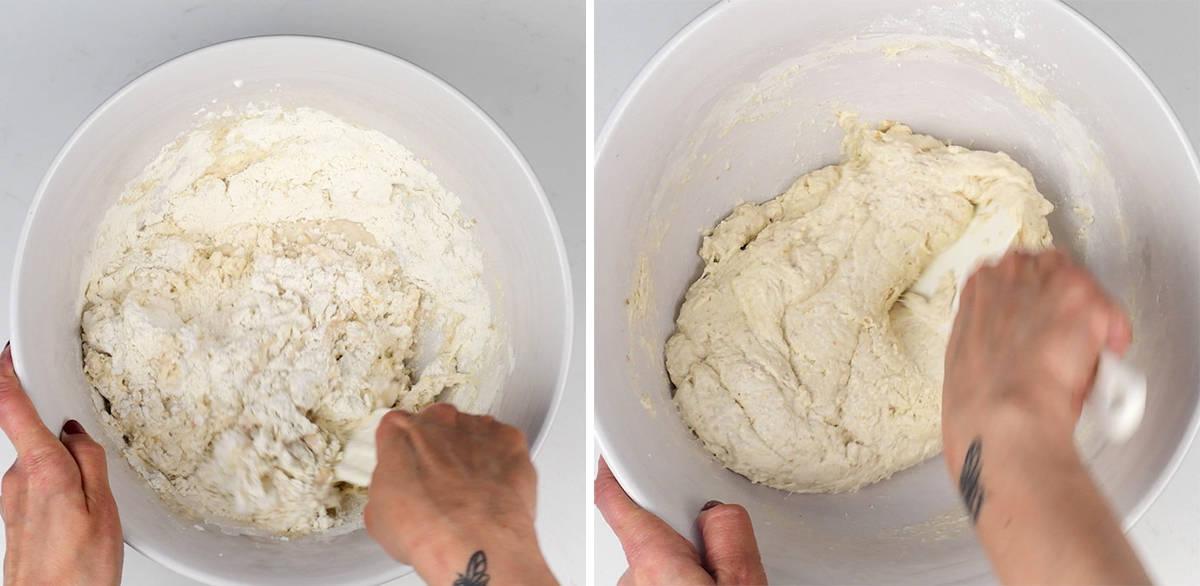
Bulk Fermentation
- Transfer the dough into a rectangular container (I like a glass pyrex dish), mist with a little water, cover and leave to rise at room temperature overnight (8-10 hours) or in the fridge (10-12 hours) if it is a warm night.
- 10 am – READY TO SHAPE Take a look at your dough – it should have risen in the bowl to almost doubled. Mist your worktop with water and scrape the dough onto it – do not punch the dough down. If the dough is really sticky then you can dust the worktop with a little flour – I prefer to use water with this recipe.
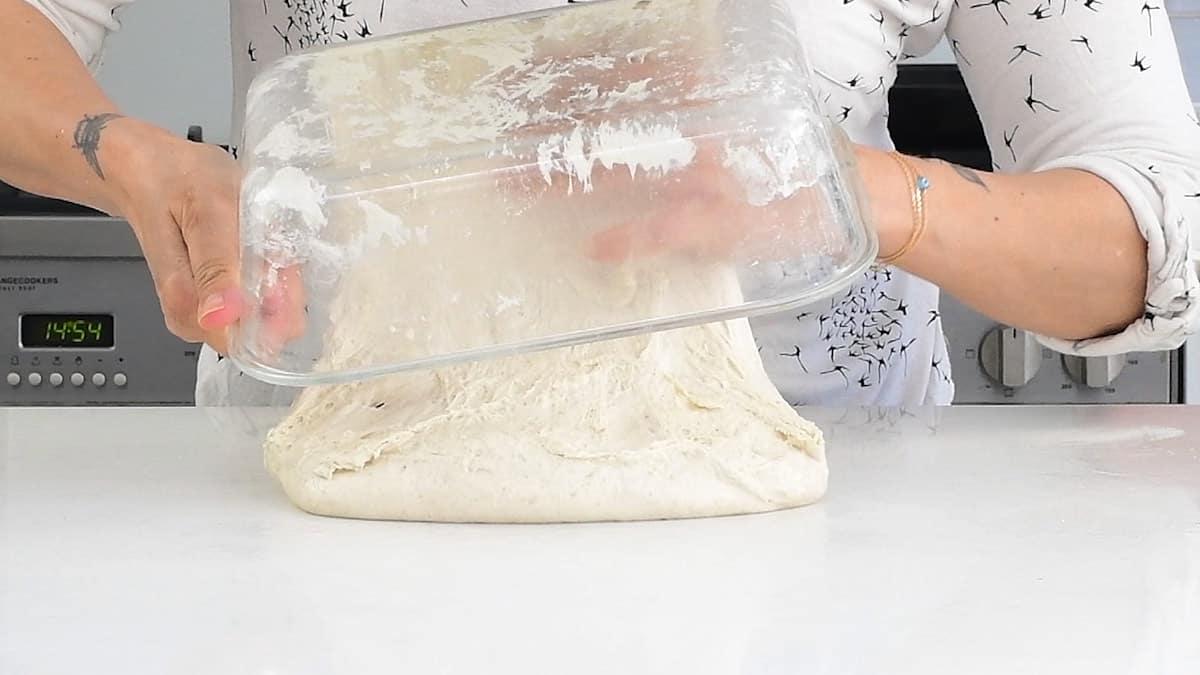
- Gently stretch the dough to form a rectangle.
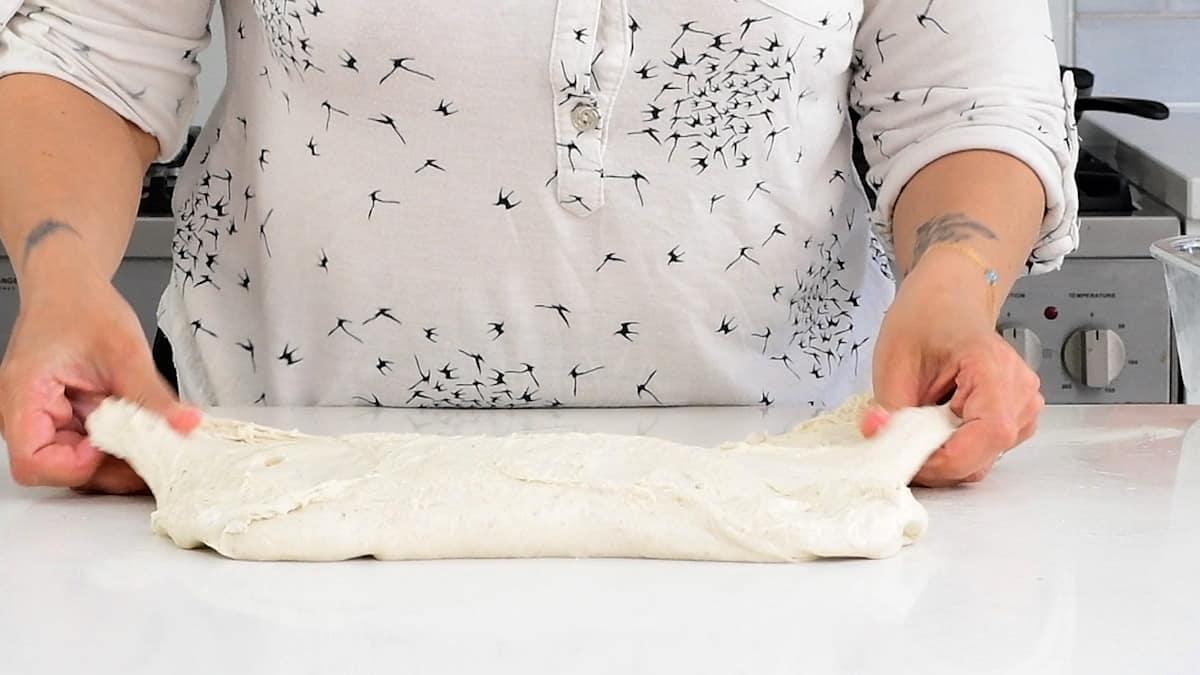
- Fold the dough into three sections, like a letter (letter fold).
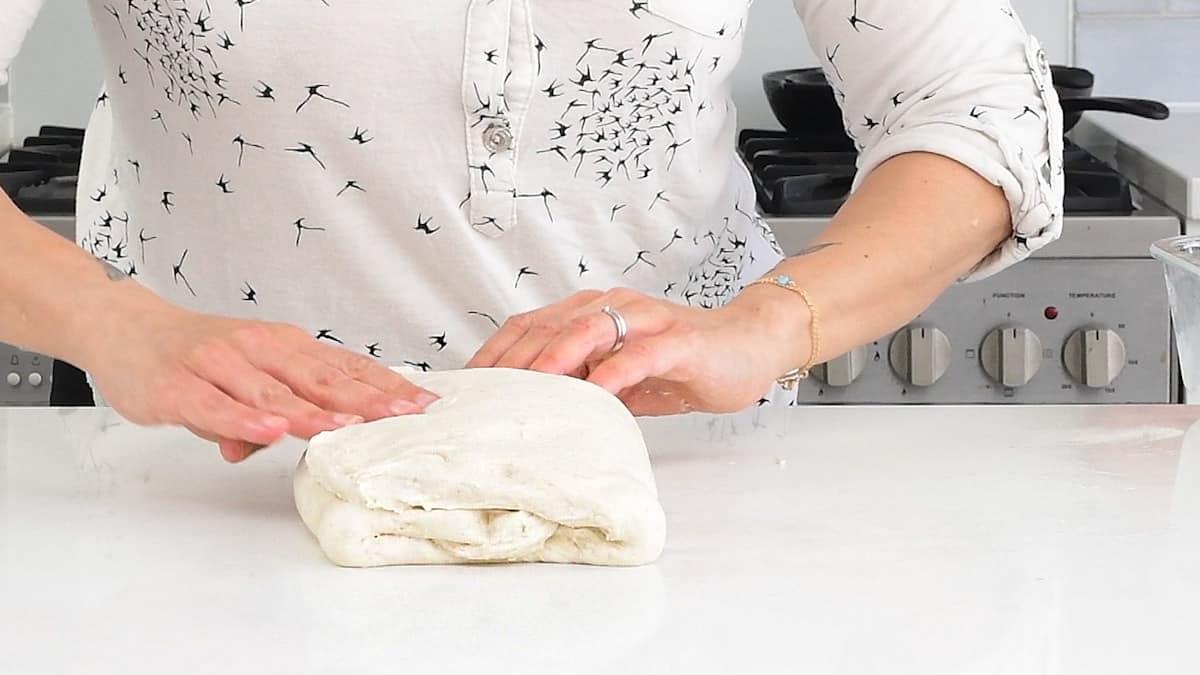
- Roll the dough into a tight ball. It should now stand pretty tall!
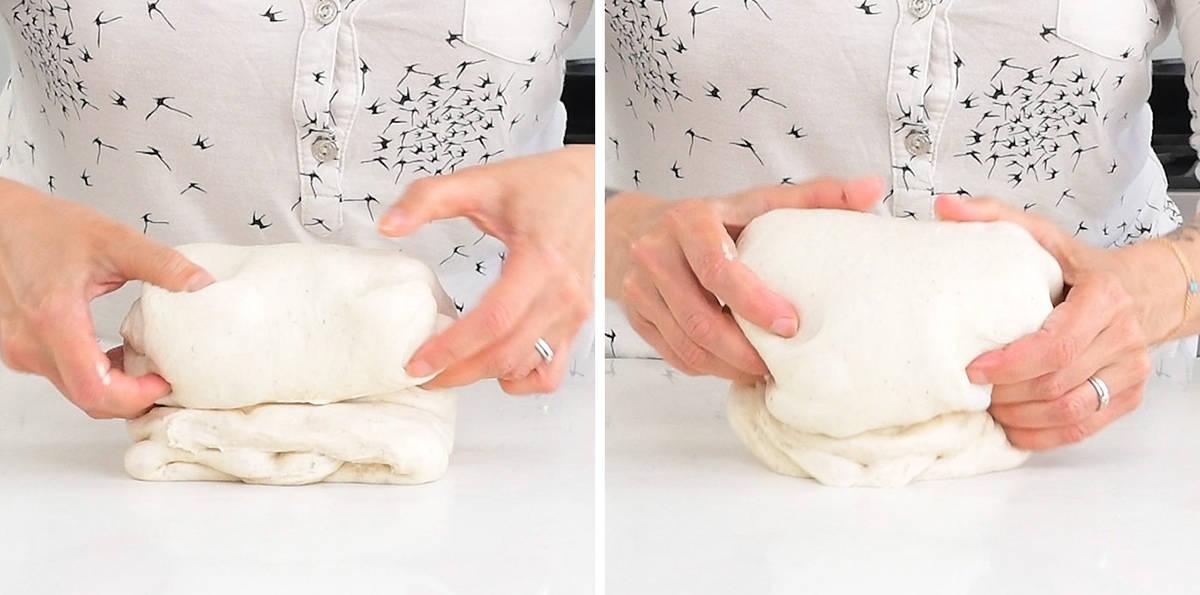
- Flip over, seam side down, and shape using your hands and a bench scraper into a round loaf (known as a “boule”). Keep turning on the countertop, shaping between your hands and slightly tucking under until the loaf is smooth.
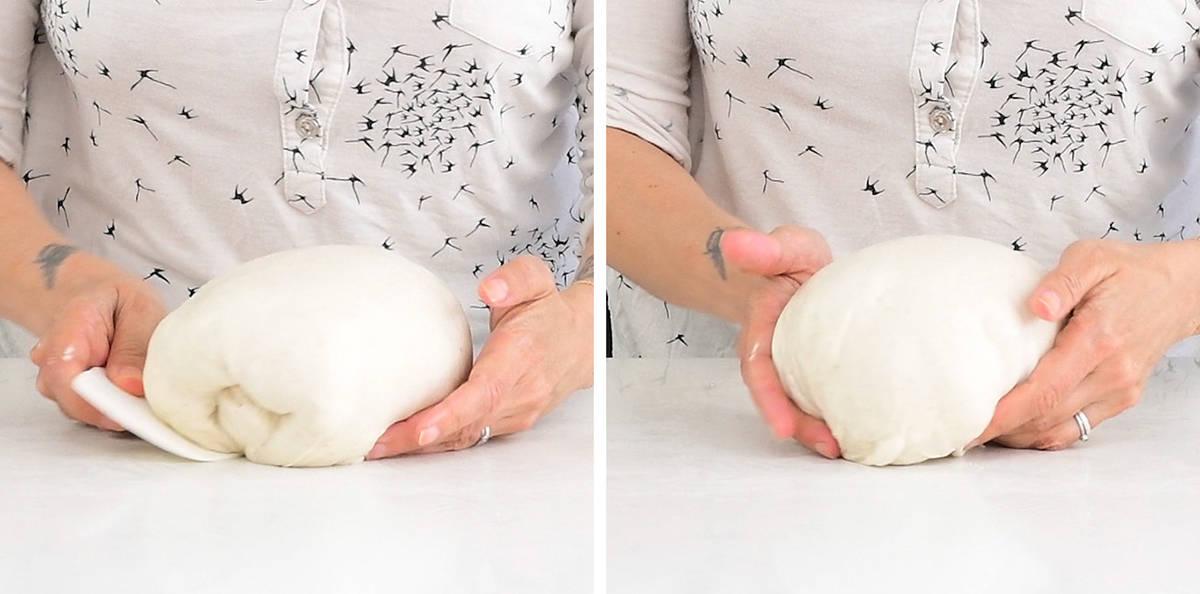
Second Rise
- Line a bowl or basket with baking paper and lightly dust the paper and your loaf with gluten free flour or rice flour to prevent the bread from sticking to the paper.
- Place into the prepared bowl seam side down, cover loosely with a plastic bag and leave to rise again for 30 minutes to a couple of hours at room temperature (again, this will be weather dependent).
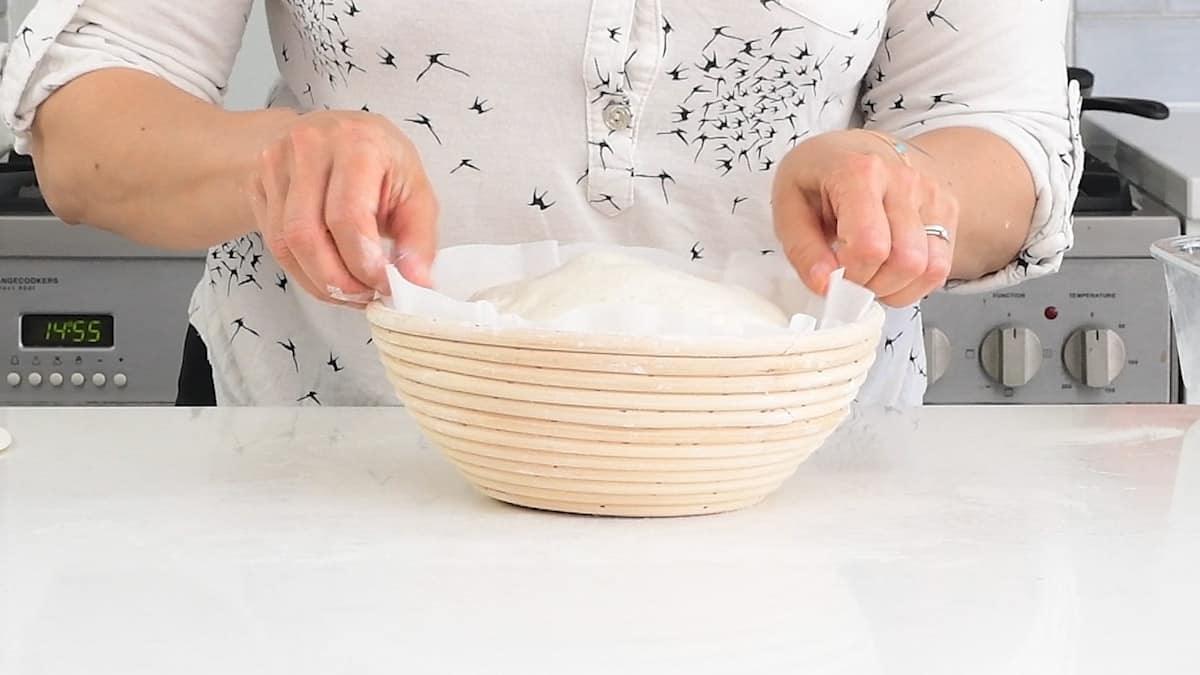
TOP TIP Check your loaf is ready to bake by gently prodding with a finger. If the indent springs back slowly leaving a small dent then you are ready to bake. If it springs back really quickly you need to allow it to rise for a little longer.
Bake the Sourdough
- Preheat your oven to 450F (230C) half an hour before the end of proving. Place a lidded pot (Dutch Oven) in the oven to preheat. Score the top of your loaf using a sharp knife, razor or lame.
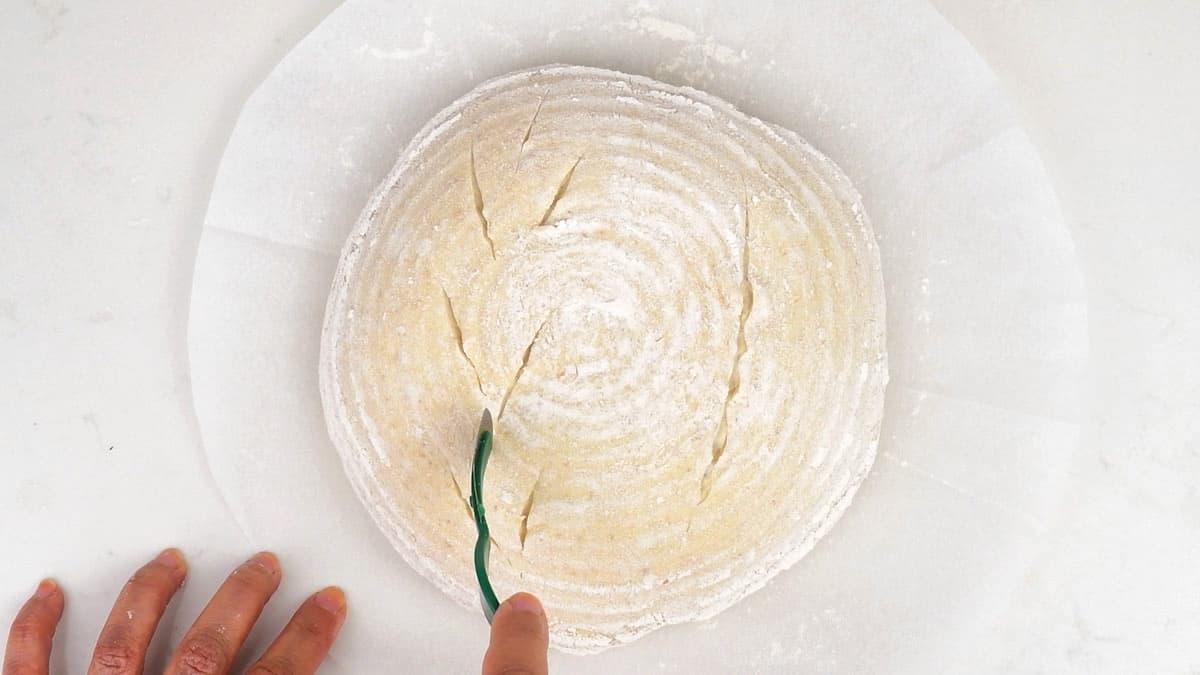
- Remove the pot from the oven using pot holders (please be very careful). Carefully place the dough into the pot, lifting it by the baking paper. Cover and bake for 20 minutes.
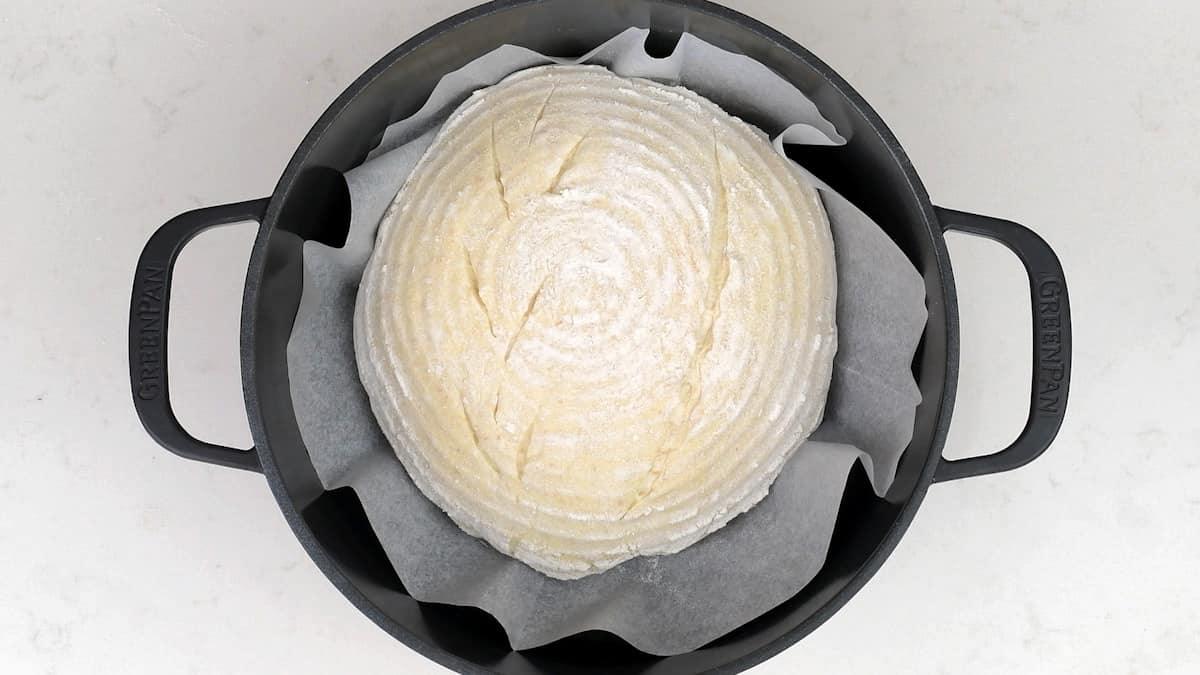
- Reduce the oven temperature to 425F (220C). Take the lid off the pot and cook for another 20-25 minutes. You can lift the bread out of the pot and cook directly on the oven shelf for the final 5 minutes.
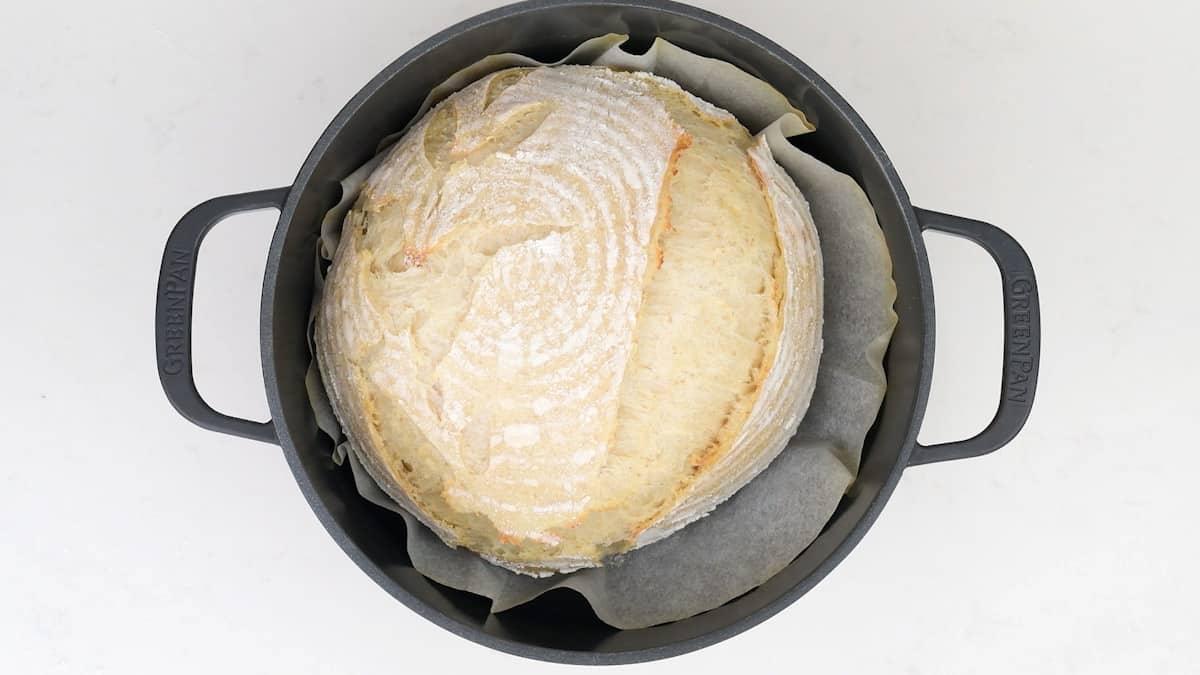
- Cool the bread on a wire rack for at least an hour before slicing. Enjoy toasted spread with some salted butter – DELICIOUS!
How to Use a Banneton
If you are using a proofing basket bread basket you will need to prep this first before first use – check this guide for preparing your banneton basket. Dust the basket with rice flour or gluten free flour, shaking out the excess.
Carefully transfer your loaf seam side up directly into the prepared basket. Dust with a little flour, cover with a bag and leave to rise. When the dough is ready to bake, after the second rise, carefully invert onto baking paper then proceed to score and bake in a Dutch Oven.
If you have never made sourdough bread before, it would be best to try the lined bowl method first as it is easier.
Storing Sourdough Bread
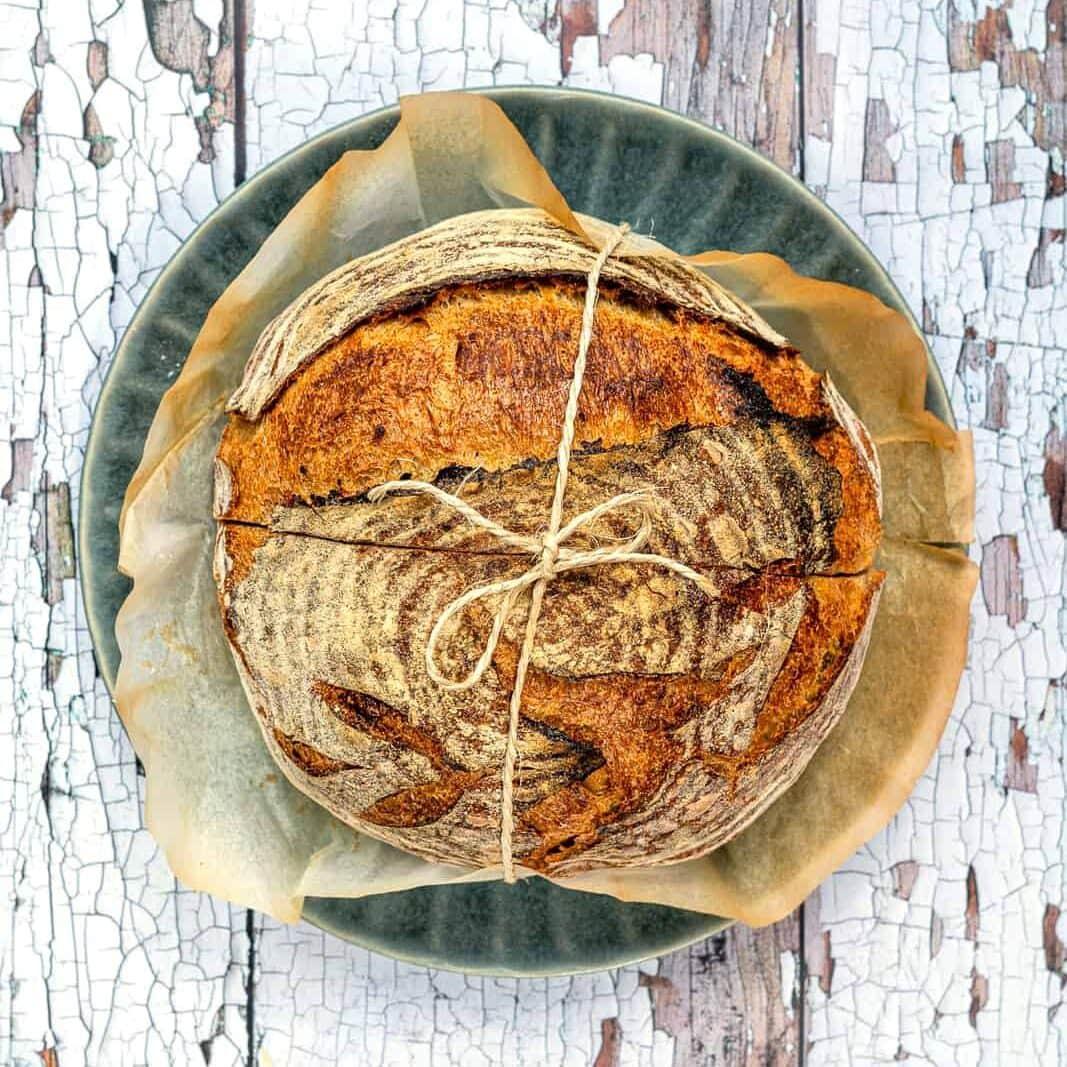
Cover the cooled loaf in a clean tea towel or a fabric breadbag and store at room temperature – the bread will keep for 2-3 days.
I prefer to slice the entire loaf and then freeze it – that way you can toast slices directly from frozen whenever the fancy takes you.
Further Reading
Once you master this basic sourdough recipe you might want to delve deeper into sourdough techniques. Check out these helpful links:
- How to shape a boule
- How to check your sourdough has finished proofing
- Sourdough Hydration Explained
Related Recipes
Bread, Muffins, Donuts and Pastries
Everything Sourdough (Sourdough with Everything Bagel Seasoning)
Bread, Muffins, Donuts and Pastries
Easy Sourdough Discard Focaccia With Yeast
Sourdough Baking
Sourdough Sandwich Bread (Easy & Beginner Friendly!)
Air Fryer
Air Fryer Sourdough Bread
HAVE YOU MADE MY OVERNIGHT SOURDOUGH BREAD RECIPE? Post a photo on my Facebook page, share it on Instagram, or save it to Pinterest with the tag #Nusde and make my day!
ALL IMAGES AND CONTENT ON Nusde ARE COPYRIGHT PROTECTED. IF YOU WISH TO SHARE THIS RECIPE, THEN PLEASE DO SO BY USING THE SHARE BUTTONS PROVIDED. DO NOT SCREENSHOT / POST RECIPE OR CONTENT IN FULL.
Recipe
Overnight Sourdough Bread
This Overnight Sourdough Bread requires no kneading or folding. A truly easy sourdough recipe perfect for beginners. Please read the whole post, including tips and step by step instructions before proceeding with this recipe.
- Serves 12 slices
- Prep 10 minutes
- Cook 45 minutes
- Total 12 hours
Ingredients
For your starter
- ¼ cup (60g) mature starter (room temperature)
- ½ cup (60g) flour
- ¼ cup (60g) tepid water ((filtered, bottled or boiled and cooled tap water))
For the overnight sourdough
- 150 g active starter ((most of the starter you prepared earlier))
- 1 ¼ cups (300g) water ((filtered, bottled or boiled and cooled tap water))
- 4 cups (500g) white bread flour (preferably organic)
- 2 tsp sea salt ((2 scant teaspoons))
- rice flour or gluten free flour (for the bowl or banetton, as needed)
Method
Feed Your Sourdough Starter
- 1
Feed 60g of active starter with 60g flour and 60g lukewarm water. Leave for 4-6 hours until doubled in size, bubbly and floating in water (float test).
Prepare The Bread Dough
- 2
Add 150g of bubbly starter in a large mixing bowl. Pour in 300g of water* and mix well – I use my dough whisk. *remember to use filtered, bottled or boiled and cooled tap water.
- 3
Add the bread flour and salt and mix well with the dough whisk or your hands. It’s easier to have a feel for the dough if you use your hands. You will have a shaggy, slightly sticky dough.
- 4
Transfer the dough into a rectangular container (I like a glass pyrex dish), cover and leave to rise at room temperature overnight (8-10 hours). If it is a hot night then place the dough in the fridge where it will need 10-12 hours.
Shape The Sourdough
- 5
The following day take a look at your dough – it should have almost doubled. Mist your worktop with water and scrape the dough onto it – do not punch the dough down. If the dough is really sticky then you can dust the worktop with a little flour – I prefer to use water with this recipe.
- 6
Gently stretch the dough to form a rectangle. Fold into three sections, like a letter. Roll the dough into a tight ball.
- 7
Flip over, seam side down, and shape into a round loaf (known as a “boule”). Use your hands and a bench scraper to roll the loaf in your hands, slightly tucking the edges under as you go (please check the video for a demo).
Second Rise
- 8
Line a bowl or basket with baking paper and lightly dust the paper and your loaf with gluten free flour or rice flour to prevent the bread from sticking to the paper.
- 9
Gently cup the loaf in your hands and place into the prepared bowl seam side down. Cover loosely with a plastic bag and leave to rise again for 30 minutes to a couple of hours at room temperature (again, this will be temperature dependent).
- 10
Preheat your oven to 450F (230C) half an hour before the end of proving. Place a lidded pot (Dutch Oven) in the oven to preheat. Score the top of your loaf using a sharp knife, razor or lame.
Bake your Sourdough
- 11
Remove the pot from the oven using pot holders (please be very careful as it can easily give you very bad burns, as I can testify). Carefully place the dough into the pot, lifting it by the baking paper.
- 12
Cover and bake for 20 minutes.
- 13
Reduce the temperature to 425F (220C). Take the lid off the pot and cook for another 20-25 minutes. You can lift the bread out of the pot and cook directly on the oven shelf for the final 5 minutes.
- 14
Cool the bread on a wire rack for at least an hour before slicing.
Notes
Using a Banneton Basket If you are using a banneton basket (you need to prep this first before first use) dust the basket with rice or gluten free flour, shaking out some of the excess. Carefully transfer your load seam side up in this case. Cover with a bag and leave to rise. When the dough is ready to bake, after the second rise, carefully invert onto baking paper then proceed to bake in a Dutch Oven. Storing Sourdough Bread Cover the cooled loaf in a clean tea towel and store at room temperature – the bread will keep for 2-3 days. I prefer to slice the entire loaf and then freeze it – that way you can toast slices directly from frozen whenever the fancy takes you.
Equipment
- Dutch Oven
- Digital scales
- Dough Whisk
- Starter Jar
- Silicone Bread Mat
- Banneton Proofing Basket
Nutrition
- Calories173 kcal
- Carbohydrates35 g
- Protein6 g
- Fat1 g
- Saturated Fat1 g
- Sodium390 mg
- Potassium47 mg
- Fiber1 g
- Sugar1 g
- Calcium6 mg
- Iron1 mg