Bread, Muffins, Donuts and Pastries
Maple Pecan Danish Pastries (Quick Method)
Maple pecan Danish pastries made with a quick-method laminated dough – no butter block, just a food processor, a few rolls and folds and an overnight chill. Flaky, bakery-style pinwheels with a maple glaze
- Serves 12
- Prep 20 minutes
- Cook 15 minutes
- Total 6 hours
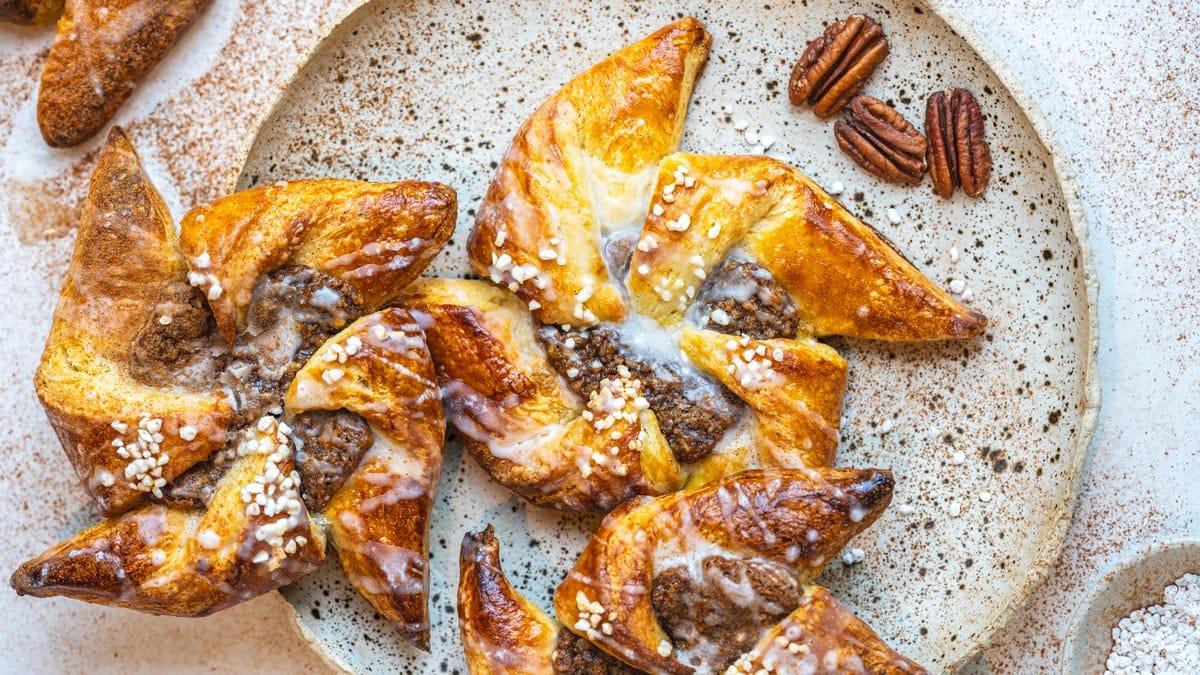
These Maple Pecan Danish pastries use a quick-method dough – no butter block and no day-long laminating – so you can bake flaky, bakery-style pinwheels at home. The “quick” part is the dough itself: the rest is a long, mostly hands-off chill, so start the day before or first thing in the morning.
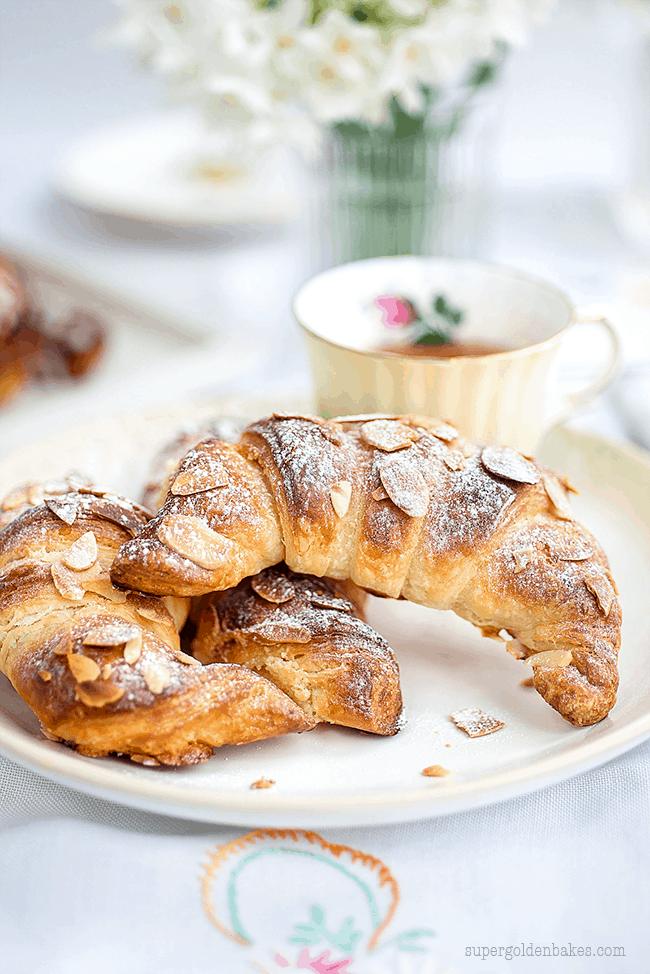
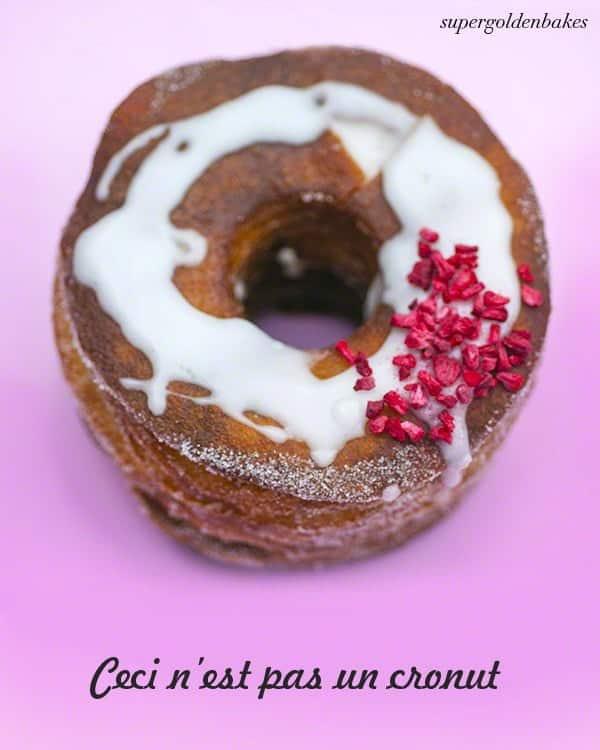
You will also love my Quick and Easy Croissants from Scratch, Homemade Cronuts and Easy Cinnamon Swirls
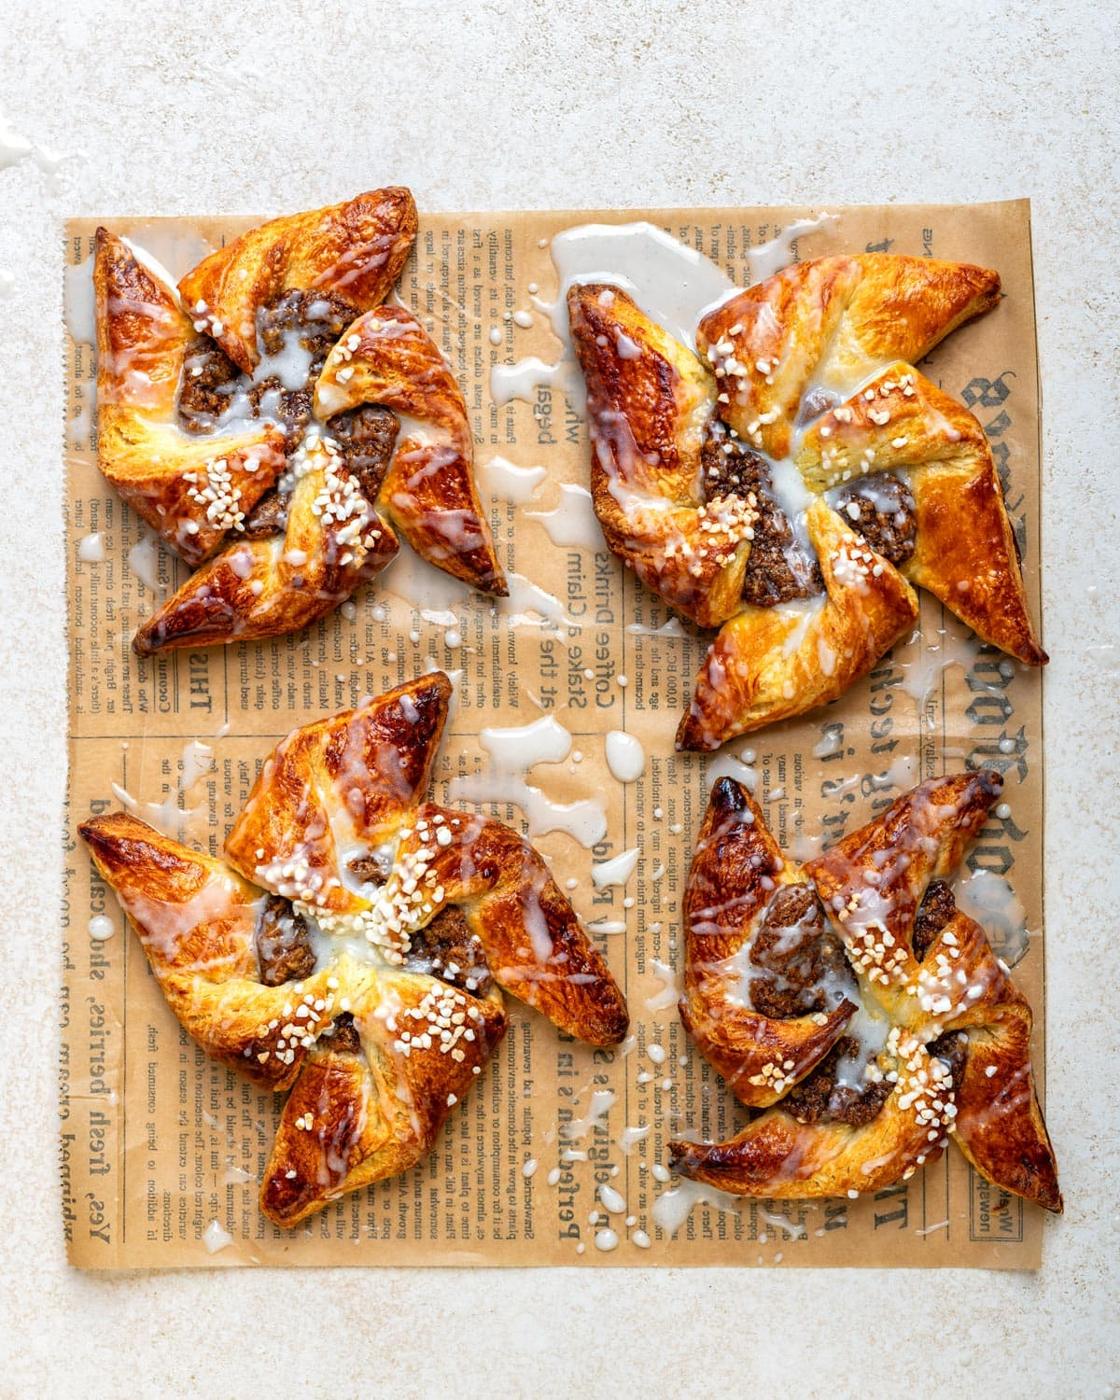
Is there a better treat than a flaky Danish paired with a warm cup of coffee? I am picturing myself taking a bite of the crisp buttery pastry as I am typing this sentence! Homemade Danish pastries are superior to store-bought ones and while definitely a labor of love, they are a wonderful baking challenge for home bakers everywhere.
I first posted this quick method Danish pastry recipe over a decade ago and I’m finally ready to share a spruced up version based on your comments and my extensive notes from testing and retesting them (much to the delight of my children).
Why You Will Love This Recipe
- Made ahead: the dough needs a long chill anyway, so it fits neatly around your day or overnight.
- No butter block: cold butter is pulsed straight into the flour, then rolled and folded – the layers build as you go.
- Maple and pecans: toasted pecans, brown sugar, maple syrup and cinnamon = all the flavors of fall in one pastry!
- Bakery-style shapes: pinwheels look impressive but are just a few cuts and folds.
Where This “Quick Method” Comes From
This “quick method” isn’t a shortcut I invented – it’s a well-documented technique developed by cookbook author Beatrice Ojakangas, who shared it with Julia Child on Baking with Julia (here is her original recipe).
Instead of the classic method of rolling and folding a single slab of butter into the dough over several sessions, the cold butter goes in as small, pea-sized pieces, just like rough puff pastry. A few rolls and folds later, you get distinct, flaky layers without hours of careful butter-wrangling.
That is really what “quick” means here: a faster, simpler way to laminate the dough, not a quick recipe from start to finish. You will still need a minimum 4-hour chill, though overnight is easier to plan around.
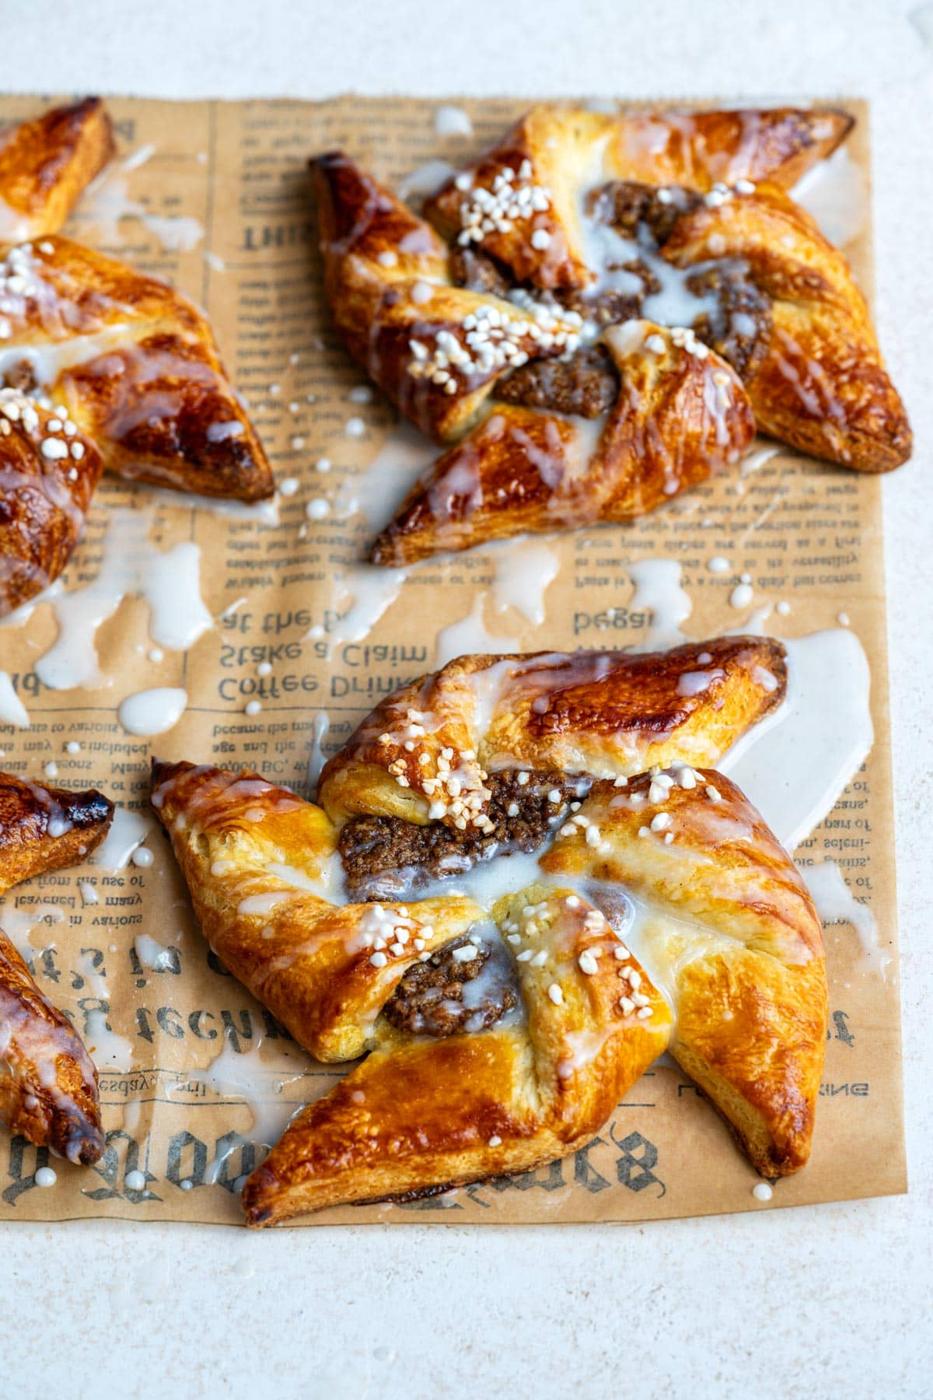
What Are Danish Pastries?
A Danish pastry – or simply a “Danish” – is a sweet, flaky pastry made from a yeasted dough layered with butter. It’s the same lamination technique used for croissants, but Danish dough is richer, with egg and a little sugar, so it bakes up golden and tender with crisp, buttery layers. Danishes are usually filled with fruit, custard, cream cheese, marzipan or nuts, then finished with a glaze, pearl sugar or a drizzle of icing.
What’s in a Name?
In English we call them Danish pastries because they are one of Denmark’s most famous bakes – but the Danes don’t call them that at all. In Denmark, Norway and Sweden they are known as wienerbrød, which literally means “Viennese bread.” Meanwhile, in Austria the very same pastry is called Kopenhagener Plunder – a “Copenhagen pastry.” Each country gives the credit to the other!
Why Are They Actually Viennese?
The story dates back to the 1850s, when Danish bakery workers went on strike over their wages. Bakeries brought in foreign workers, including Austrians, who brought with them the Viennese technique of folding butter into yeasted dough.
Danish bakers adopted the method and made it their own with new fillings and shapes – which is why the pastry still carries a Viennese name in Denmark today. Classic Danish shapes include the spandauer (a round with the filling in the center), snails and the big, pretzel-shaped kringle.
Shape ideas
Six ways to shape your Danish pastries
The same dough and filling work for all of these. Stick to one shape and size per tray so everything bakes evenly.
Here’s What You’ll Need
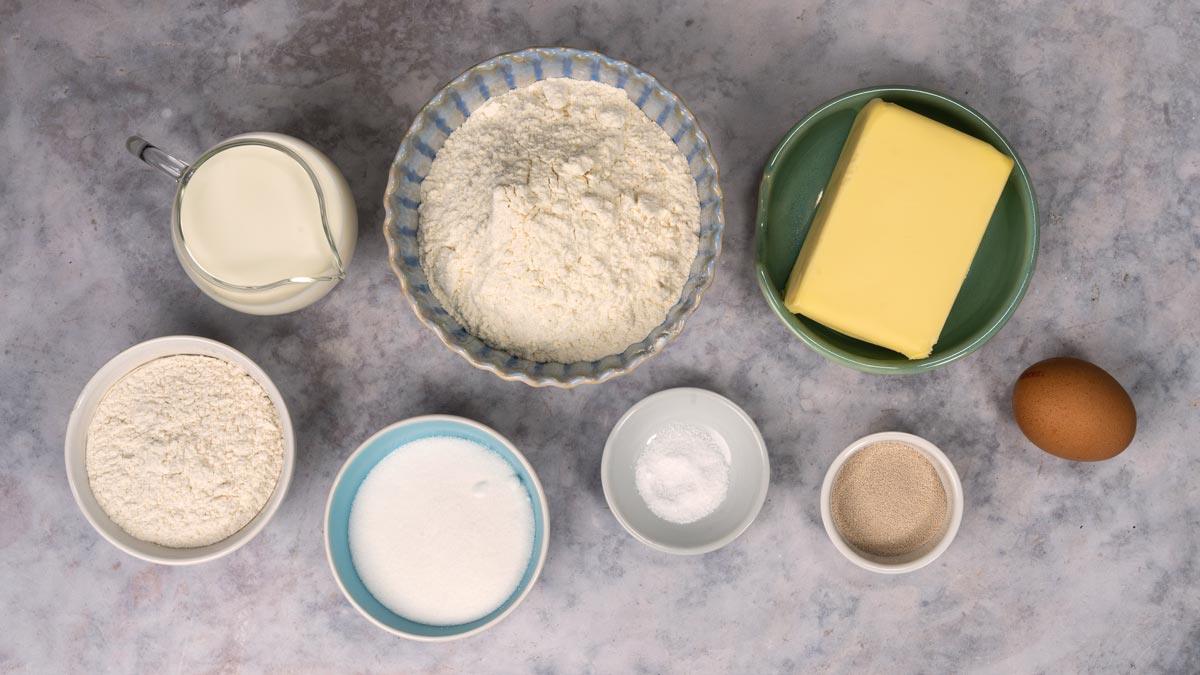
For the Dough
- All-purpose flour (plain flour) and bread flour: a mix of the two gives a dough that is tender but strong enough to hold its layers.
- Cold unsalted butter: it must be fridge-cold and cubed so it stays in pieces when you pulse it into the flour.
- Whole milk and yeast: warm the milk until just tepid, not hot, or it will kill the yeast.
- Sugar: adds sweetness to this enriched dough.
- Egg: one goes into the dough, plus extra for the egg wash.
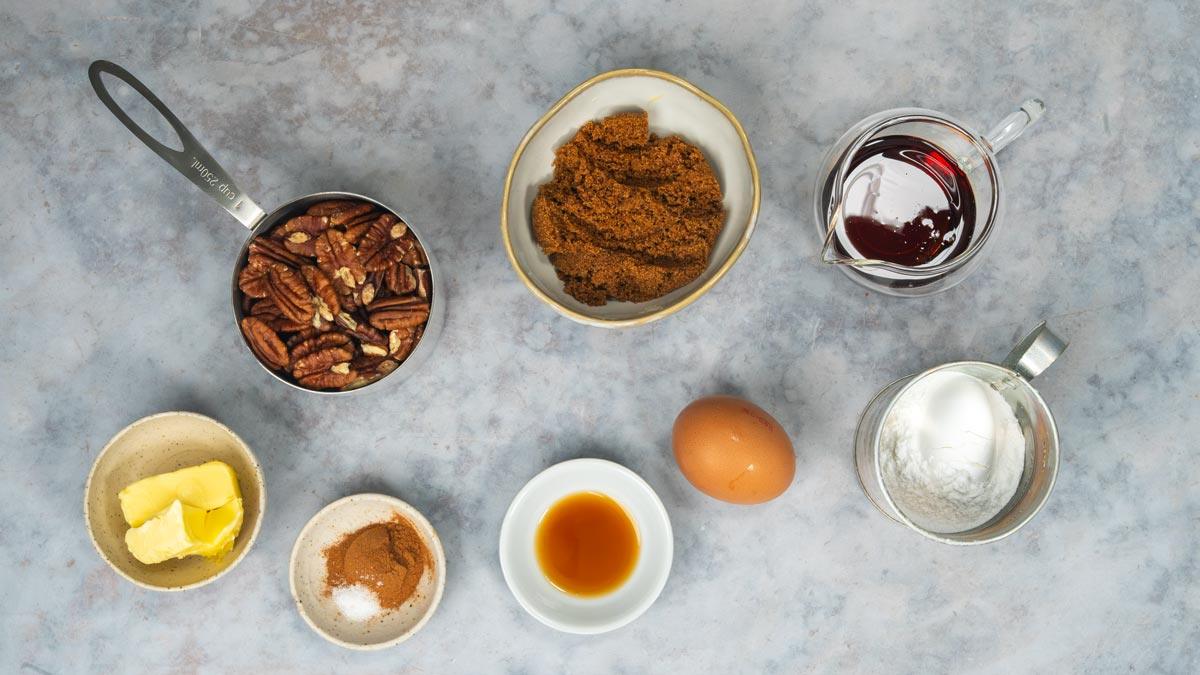
For the Filling
- Pecan and maple filling: toasted pecans, dark brown sugar, cold butter, maple syrup, vanilla, cinnamon and a pinch of salt.
- Maple glaze: powdered sugar (icing sugar), maple syrup, vanilla and a splash of hot water to thin.
- Swap the filling: the dough also works with almond, cream cheese or fruit fillings. The same quick-method dough makes my Almond Croissants too.
How to Make Danish Pastry Dough Step-by-Step
Make the Dough
- Activate the yeast. Heat the milk for a few seconds in the microwave until just tepid, not hot. Whisk in the sugar and yeast and leave for 4–5 minutes until frothy, then whisk in the egg.
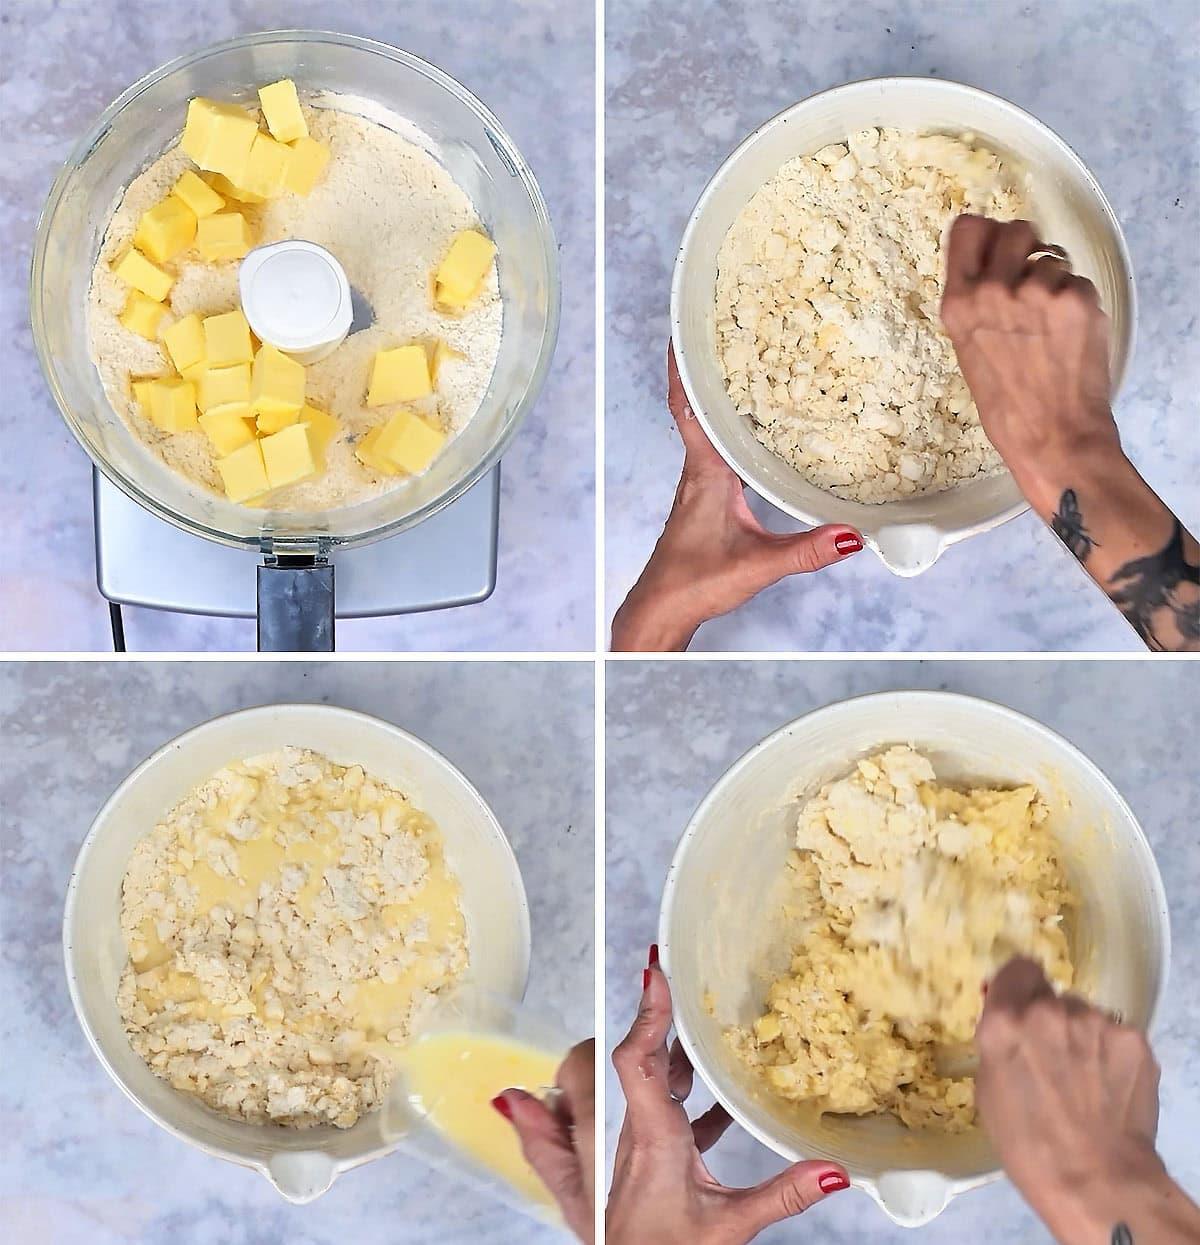
- Pulse in the butter. Put the flour and salt in a food processor fitted with the metal blade. Add the cubed butter and pulse briefly a few times, until the mixture looks like chunky breadcrumbs – you want the butter to stay in pea-sized pieces.
- Mix the dough. Tip the flour mixture into a large bowl and add the milk and yeast mixture. Gently combine until the dough just comes together. It will look shaggy and lumpy – that is exactly right, so don’t overwork it.
Cover and Chill
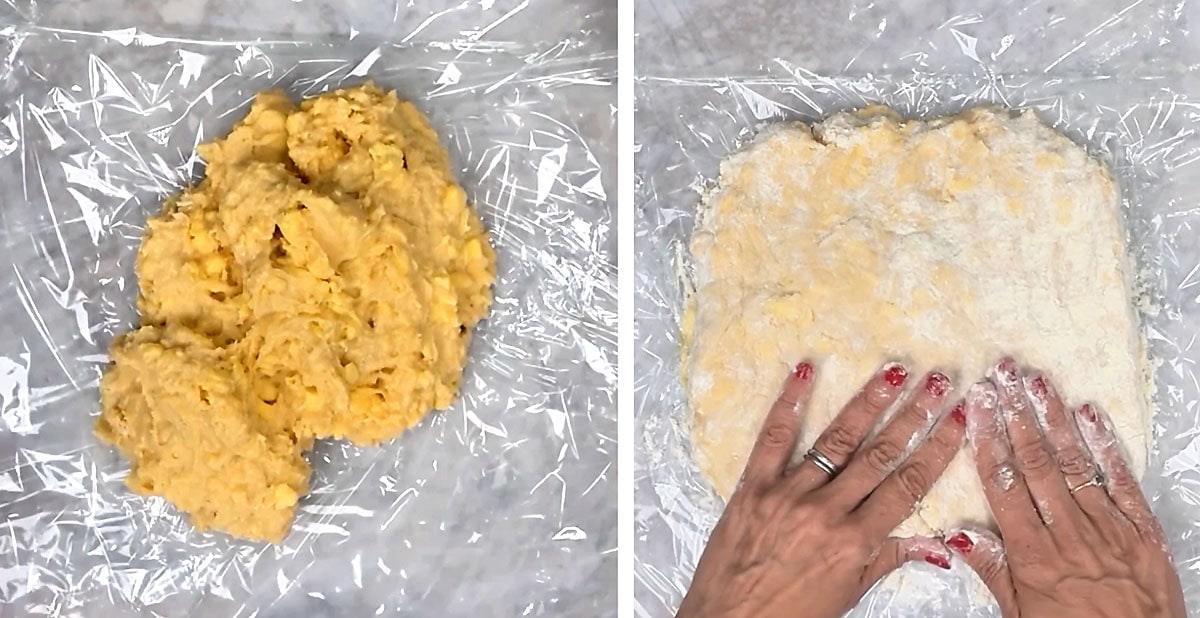
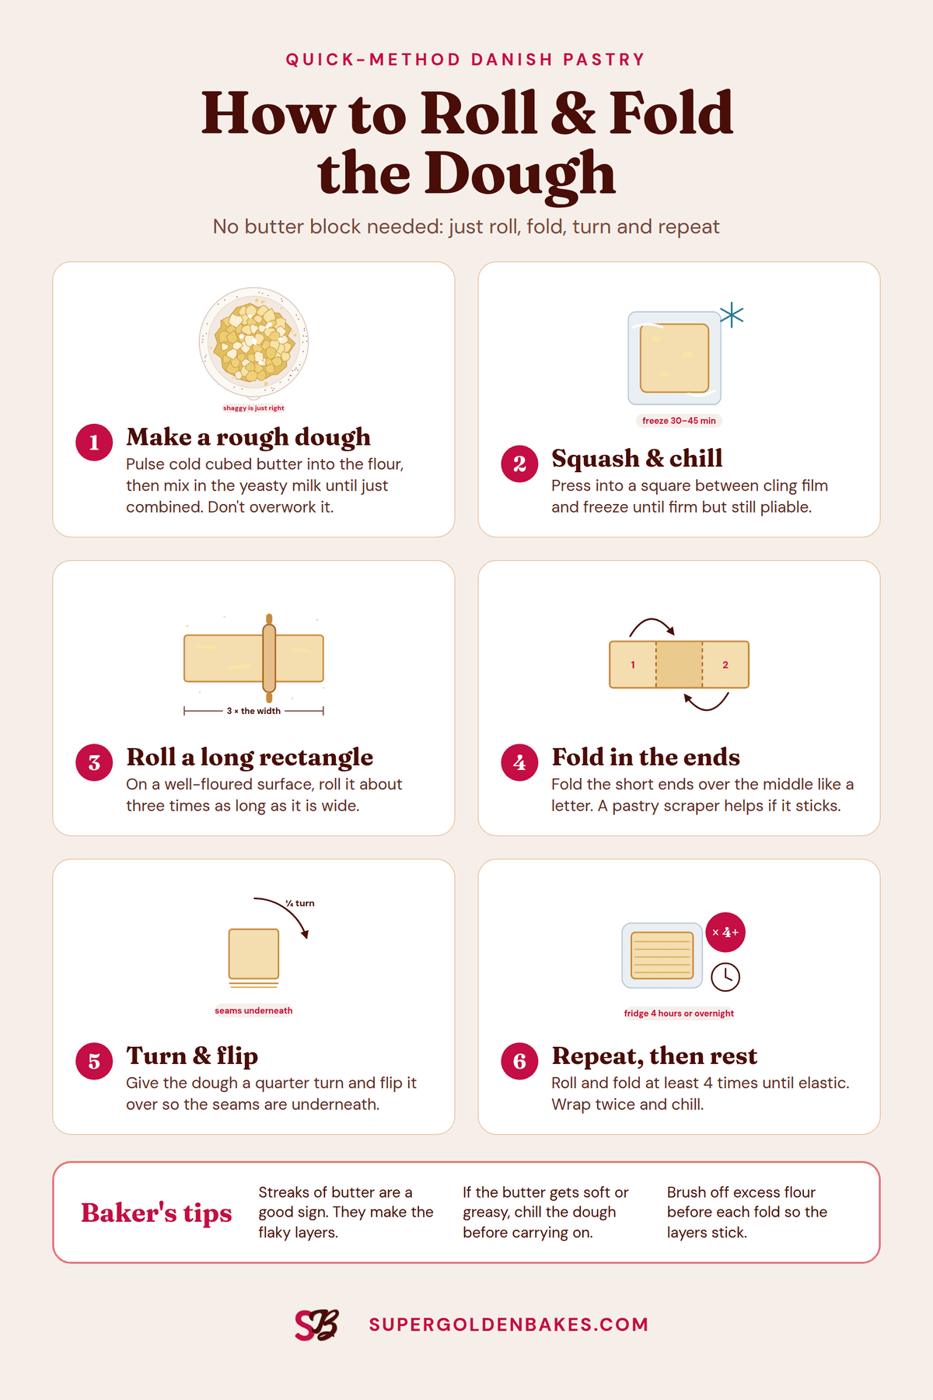
- Shape and freeze. Line your worktop with two large pieces of plastic wrap (cling film). Tip the dough onto it and use the wrap to press it into a rough square. Freeze for 30–45 minutes, until fairly firm but still pliable.
Roll and Fold
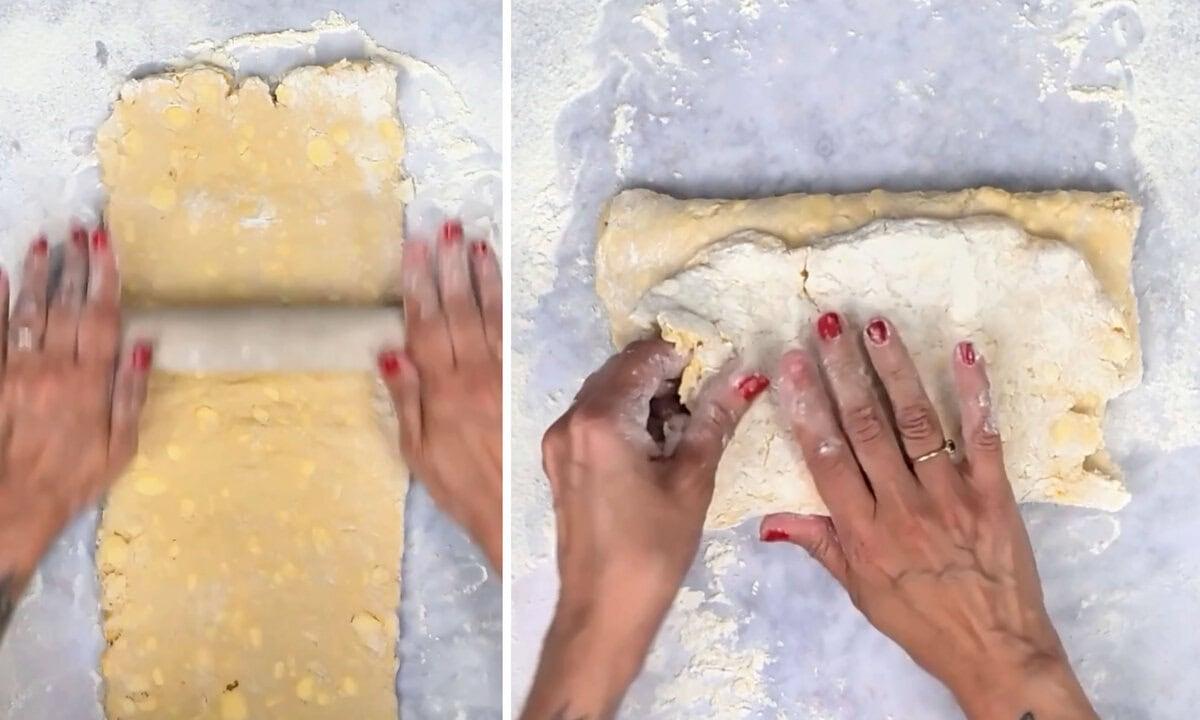
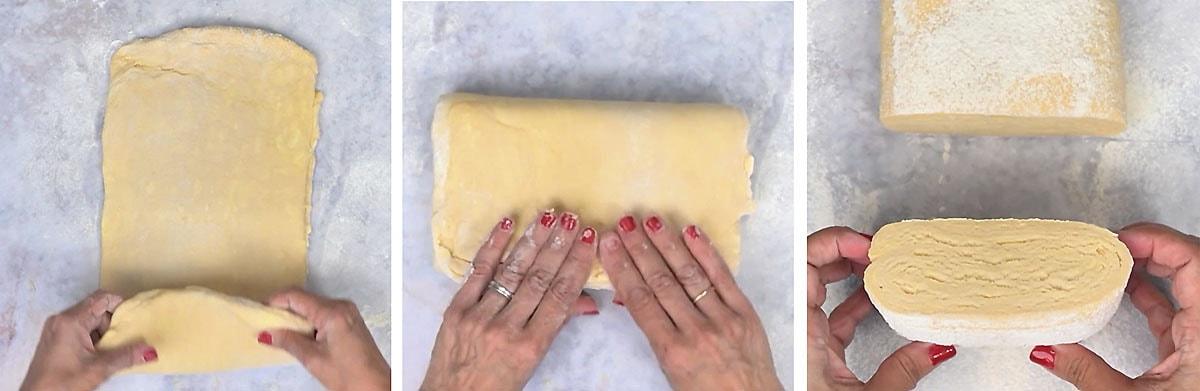
- Roll and fold. Liberally dust your worktop and rolling pin with flour. Roll the dough into a rectangle roughly three times as long as it is wide, then fold the short sides into the middle, using a bench scraper if the dough is sticky. Give it a quarter turn and fold the short ends toward the center again.
Baker’s tip
Keep the butter in pieces
Tough rather than flaky pastry usually means the butter was worked too far into the flour or the dough was handled too much. Keep the butter in visible pieces and work quickly – if the dough softens or turns greasy, wrap it and chill it before carrying on.
- Repeat, then rest. Flip the dough over so the seams sit underneath, roll it out again and repeat the rolling and folding at least four times, until the dough starts to feel smooth and elastic. Wrap it twice in plastic wrap and chill for at least 4 hours, or overnight.
How to Shape Pinwheel Danish Pastries
- Make the filling. Put all the filling ingredients in the small bowl of the food processor and pulse to a fairly coarse paste.
- Get ready to shape. Cut the chilled dough in half, keeping the half you are not using in the fridge. Heat the oven to 375°F (190°C) and line two large baking sheets with parchment paper (baking paper).
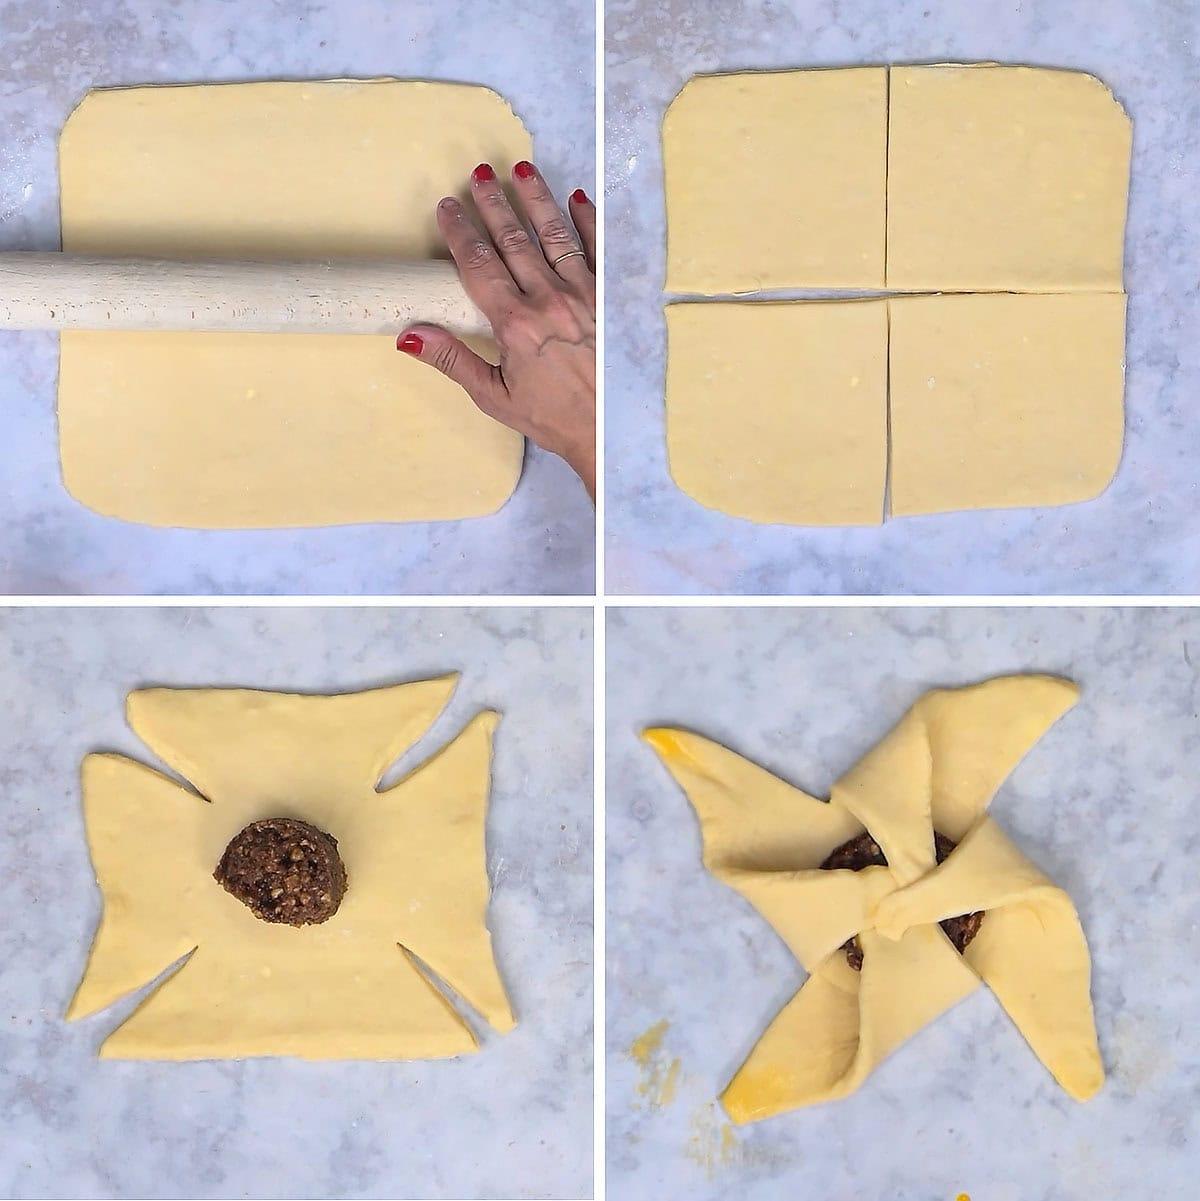
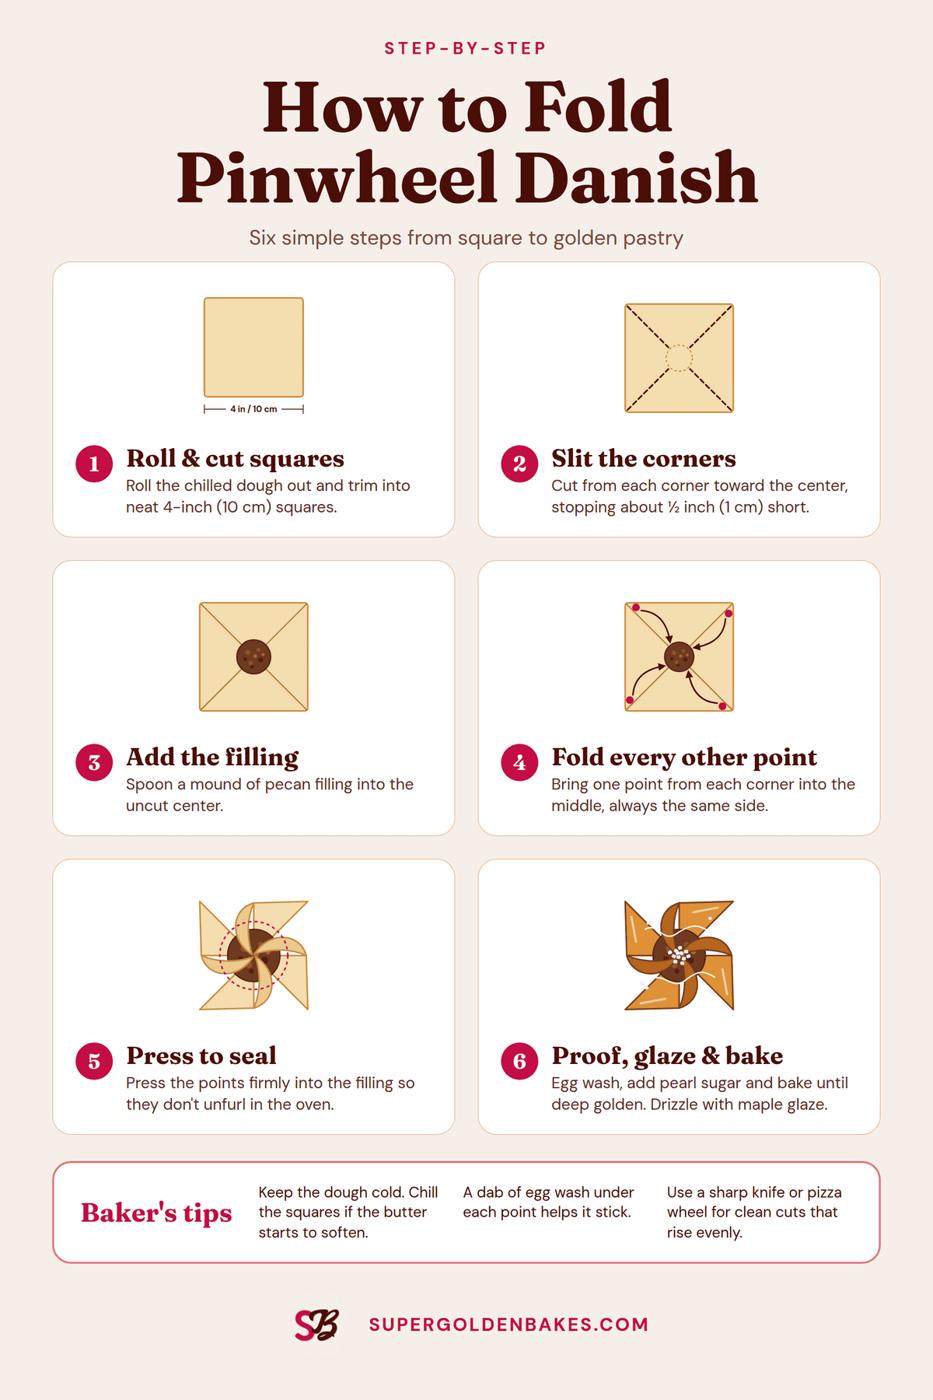
- Cut and fold the pinwheels. Roll the dough out to about 3/16 to ¼ inch (4–6mm) thick and trim the edges.
- Cut the corners. Cut the dough into squares and cut from each corner toward the center, stopping short of the middle.
- Fill and fold. Spoon about 2 tsp of filling into the center of each square, then fold every other point into the middle and press down firmly so the points don’t unfurl in the oven.
Rise, Glaze and Bake
- Rise and chill. Transfer the pastries to the lined baking sheets, cover loosely and let them rise at room temperature for 30 minutes. Then chill the pastries in the fridge for 15 minutes before baking, so the butter firms up again.
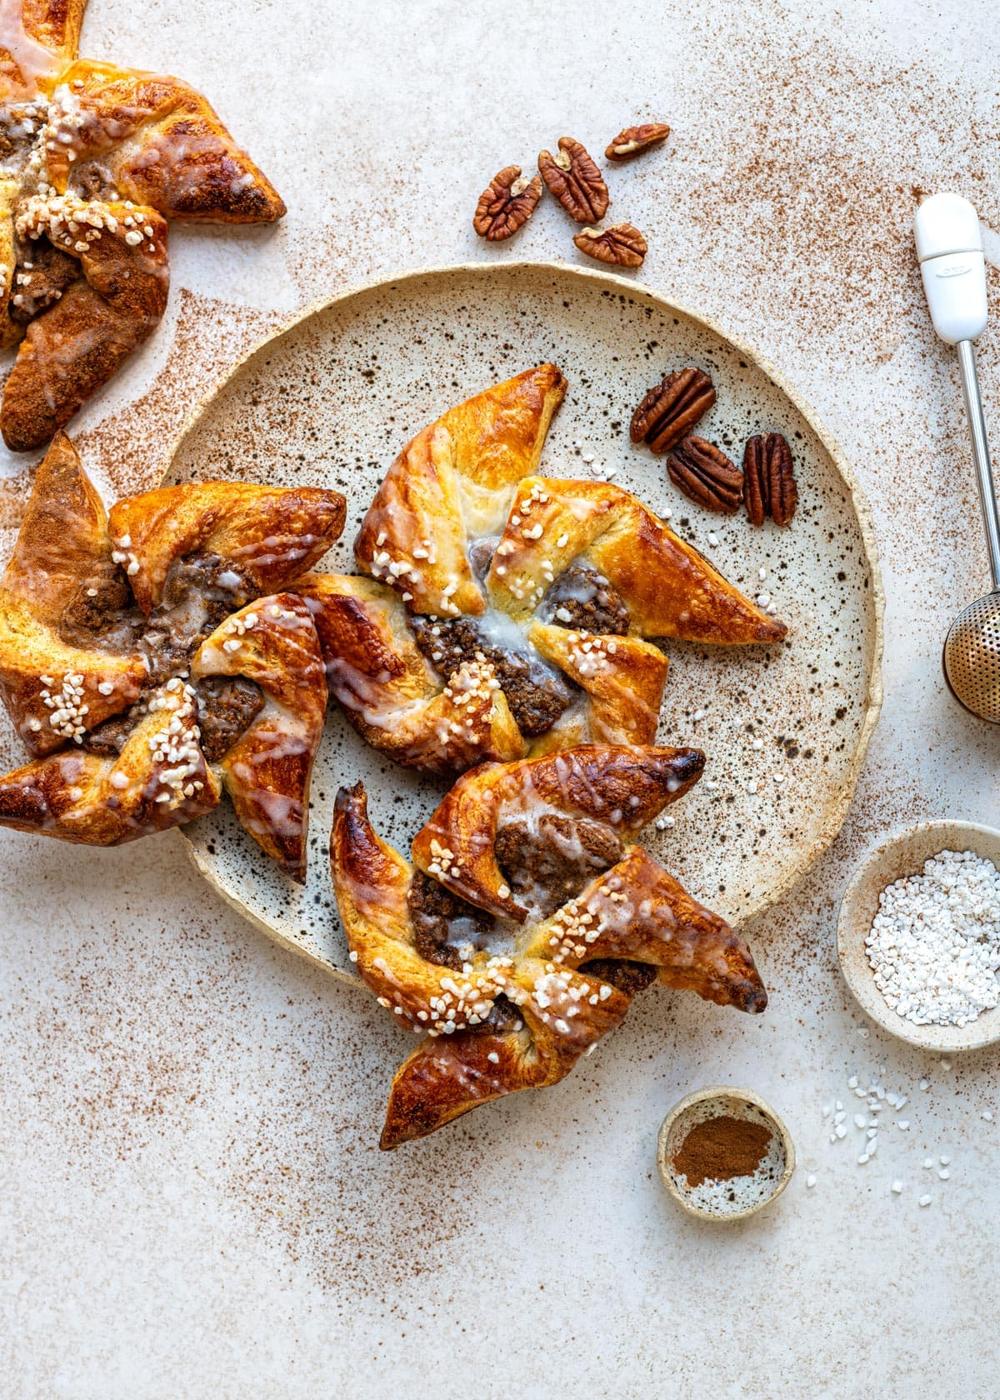
- Glaze and bake. Brush with egg wash using a pastry brush, sprinkle with pearl sugar and bake for 15–17 minutes, until puffed and deep golden.
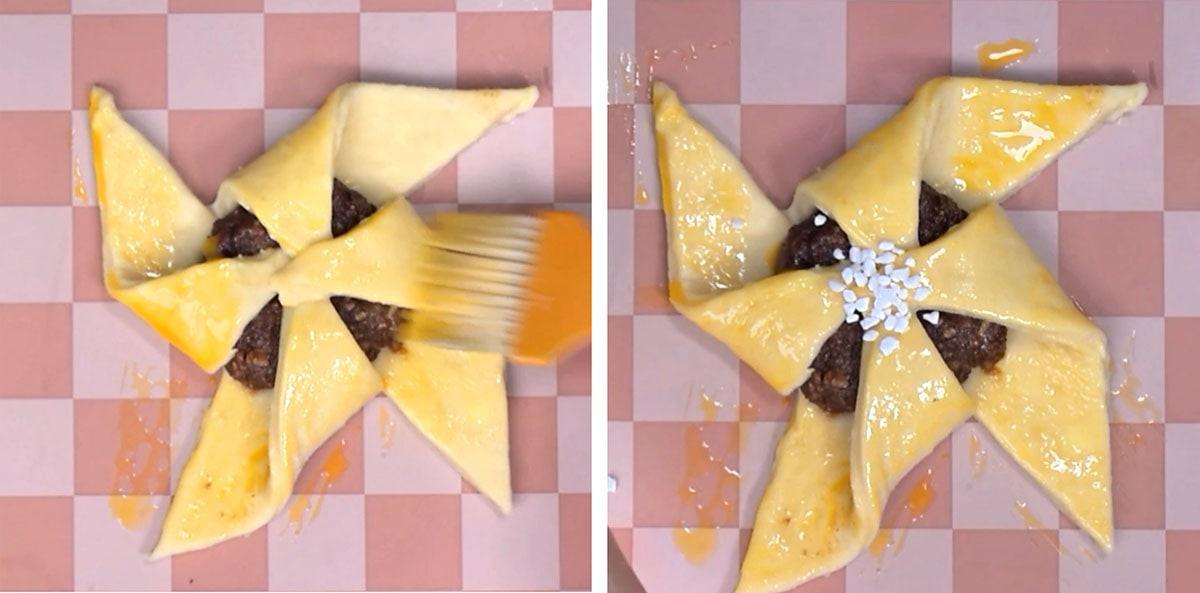
- Add the maple glaze. Cool on a wire rack. For the glaze, mix the powdered sugar, maple syrup and vanilla, adding a little hot water until thick but pourable, then drizzle over the cooled pastries.
Storage and Make-Ahead
- Make ahead: the dough needs at least 4 hours in the fridge but works best if you split it over two days.
- Chill the dough: once folded, cover the dough with plastic wrap (not too tightly as it needs space to expand). Chill overnight in the fridge before shaping.
- Freeze unbaked pastries: freeze shaped pastries on a tray until solid, then bag them. Bake from frozen, adding a few minutes to the baking time.
- Store: best eaten on the day. Keep leftovers in an airtight container at room temperature for up to 2 days, or freeze baked pastries for up to 1 month and refresh in a low oven.
Frequently Asked Questions
Recipe
Maple Pecan Danish Pastries
Flaky maple pecan Danish pastries made with an easy quick-method dough – no butter block, just a food processor and an overnight chill.
- Serves 12
- Prep 20 minutes
- Cook 15 minutes
- Total 6 hours
Ingredients
For the dough
- ¾ cup (180ml) whole milk
- 2 ¼ tsp dry active yeast (1 sachet / 7g)
- ⅓ cup (70g) sugar
- 1 large egg (room temperature)
- 2 cups (250g) all-purpose flour ((= plain flour), plus more for dusting and rolling)
- ½ cup (65g) white bread flour
- 1 tsp salt
- 2 sticks (230g) unsalted butter (cold and cubed)
For the filling
- 3 ½ oz (100g) pecan halves
- 4 tbsp dark brown sugar
- 2 tbsp (30g) unsalted butter (cold and cubed)
- 6 tbsp maple syrup
- 1 tsp vanilla extract
- 1 tsp ground cinnamon
- pinch salt
For the egg wash and decoration
- 1 large egg
- 1 tsp whole milk (or water)
- 12 tsp pearl sugar ((optional))
For the glaze
- 5 tbsp powdered sugar ((= icing sugar))
- 2 tbsp maple syrup
- 1 tsp vanilla extract
- milk or water (as needed)
Method
- 1
Make the dough. Heat the milk for a few seconds in a microwave until just warm. Add the sugar and yeast and whisk to combine. Let it stand for 4-5 minutes until the yeast is frothy. Add the egg and lightly whisk together. Set aside.
- 2
Put the flour and salt in a food processor fitted with a metal blade. Add the cubed butter and briefly pulse a few times until mixture resembles chunky breadcrumbs. You want the butter to remain in pea sized pieces.
- 3
Put the flour mixture in a large bowl and add the milk/yeast mixture. Gently combine using a spatula until the dough comes together but don't overwork it.
- 4
Line your worktop with two large pieces of plastic wrap. Tip the dough onto it, sprinkle with flour and shape dough into a square. Put in the freezer for 30–45 minutes, or until the dough is fairly firm but still pliable.
- 5
Liberally dust your worktop and rolling pin with flour. Roll your dough out to a rectangle roughly three times as long as it is wide.
- 6
Do a letter fold. Rotate the dough by a quarter turn and flip it over so the seams are underneath. Roll it out again and repeat the rolling and folding at least 4 times, until the dough becomes smooth and elastic.
- 7
Shape the dough into a square and cover with plastic wrap. Chill in the fridge for a minimum of 4 hours, ideally overnight. You are now ready to use it.
Make the filling and shape the pastries
- 8
Preheat the oven to 375°F (190°C) and line two large baking trays with parchment paper.
- 9
Put all the ingredients in a food processor. Pulse until the ingredients form a fairly coarse paste. Set aside until needed.
- 10
Cut the dough in half. Cover the piece you aren’t using with plastic wrap and store in the fridge until needed.
- 11
Dust your worktop and rolling pin with flour. Roll the dough out to about 3/16 to ¼ inch (4–6mm) thick and trim the edges.
- 12
To create pinwheels, cut the dough into squares and make small cuts from the corner toward the center of each square.
- 13
Place about 2 tsp of the filling in the middle and fold every other point in towards the middle. Repeat with remaining dough – you should have enough for 12 pinwheels.
Chill and brush with egg wash
- 14
Transfer onto the baking tray, cover loosely with plastic wrap and let them rise at room temperature for 30 minutes. Chill in the fridge for 15 minutes before baking.
- 15
Lightly beat the egg and milk to make the egg wash. Brush the pastries with the egg wash and sprinkle the middle with pearl sugar. ( See Note 1)
Bake (in batches)
- 16
Bake for 15-17 minutes until the pastries are puffed and deeply golden. Transfer baked pastries to a cooling rack.
Glaze and serve
- 17
Mix all the ingredients for the glaze together, thinning with water or milk as needed, until thick but pourable. Use a spoon to drizzle the glaze over the pastries.
Notes
Note 1: Instead of pearl sugar, scatter the egg-washed pastries with chopped pecans before baking. Brush pastries with warm, sieved apricot jam as soon as they are out of the oven for a glossy, bakery-style finish. Once they have cooled, you can still drizzle over the maple glaze. Make ahead: This recipe works best if you split the process over two days. Chill the dough: once folded, cover the dough with plastic wrap (not too tightly as it needs space to expand). Chill in the fridge for at least 4 hours, ideally overnight, before shaping. Store: best eaten on the day. Keep leftovers in an airtight container at room temperature for up to 2 days, or freeze baked pastries for up to 1 month and refresh in a low oven. Freezing: You can freeze the (raw) shaped pastries on a tray until solid, then bag them. Bake from frozen, adding a few minutes to the baking time. Stick to one shape and size Mixed shapes and sizes need different baking times, so it’s easy to over- or under-bake some of them. Keep a close eye on the oven near the end – these pastries can go from golden to burnt quickly, especially in a hot or fan oven.
Equipment
- Digital scales
- Food Processor
- Rolling Pin
- Pastry brush
Nutrition
- Calories402 kcal
- Carbohydrates47 g
- Protein6 g
- Fat25 g
- Saturated Fat12 g
- Polyunsaturated Fat3 g
- Monounsaturated Fat8 g
- Trans Fat1 g
- Cholesterol78 mg
- Sodium216 mg
- Potassium139 mg
- Fiber2 g
- Sugar19 g
- Vitamin A605 IU
- Vitamin C0.1 mg
- Calcium55 mg
- Iron1 mg
Questions
Is this recipe actually quick?
“Quick” refers to the lamination method, not the total time. This method skips the repeated butter-rolling of classic Danish dough, but you will still need a minimum 4-hour chill (overnight is easiest), plus shaping and baking. The hands-on time is well under an hour, spread across a longer, mostly hands-off day.
Can I make the dough ahead of time?
Yes – the dough needs to chill for at least 4 hours and can be made the day before, kept wrapped in the fridge.
Why is my dough dense instead of flaky?
This usually means the butter was worked too far into the flour, or the dough was handled too much while rolling and folding. Keep the butter in visible pieces and work quickly, especially if your kitchen is warm.
Can I use a different filling?
Yes – this quick-method dough works well with almond, cream cheese or fruit fillings if maple pecan isn’t for you.