Air Fryer Recipes
Easy Air Fryer Bread
No oven, no problem. This easy no-knead Air Fryer Bread bakes a crusty, fluffy loaf in about 45 minutes of hands-off air frying – plus troubleshooting tips and answers to the most common questions
- Serves 14 slices
- Prep 10 minutes
- Cook 45 minutes
- Total 2 hours
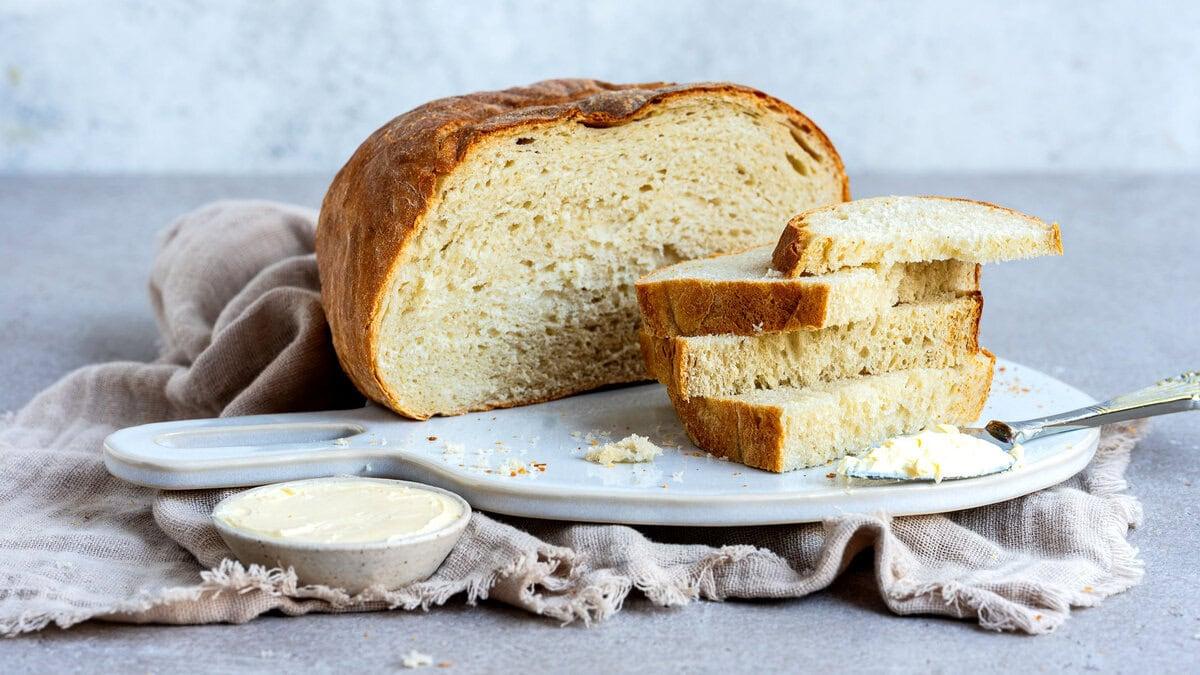
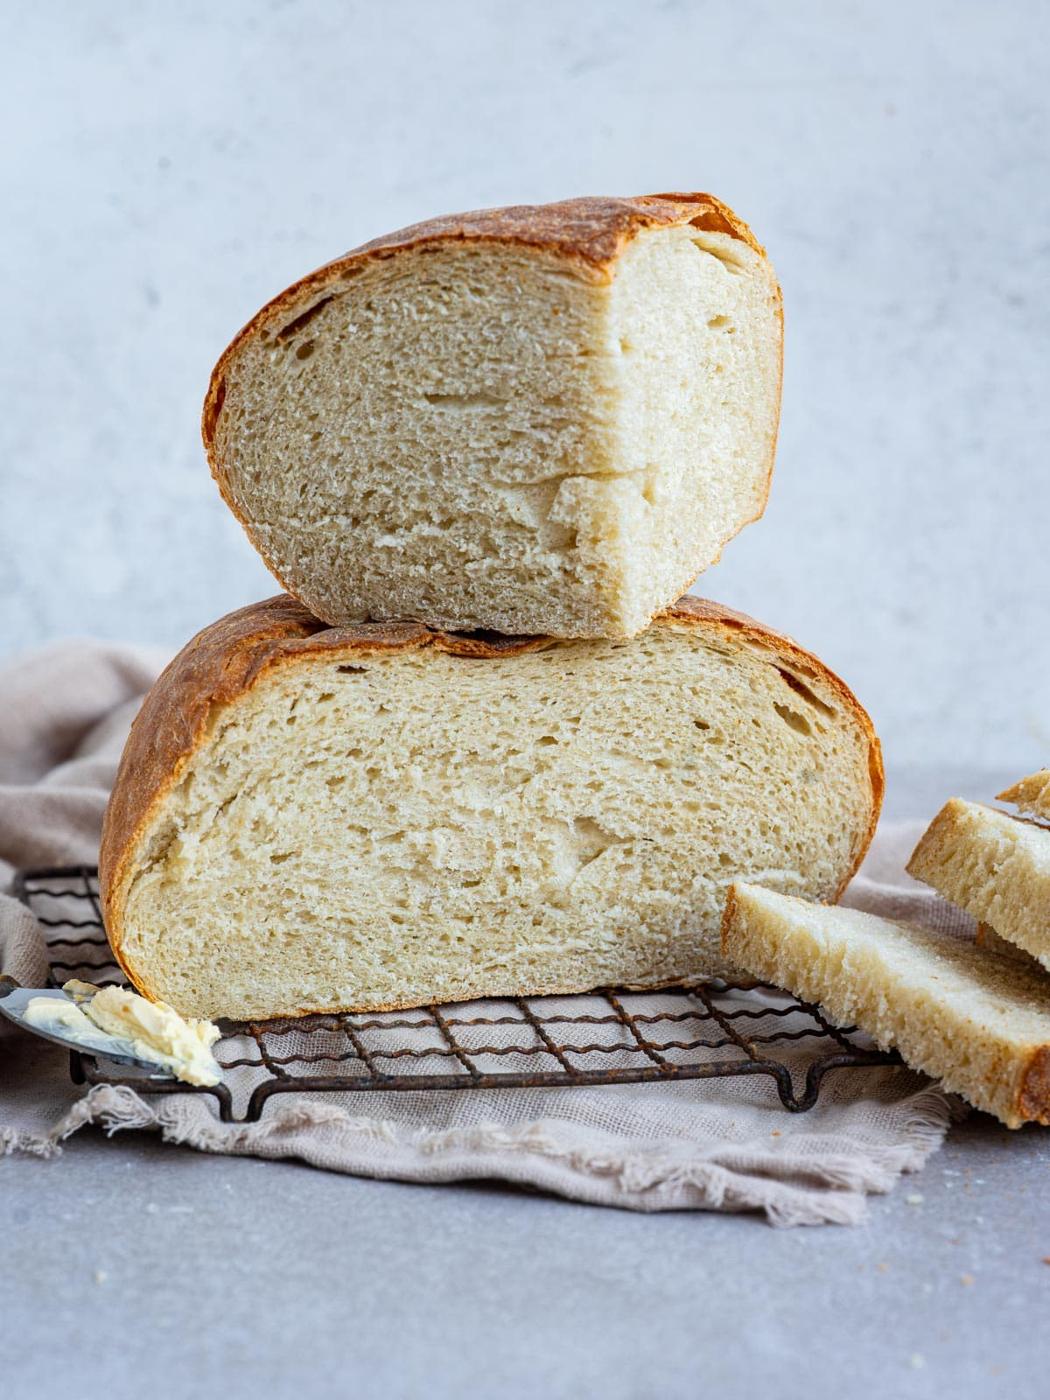
Making Air Fryer Bread is super simple, no kneading needed, and it tastes amazing! Check out my easy no-knead air fryer bread recipe to whip up some fluffy bread with a nice golden crust and soft inside. It’s perfect for toast or sandwiches!
Want to bake Sourdough Bread in your air fryer? Check out my recipe!
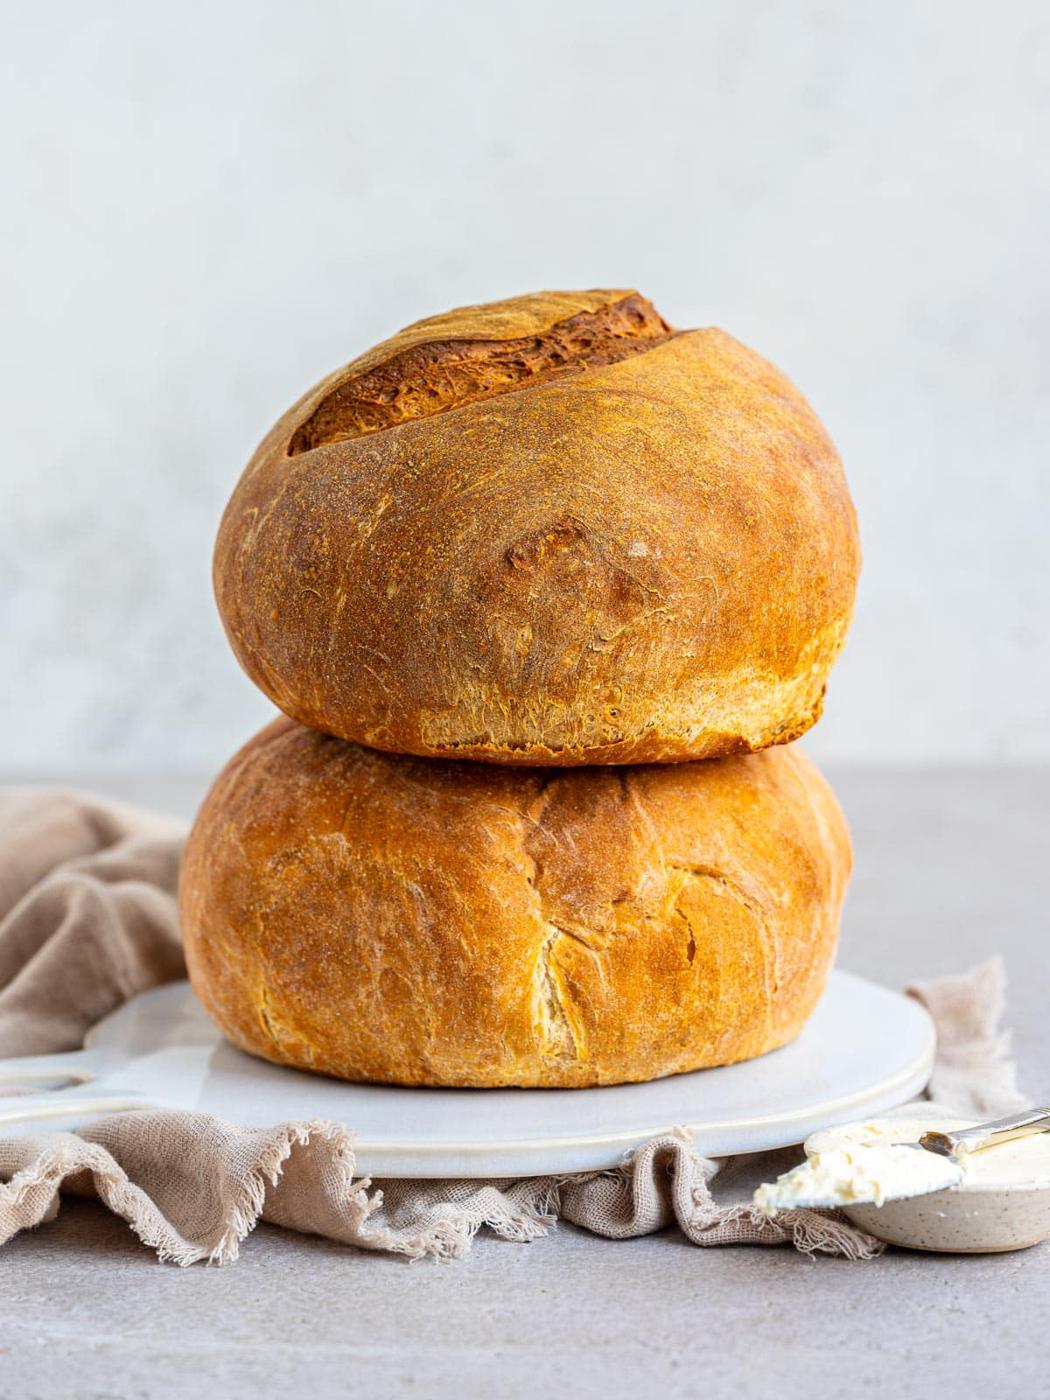
Air fryers are easy to use, take up little space and are much cheaper to run than the oven. No wonder they are flying off the shelves and no surprise that more and more people are looking for air frying recipes.
I’ve been using my air fryer every day to make roast beef, cook chicken, bake cakes, and recently, I’ve started making bread. And guess what? You CAN bake bread in an air fryer! It’s super easy, and it can help you save on your energy bills too. So, what are you waiting for?
Love baking in your air fryer?
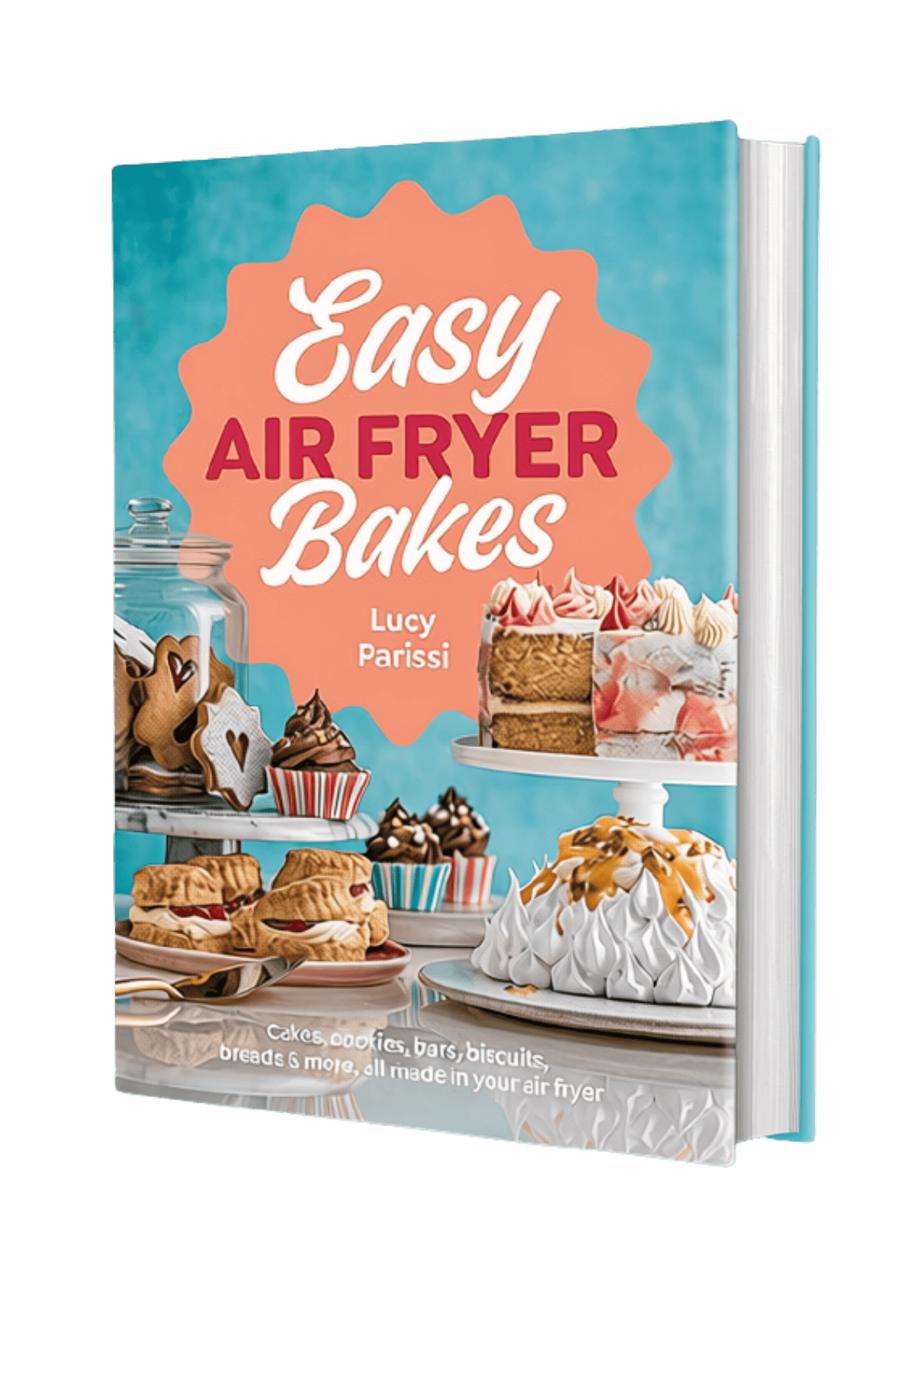
My cookbook, Easy Air Fryer Bakes, will show you how to harness the power of baking in the air fryer and achieve anything from pavlovas and celebration cakes to decadent desserts, savory bakes and even bread. Order now
My cookbook, Easy Air Fryer Bakes, covers everything from pavlovas and celebration cakes to savory bakes and bread. Order now
Can You Really Make Bread in an Air Fryer?
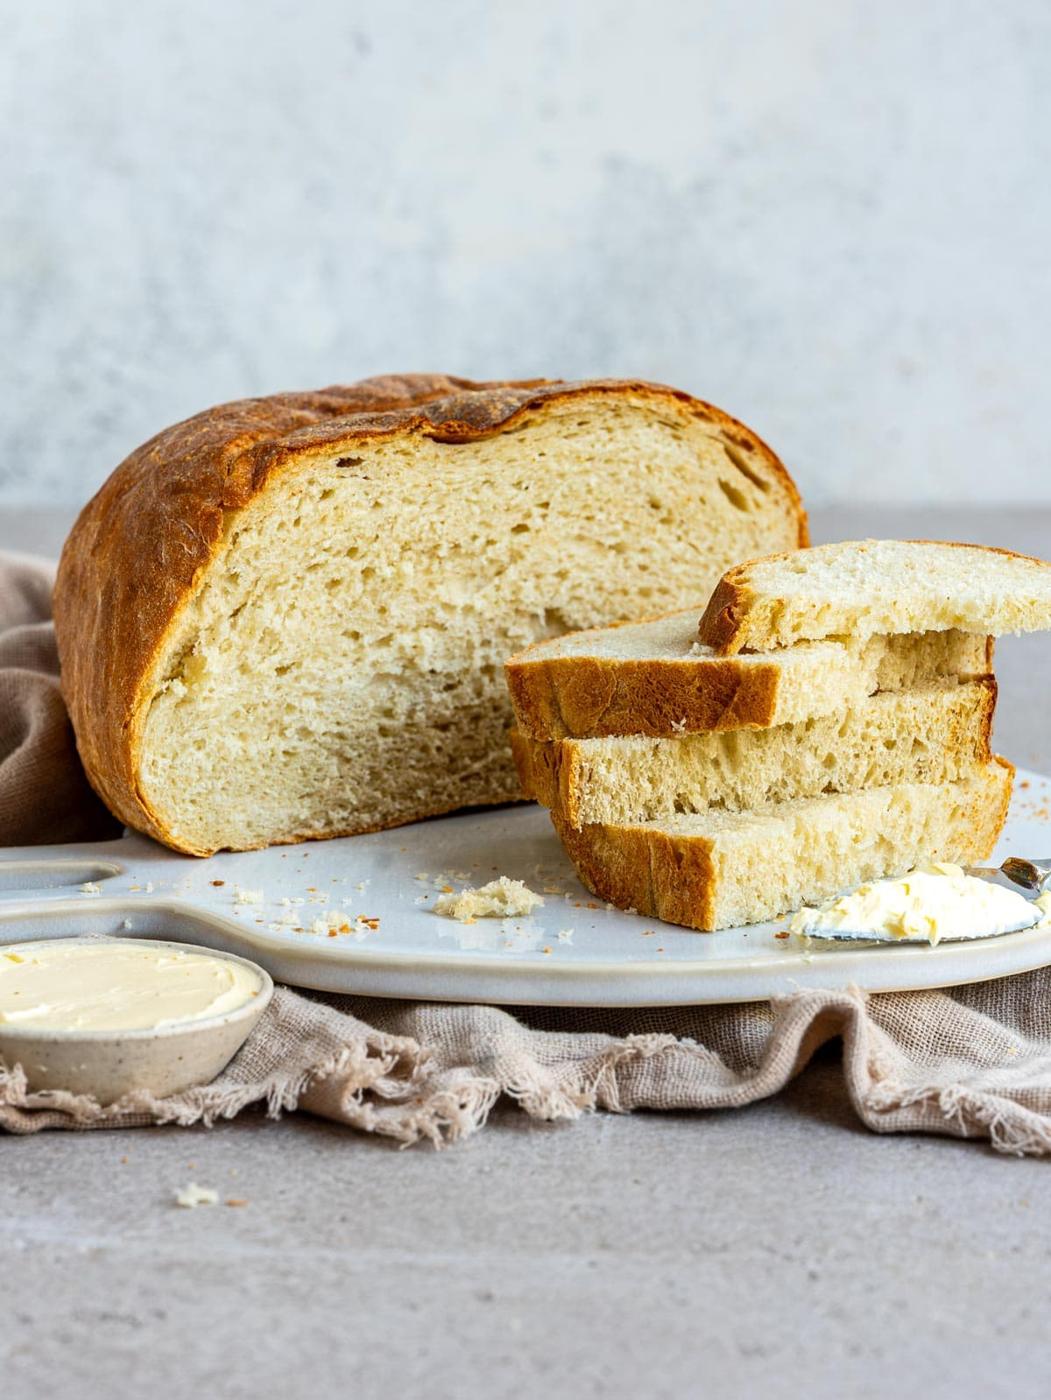
Yes, you can make bread in an air fryer! Because an air fryer operates as a high-efficiency mini convection oven, it creates the ideal environment for baking yeast bread – delivering a crisp outer crust and a soft, airy crumb in about 45 minutes.
If you’ve been searching for how to make bread in an air fryer or a bread recipe for an air fryer, this no-knead loaf is proof: no stand mixer, no proving drawer, no complicated technique – just four pantry staples, one bowl, and a cake tin or loaf tin that fits your basket (or no pan at all – you can bake it freehand).
The top heating element browns the crust fast, which is exactly why we flip the loaf upside-down for the final few minutes below – it gets direct heat to the bottom, which would otherwise stay pale and slightly doughy while the top is already done.
Here’s What You’ll Need
Like any bread recipe, you’ll need just four essential ingredients: flour, yeast, salt, and water. To boost the flavor, I’ve included a bit of sugar and some melted butter.
You’ll also need a deep cake pan that fits comfortably in your air fryer, like a cake barrel or a 7-inch cake tin for this – or you can bake the loaf freehand, without a pan (see below). Let’s break down the key ingredients:
- FLOUR: Bread flour is the primary ingredient for your dough, which gives the bread its structure and chewy texture. If you don’t have bread flour on hand, you can use all-purpose flour (plain flour), but keep in mind that the texture will be slightly different.
- YEAST: I always use fast action, a.k.a rapid rise yeast, which is a type of yeast that allows for quicker rising times and does not need to be activated in advance. You simply stir the yeast granules in the flour and other dry ingredients.
- SALT: Don’t forget to add salt to your mixture, as it plays a critical role in enhancing the overall flavor of the bread. Salt also helps to strengthen the dough and slows down the fermentation process.
- WATER: Adding water to the dry ingredients activates the yeast and forms our bread dough. Make sure the water is not too hot as it will kill the yeast – tepid is best.
- SUGAR OR HONEY: Adding a little sweetness enhances the flavor of the bread and helps to create a beautiful golden crust. This is entirely optional however so feel free to leave out!
- BUTTER: A little melted butter adds richness and flavor to your dough and helps create a tender crumb.
Cups or grams?
My conversion calculator switches between cups, grams and ounces for flour, sugar, butter and more.
How to Make Air Fryer Bread
↓ For the full ingredients and detailed method, jump to the recipe card.
Prepare The Dough
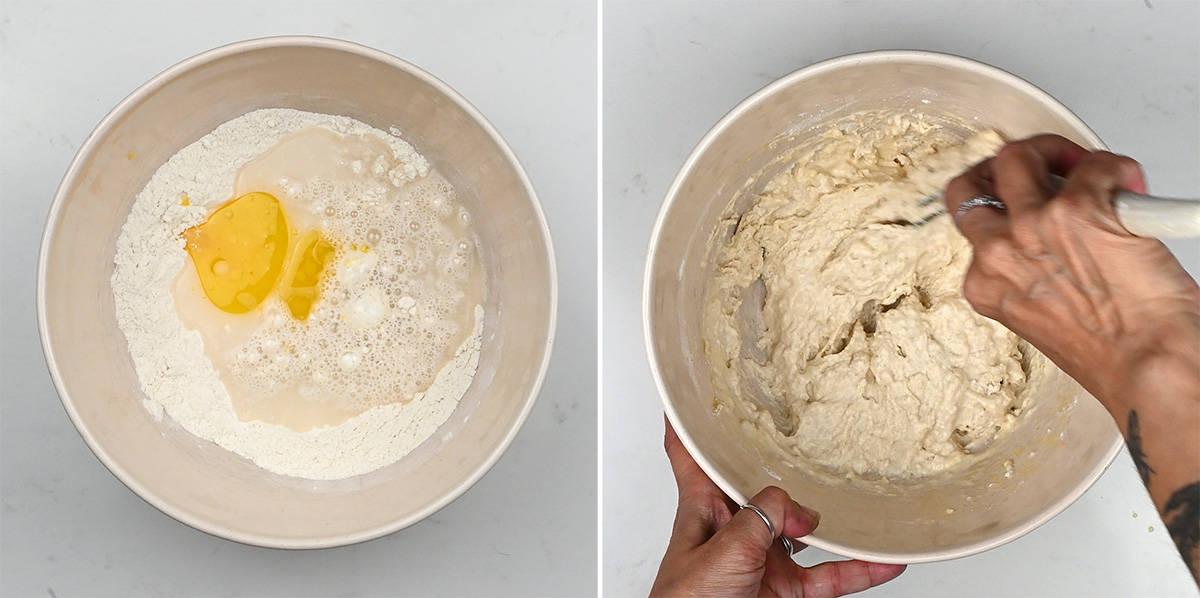
- Measure the flour, sugar, salt and yeast into a mixing bowl and stir to combine. Add the water and melted butter and mix together with a spoon or a dough hook until there are no dry streaks of flour. You will have a shaggy, sticky dough.
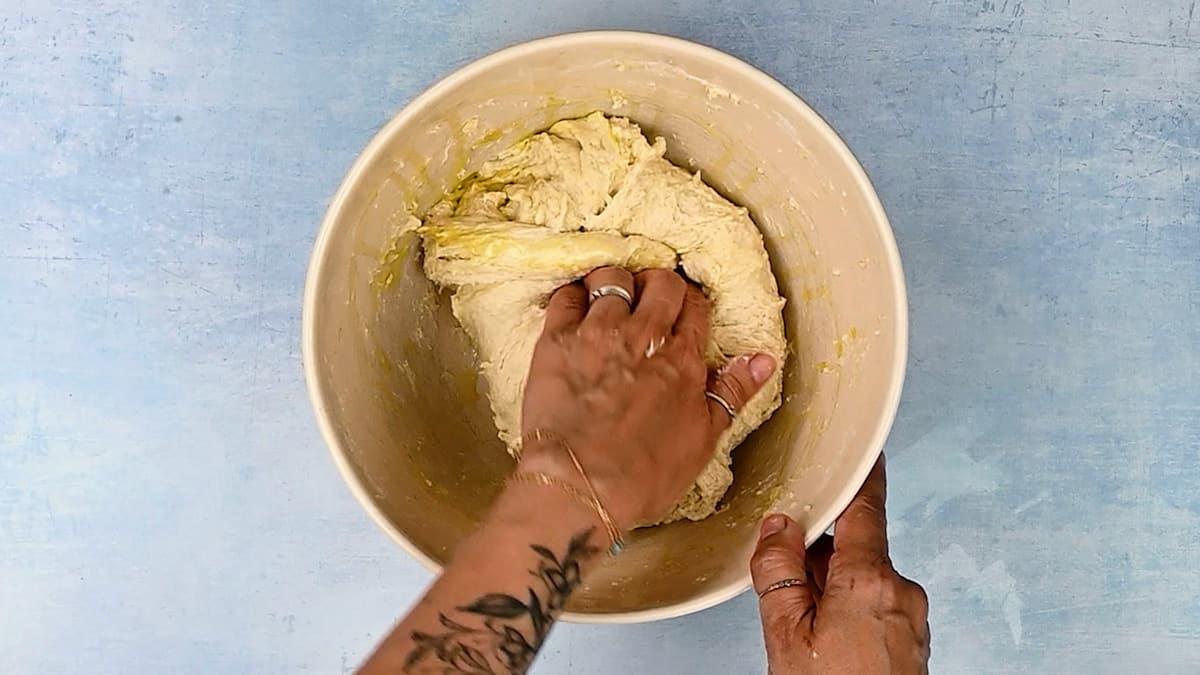
- You don’t need to knead this dough, but if you’ve got a bit of time, you can do a few “stretch and folds” after letting it rest for 15 minutes. Just grease your hands with a little oil and stretch one corner of the dough from the bottom over to the center. Turn the bowl and do this a few times. Alternatively, use a hand mixer fitted with dough hooks and beat on low speed until the dough becomes elastic and forms a ball on the beaters. Either way, working the dough develops the gluten, which gives the bread better structure – it rises higher, holds its shape and has a more even crumb.
First Rise
- Cover the bowl with a clean towel. Place it in a warm spot to rise for an hour. I often put the bread in the turned-off microwave or oven to prove.
Shape the Bread
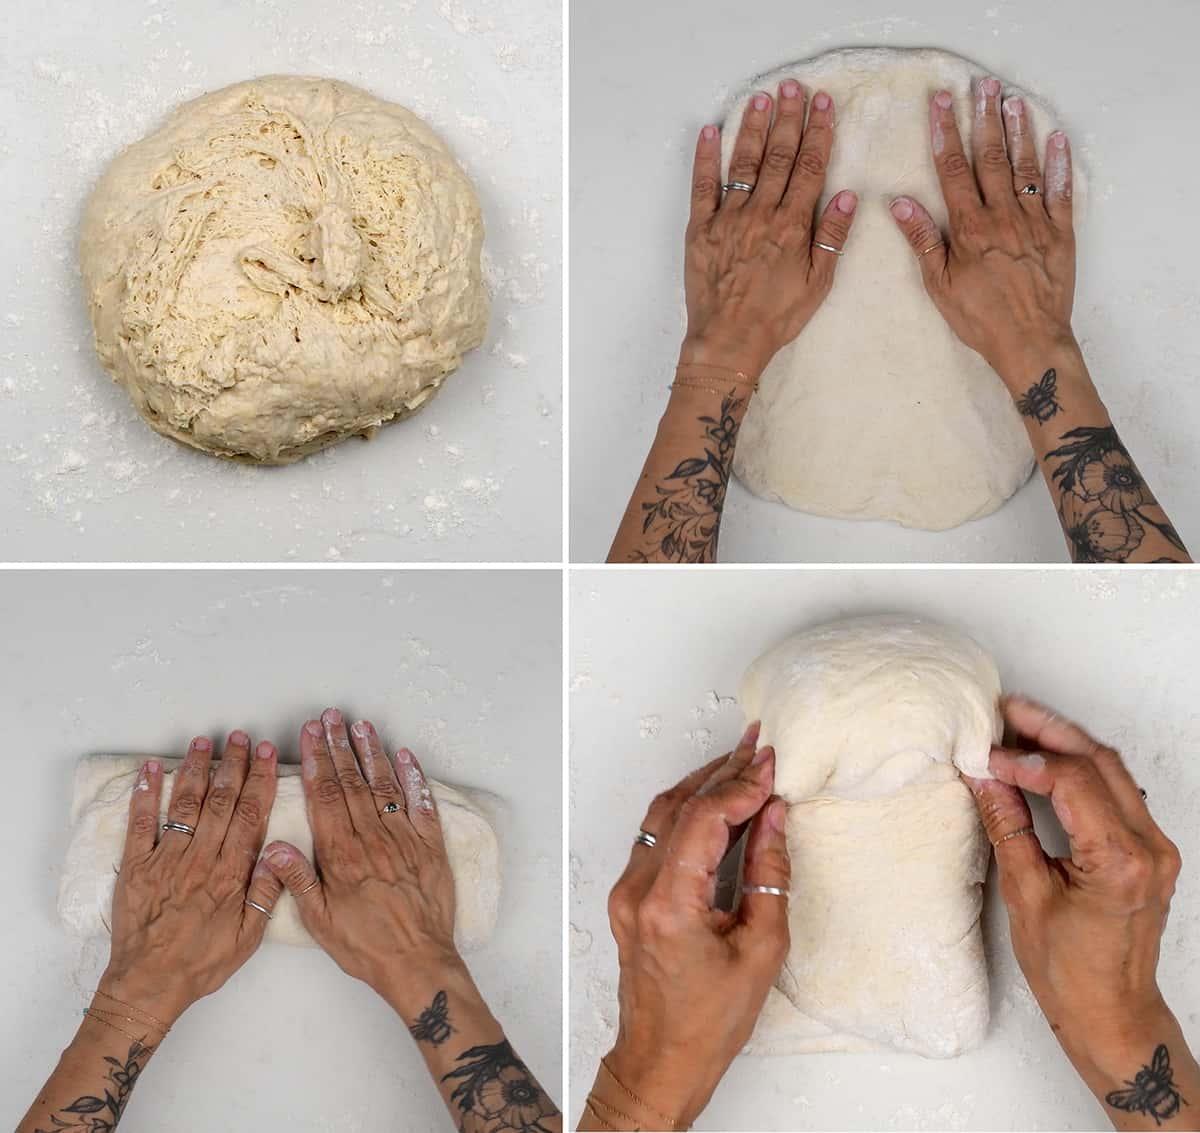
- Tip the dough onto a lightly floured worktop. Gently stretch the dough to a rectangular shape. Fold the top towards the middle then the bottom over that, as you would fold a letter to place in an envelope.
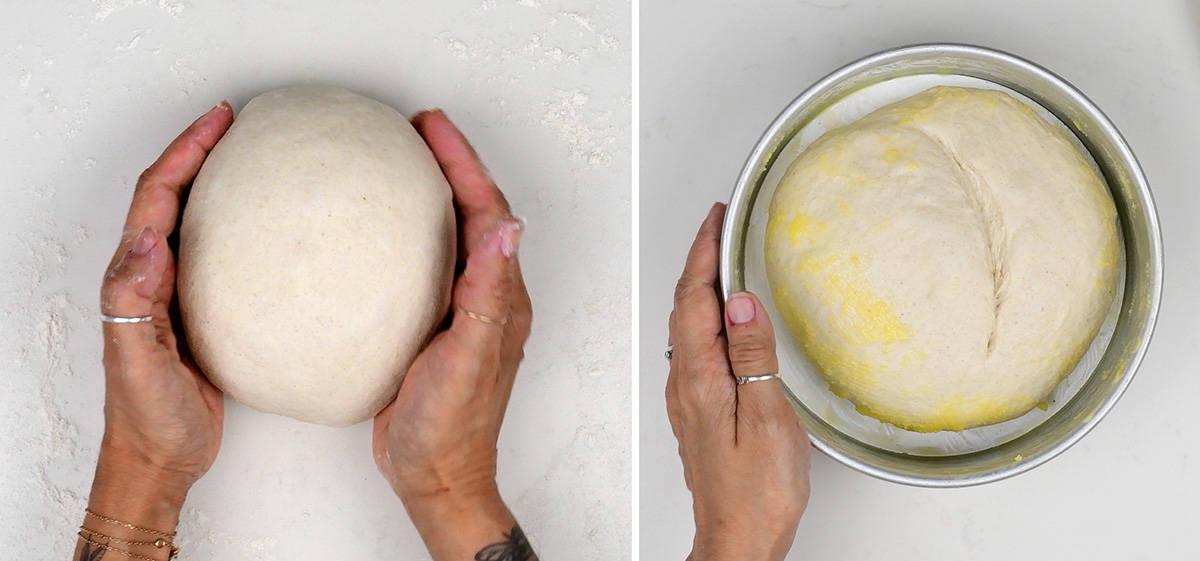
- Turn sideways and fold into a roll. Use your hands to shape the bread into a ball shape (also known as a “boule”) dusting with flour as needed.
Second Rise
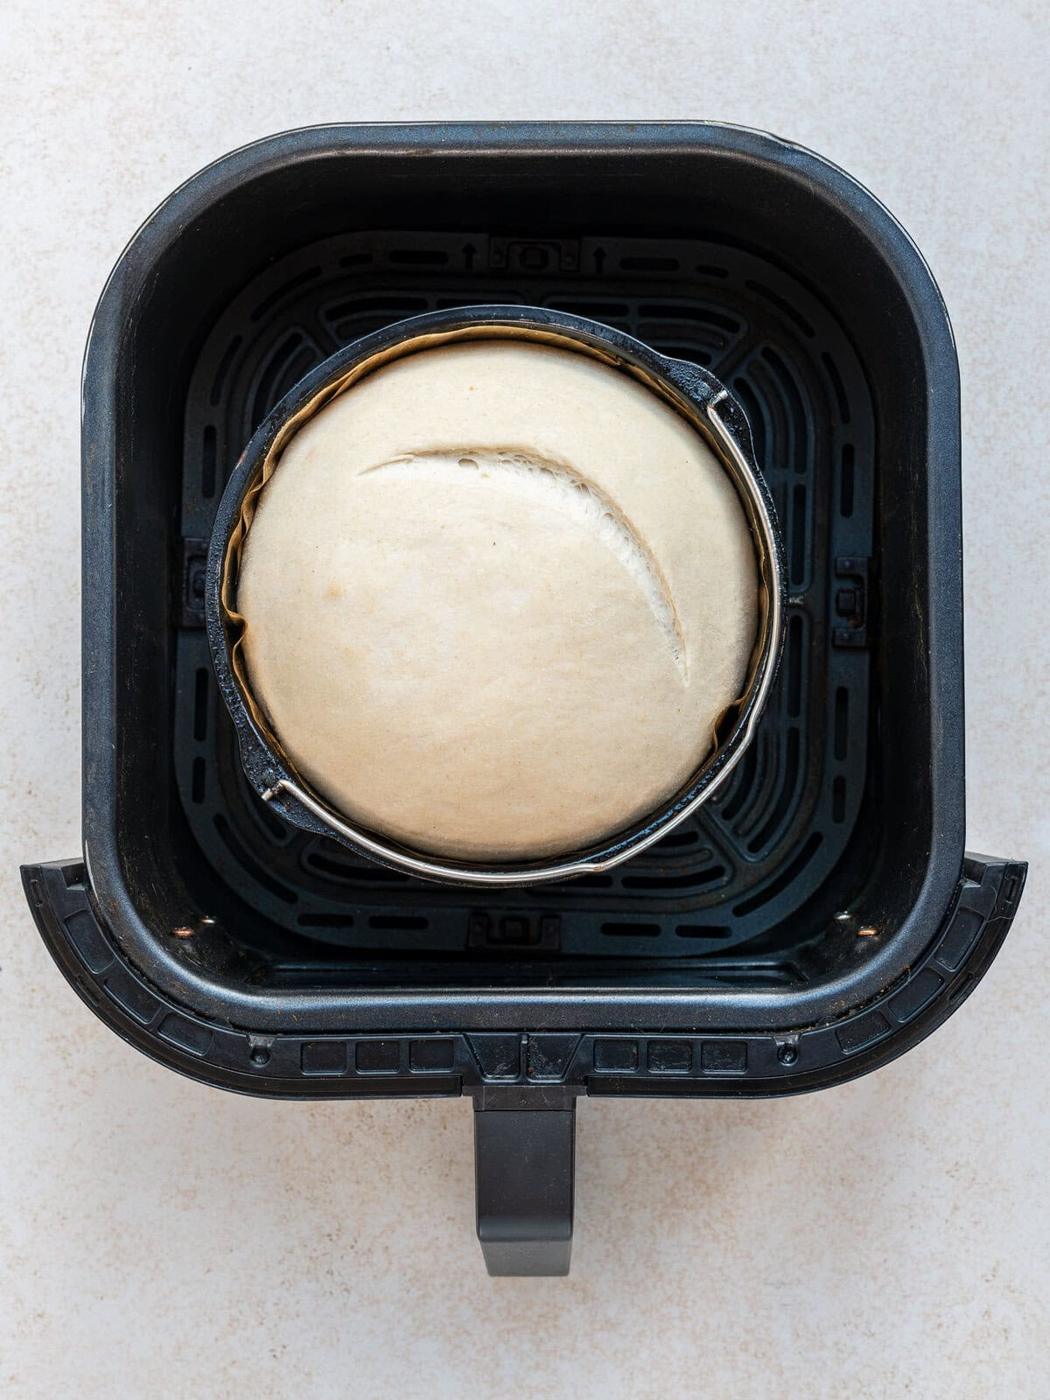
- Transfer the shaped loaf into a greased cake barrel or pan, loosely cover with plastic wrap, and let it rise for about half an hour. While that’s happening, go ahead and preheat your Air Fryer to 400°F (200°C) for five minutes. Give the top of the bread a little score with a knife and brush the sides with some melted butter so it doesn’t stick.
Bake in the Air Fryer
- Put the pan in your preheated air fryer and lower the heat to 375°F (190°C). Cook for 10 minutes, keeping an eye on the bread to make sure the top isn’t browning too quickly. Then, lower the heat to 350°F (180°C) and bake for another 30 minutes.
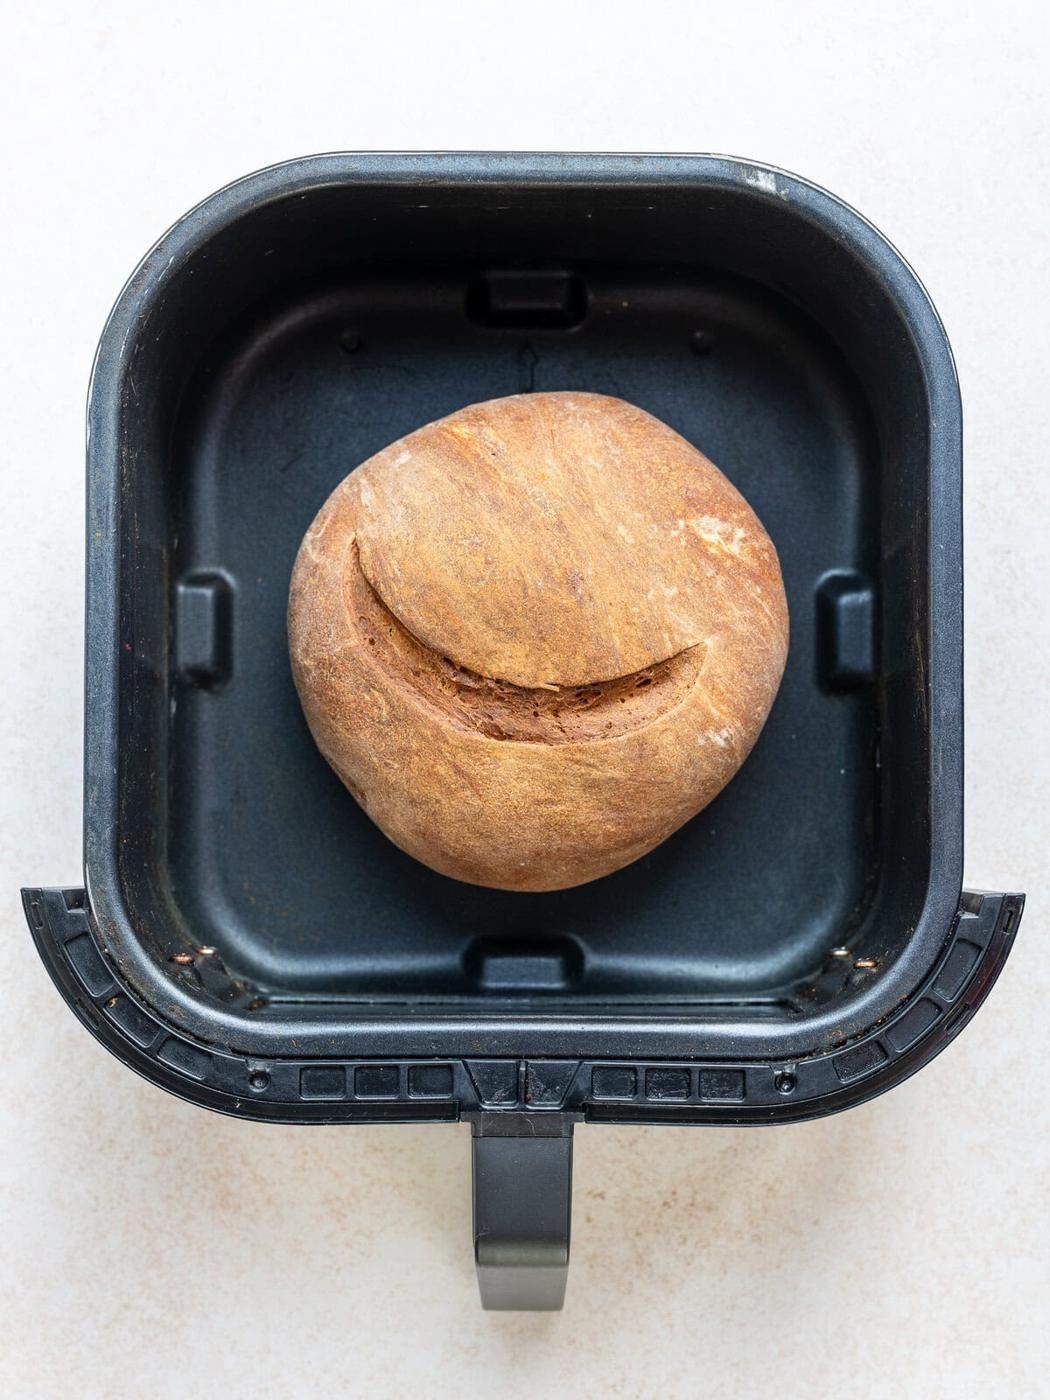
- Carefully take the pan out of the air fryer using pot holders. Remove the bread from the pan. Place the loaf back in the air fryer bottom side up. Cook it for an extra 5 minutes to brown the underside. Let it cool on a wire rack before slicing with a bread knife.
Baking Freehand (No Pan)
No cake pan? You can bake this loaf freehand, directly in the air fryer basket. If you are baking freehand, I recommend doing the stretch and folds or using a hand mixer when you make the dough – it creates a bread that holds its shape better without a pan to support it.
- Shape the dough into a tight boule so it holds its shape, then let it rise on a piece of parchment paper (baking parchment) or a silicone liner. Check that the risen loaf fits your basket with a little room around it.
- Preheat the air fryer as above, then lift the bread in on the parchment or liner – don’t add parchment during preheating, as loose paper can blow into the heating element.
- Bake for 10 minutes at 375°F (190°C), then 30 minutes at 350°F (180°C), and flip the loaf over for a final 5 minutes to brown the underside. A freehand loaf spreads a little more and bakes slightly flatter than one baked in a pan.
Air Fryer Bread Tips
- Adjust for your model – Air fryers can differ greatly in wattage and size. These differences will affect how the bread bakes. You may need to adjust the time or temperature to suit your air fryer model.
- Chill before scoring – Place the bread in the fridge after the second rise. It firms the dough up and makes it much easier to score.
- Avoid a soggy bottom! Another challenge with air fryer bread is that the bottom can often remain somewhat doughy, even though the top is beautifully baked. To solve this problem, flip the bread over (out of the pan, if you are using one) and cook it upside down directly in the air fryer basket for the final 5 minutes.
- How can I tell my bread is baked? Tap on the bottom of the bread and if you hear a hollow sound then the bread should be cooked all the way through. I prefer to use an instant read digital thermometer to check if the internal temperature at the core is about 195–205°F (90–95°C) – much more foolproof!
- Storing: The best way to store bread is to slice it and freeze it. You can then toast slices from frozen as and when you need them. The bread can also be placed in a bread bag or wrapped in a linen towel for up to three days.
Frequently Asked Questions
Yes – but check the height clearance first. Standard 2lb loaf tins are quite tall, and in smaller or single-drawer air fryers a tall tin can sit too close to the heating element, burning the top crust before the center is cooked through. Aim for at least 2 inches (5cm) of clearance between the top of the tin (once the dough has risen) and the element or fan.
No. A pan gives you a taller loaf with straighter sides, but you can bake the bread freehand on a piece of parchment paper (baking parchment) or a silicone liner in the basket. Use the same temperatures and times, and expect a slightly wider, flatter loaf.
I haven’t tested this recipe with gluten-free flour, so I can’t guarantee the result. Gluten-free flour lacks the protein structure that traps the gas yeast produces, so a straight 1:1 swap – without an added binder like xanthan gum or psyllium husk – tends to come out dense and flat rather than risen. If you already have a gluten-free bread recipe you trust that accounts for this, it should adapt to the air fryer.
Yes. Fold in sesame seeds, flaxseed or chopped nuts after mixing the dough, or brush the top with milk and sprinkle seeds on just before baking for a seeded crust. A lot of flaxseed can make the crumb denser, as it absorbs extra water.
Very well. Slice the loaf before freezing rather than freezing it whole – that way you can pull out and toast individual slices straight from frozen, rather than thawing the whole loaf.
Halve the ingredient quantities and bake in a 1lb loaf tin or a small 6-inch round pan instead – this suits double-drawer models like the Ninja Dual Zone’s 3.8L/4.7L drawers. Check doneness a few minutes earlier than the main recipe, since a smaller loaf cooks faster.
This recipe uses fast-action (rapid rise/instant) yeast, which goes straight into the dry ingredients – no need to bloom it in water first. If you only have active dry yeast, dissolve it in the warm water for 5–10 minutes until foamy before mixing it into the dry ingredients.
Yes – preheat for the full 5 minutes as in the recipe. Starting the loaf in a cold basket delays the initial oven spring (the early burst of rise you get from a hot environment), which can leave you with a flatter, denser loaf.
The most reliable way is an instant-read thermometer: the center should read 90–95°C (195–205°F). Tapping the bottom for a hollow sound works too, but the thermometer removes the guesswork, especially for a first attempt.
New to Air Fryer Baking? Try These Recipes!
Cake
Air Fryer Cake
Air Fryer
Air Fryer Soda Bread (Just 3-Ingredients!!)
Cookies & Bars
Air Fryer Cookies
Air Fryer
Air Fryer Sourdough Bread
Air Fryer
Air Fryer Dinner Rolls (Soft and Fluffy!)
I hope this Air Fryer Bread becomes your go-to loaf – it’s crunchy, fluffy, and simple enough for everyday baking. Please leave a rating and a comment – I love celebrating your baking wins! Share your creations on Instagram @supergolden88 or TikTok @Nusde – can’t wait to see your easy air fryer bakes!
Air Fryer Bread Troubleshooting Guide
A few common hiccups and how to fix them:
Note: We’ve updated the time breakdown in the recipe card above – baking time is just 45 minutes, with the remaining time dedicated to hands-off proving.
Recipe
Air Fryer Bread
Air Fryer Bread is easy to make, requires no kneading and tastes delicious! Follow my easy no-knead air fryer bread recipe to bake fluffy bread with a golden crust and soft crumb. Perfect for toast or making sandwiches.
- Serves 14 slices
- Prep 10 minutes
- Cook 45 minutes
- Total 2 hours
Ingredients
- 3 cups (360g) white bread flour (or see notes)
- 1 tbsp sugar ((optional))
- 2 tsp salt
- 2 ¼ tsp rapid rise yeast ((one packet))
- 1 cup (240ml) water (, lukewarm)
- 2 tbsp melted butter (, plus extra for greasing)
Method
Make the dough
- 1
Measure the flour, sugar, salt and yeast into a mixing bowl. Stir to combine the dry ingredients.
- 2
Pour in the water and melted butter. Mix together with a spoon or a dough hook until there are no dry streaks of flour and you have a shaggy, sticky dough.
- 3
You do not have to knead this dough but you can, if you have time, do a series of “stretch and folds”. Grease your hands with a little oil and stretch one corner of the bread from the underside over to the middle. Turn the bowl and repeat this action a few times. Alternatively use a hand mixer fitted with dough hooks and beat on low speed until the dough becomes elastic and forms a ball on the beaters.
- 4
Cover with a clean towel and place someplace warm to rise for an hour.
- 5
Tip the dough onto a lightly floured worktop. Gently stretch the dough to a rectangular shape. Fold the top towards the middle then the bottom over that, as you would fold a letter to place in an envelope.
- 6
Turn sideways and fold into a roll. Use your hands to shape the bread into a ball shape (also known as a “boule”) dusting with flour as needed.
Bake in a cake pan
- 7
Place it in a greased 7 inch cake pan, cover and leave to rise for half an hour.
- 8
Preheat the Air Fryer to 400°F (200°C) for five minutes. Score the top of the bread with a knife and brush the sides with a little melted butter so it doesn’t stick.
- 9
Reduce the temperature to 375°F (190°C). Place the pan in your air fryer and cook for 10 minutes.
- 10
Lower the heat to 350°F (180°C) and continue to cook for 30 minutes.
- 11
Remove the pan from the air fryer (using pot holders) and take the bread out. Place the bread back in the air fryer upside down and cook for a further 5 minutes to allow for the bottom of the bread to bake evenly.
Bake freehand
- 12
Place the shaped dough on a piece of parchment paper (baking parchment) or a silicone liner, cover and leave to rise for half an hour.
- 13
Preheat the Air Fryer to 400°F (200°C) for five minutes. Score the top of the bread with a knife.
- 14
Reduce the temperature to 375°F (190°C). Lift the bread into the air fryer basket on the parchment or liner and cook for 10 minutes.
- 15
Lower the heat to 350°F (180°C) and continue to cook for 30 minutes.
- 16
Flip the bread over and cook for a further 5 minutes to brown the underside.
Check and cool
- 17
Check the bread is done by tapping the underside – it should sound hollow. If the bread still feels doughy, continue to air fry for a few more minutes (Air Fryers can vary from brand to brand so keep that in mind).
- 18
Cool on a wire rack before slicing.
Notes
HOW CAN I TELL IF THE BREAD IS BAKED? Tap on the bottom of the bread and if you hear a hollow sound then the bread should be cooked all the way through. You can also use an instant-read digital thermometer. Check if the internal temperature in the center is about 195–205°F (90–95°C). AVOID A SOGGY BOTTOM! One challenge with air fryer bread is that the bottom tends to be a bit doughy while the top looks perfectly baked. Flipping the bread over or cooking directly in the air fryer basket for a few minutes gets around this issue. STORING YOUR BREAD The best way to store bread is to slice it and freeze it. You can then toast slices from frozen as and when you need them. The bread can also be placed in a bread bag or wrapped in a linen towel for up to three days. USING ALL-PURPOSE FLOUR You can use all-purpose flour (plain flour) if you need to. 3 cups is 385g. For other flours, and for any ingredient, use my Baking Conversion Calculator.
Equipment
- Mixing Bowl
- Digital scales
- Dough Whisk
- Cordless Hand Mixer
- Instant Vortex Digital Air Fryer
- Instant Read Thermometer
- Deep Round Air Fryer Tin
- Bread Knife
Nutrition
- Calories121 kcal
- Carbohydrates21 g
- Protein4 g
- Fat2 g
- Saturated Fat1 g
- Polyunsaturated Fat0.3 g
- Monounsaturated Fat1 g
- Trans Fat0.1 g
- Cholesterol4 mg
- Sodium347 mg
- Potassium46 mg
- Fiber1 g
- Sugar1 g
- Vitamin A51 IU
- Vitamin C0.01 mg
- Calcium6 mg
- Iron0.3 mg
Questions
Can I use a loaf tin instead of a cake pan?
Yes – but check the height clearance first. Standard 2lb loaf tins are quite tall, and in smaller or single-drawer air fryers a tall tin can sit too close to the heating element, burning the top crust before the center is cooked through. Aim for at least 2 inches (5cm) of clearance between the top of the tin (once the dough has risen) and the element or fan.
Do I need a cake pan to make air fryer bread?
No. A pan gives you a taller loaf with straighter sides, but you can bake the bread freehand on a piece of parchment paper (baking parchment) or a silicone liner in the basket. Use the same temperatures and times, and expect a slightly wider, flatter loaf.
Can I make this bread gluten-free?
I haven’t tested this recipe with gluten-free flour, so I can’t guarantee the result. Gluten-free flour lacks the protein structure that traps the gas yeast produces, so a straight 1:1 swap – without an added binder like xanthan gum or psyllium husk – tends to come out dense and flat rather than risen. If you already have a gluten-free bread recipe you trust that accounts for this, it should adapt to the air fryer.
Can I add seeds, nuts or other mix-ins?
Yes. Fold in sesame seeds, flaxseed or chopped nuts after mixing the dough, or brush the top with milk and sprinkle seeds on just before baking for a seeded crust. A lot of flaxseed can make the crumb denser, as it absorbs extra water.
Does this bread freeze well?
Very well. Slice the loaf before freezing rather than freezing it whole – that way you can pull out and toast individual slices straight from frozen, rather than thawing the whole loaf.
What if my basket is small (e.g. a double-drawer model)?
Halve the ingredient quantities and bake in a 1lb loaf tin or a small 6-inch round pan instead – this suits double-drawer models like the Ninja Dual Zone’s 3.8L/4.7L drawers. Check doneness a few minutes earlier than the main recipe, since a smaller loaf cooks faster.
What kind of yeast does this recipe use?
This recipe uses fast-action (rapid rise/instant) yeast, which goes straight into the dry ingredients – no need to bloom it in water first. If you only have active dry yeast, dissolve it in the warm water for 5–10 minutes until foamy before mixing it into the dry ingredients.
Do I need to preheat the air fryer?
Yes – preheat for the full 5 minutes as in the recipe. Starting the loaf in a cold basket delays the initial oven spring (the early burst of rise you get from a hot environment), which can leave you with a flatter, denser loaf.
How do I know when the bread is fully baked?
The most reliable way is an instant-read thermometer: the center should read 90–95°C (195–205°F). Tapping the bottom for a hollow sound works too, but the thermometer removes the guesswork, especially for a first attempt.